Boat Builders Projects

In a rather lame and transparent way to bump this topic to the top to raise awareness for this kind of awesomeness, I’m going to start posting boat designs that are CNC friendly.

Here’s some pics of the frames used to build an Oppikat, by Dudley Dix. It’s a Hobie Wave style trainer for the munchkins that you can build yourself. It’s half plywood and half cedar strip to develop the curves. It’s even available in DXF for an additional charge.

image

The pics below are from ckdboats.blogspot.ca which is a really cool and wide-ranging blog that often times contains boat porn.

The pics are of CNC cut frames that you can order directly from them or you can make your own. I would imagine it would save hours versus cutting them on a bandsaw. One cool thing about building a catamaran is that you can build one hull at a time if space is limited.

The payload of an Oppikat is limited to one adult and one kid or two kids, but it would be a very safe and fun way to introduce a youngster to the joys of sailing.

I’ve been in touch with the designer and asked him if it could be scaled up to handle a larger payload. He said that he’d be happy to do it for $300, in addition to the cost of the plans and that would entitle me to build one boat and he’d offer the new design on his website. I’m seriously tempted as it’s a very cool design and would be fun to give strip building over frames a try.

image

image

image

3 Likes

I found a few 1 sheet boat free designs and added them to the links page on

http://www.disciplesofcnc.com/

Accounts there are free for CNC file sharing. It’s in the works.

Thank you

As an alternative to the strip build method of the Oppikat listed above, Woods Designs has developed a plywood hull that accomplishes a similar Hobie Wave look and feel. This is an important departure from the 70’s look of the Hobie 14, which it never outgrew. With plywood, the hulls go together much faster than strip building.

The Quattro 14 is several feet longer than the Oppikat, with the cubic proportional payload increase. While it only sports a single trapeze, it can handle more than one adult or an adult and multiple kids.

This is to me a much better solution for my family for just a little more materials and labor. Once again, the bulkheads can be cut out with a Maslow, ensuring accuracy and decreasing build time.

image

The plans can be purchased as a digital download or they will ship you paper plans. If in PDF format, I’m sure there’s a way to convert that to something more Maslow-friendly. If you opt for the paper plans, you can draw up your own CAD files manually. Paper plans also allow you to place your Maslow cut parts on top to ensure accuracy. Either way, it should be doable. Since both the Oppikat and the Quattro are longer than an 8’ sheet of plywood, there will be some panel joining tech, whether that’s a puzzle or scarf joint is up to the builder.

The Quattro also comes in a 16’ version with two trapezes for increased performance and payload. That’s about it for multihulls. Next, we’ll delve into dinghies.

1 Like

The Quattro and Oppikat do make the Hobby Kat look like the ugly step sister. As much fun as it was to look at some of the boat designs in those old magazines, I can see the value of working off modern designs and build instructions.

Just out of curiosity would you try to find a donor boat for the mast and rigging, or buy all new hardware?

That’s a great question! There are two main approaches: buying or building.

For buying, I would definitely try to find a donor boat for the comparable cat. For example, an old Hobie 14 for the Quattro 14. I would also shoot the designer an email to verify this as a slight change of what they call the Center of Pressure on the sails vs. the Center of Lateral Resistance on the skegs could seriously affect a cat’s ability to tack (especially one without a jib).

You can find cheap or even free cats on Craigslist as donor boats. Some even come with beach dollies or trailers. Note the trailers will probably need as much TLC as the boat listed.

New spars are very expensive to purchase and if you need them shipped, they’re exorbitant. Then you get to go down the rabbit hole of aluminum vs. carbon fiber…

Some boats can also accept wind surfing rigs, but they usually require some modifications to secure the mast upright.

Another option is to buy an aluminum pole and attach a track to it. If you do this, you also have the option of breaking the mast pole into two sections and using a sleeve to connect them.

A third option for someone who’s building the boat is to also build the mast. This usually is a hollow wooden tube made up of several “birdsmouth” sections all glued together to form a polygon. Then you get all the fun of shaping and sanding it down to a cylinder. For even more fun, some boat plans specify tapered masts. The birdsmouth approach increases the surface area between individual sections that get epoxied together, forming a much stronger column.

image

You can also get fancy and emulate a standard mast extrusion.

3 Likes

This time, I’m showcasing a boat I’ve actually built, Chesapeake Light Craft’s Eastport Pram. This was a paper plans build, which can then be converted into a digital cut file using a comprehensive series of offset measurements using the edge of the paper as a baseline. Then using tools like Bezier curves, you can create smooth “connect the dots” cut lines. It’s also available as a kit that they cut for you on their monstrous industrial sized CNC machine. The good news is that their kit is actually more expensive than all the plywood and a working Maslow build. These are important rationalizations if you have to convince your significant other that getting a Maslow will pay for itself…:wink:

One important factor about an EP is that it’s only 7’9" long, meaning all of the parts can be cut entirely out of single sheets of plywood. This means you don’t have to mess with scarf or puzzle joints at all. This was a great first boat build project for me and gave me the courage to tackle a larger boat build.

The trade off is that it barely holds me, my wife and 3 year old son as it only has a payload of 375 pounds (and in all fairness to my wife, I take up most of that). With that being said, it’s a lively little boat that’s fun to single hand on days where it’s not nukin’. The standing lug sail is also a fun build or cheap to buy and is easy to use for beginning sailors.

image

Using the plans, I laid out all the parts manually and cut them out primarily with a japanese pull-saw. This took over 20 hours of the 100 hour build. I leveraged the effort by cutting out templates at the same time out of masonite/tempered hardboard in order to save the lofting. My idea was that I could rough cut out plywood blanks and use the fine tuned templates with a router and a pattern following bit. I will say that my hand cut parts stitched together with the same accuracy as a purchased CNC kit. With a tuned Maslow, one could cut out all the parts in several hours while only really having to babysit the machine, freeing you up to do other things like reading the comprehensive build manual. With tabs to secure the parts once the 6mm marine grade plywood has been breached, it’s a simple process to liberate the parts with a chisel.

Of course, once the Maslow is done doing the fun part, you’re left with dozens of hours of typical 21st century fiberglass, plywood and epoxy boat building. The great news is that this boat is easy to lift with one person and load into the back of a pickup truck. With help, it’s also a pretty easy car topper than can be tied down to just about any roof rack system. I even load all of my camping gear into the boat, using it as a cargo basket.

All in all, this build was a great experience for me and my family. We’ve even thrown pirate-themed birthday parties at the lake for my son and his friends, which really bumped up my “Cool Dad” factor…:sunglasses:

9 Likes

When I was broke right after college I built 2 skin on frame kayaks, a skin on frame canoe, and a plywood canoe so my friends and I could float down the Wapsi and drink some beer. These of course were not done with the Maslow but I might have to attempt it again when mine comes in.

599

10 Likes

I just received a request for a quote to build an Angus Sailing Rowcruiser. If the deal goes through, there’s a very real possibility that I’ll be able to build the cost of a Maslow into the price I quote. Angus offers DXF files in addition to paper plans, which should hopefully facilitate the ability to create cut files. How cool would that be? :sunglasses: There would probably have to be a separate build thread for that project.

7 Likes

Nice work! I look forward to seeing you new work.

Thank you

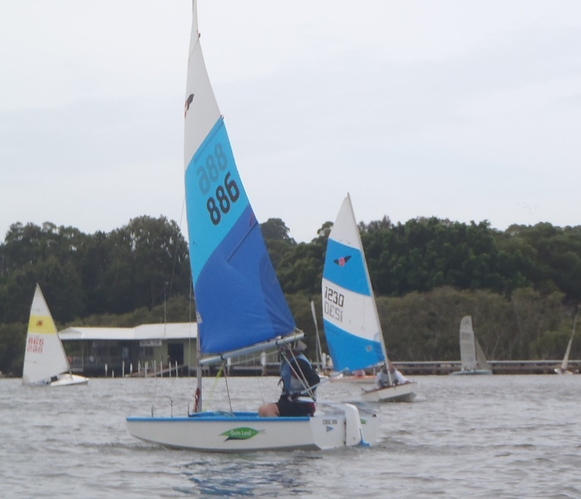
Just a quick entry in the CNC’able boat showcase: The Optimist (Opti) Dinghy. It’s a pram, which means more buoyancy up front. It’s probably the world’s most popular training dinghy for kids’ programs at yacht clubs around the world. If you go to any marina with a yacht club on a given Saturday morning, you’ll probably see a dozen of these little butterflies scooting around in protected waters.

Since it’s such a popular one-design boat, in order to race your Opti, you have to get it measured. An official takes a bunch of measurements to make sure you didn’t tweak something to make it just a little bit faster than all the other Optis. If you cut out your parts with a CNC from approved plans/cut files that have been known to build a “legal” Opti, then you’re at least half the way there already.

There’s a series of YouTube videos that show a group of dads building a bunch of Optis simultaneously, but they do it using the old method where you build a frame to wrap your Opti around, then you have to cut it free to liberate it. Thus rendering your frame only good for firewood. You can’t even build another Opti on it. With the advent of stitch and glue construction, you can CNC out a 3D “mold” that you can build any number of Optis in. It’s cut to form the perfect curve so you can force your plywood into the correct shape, then pop out the boat once it’s structural. The mold even uses puzzle joints to pull the parts into the proper curve.

image

Anyway, a very talented gentleman from Half Moon Bay (one of my favorite stops on the west coast) wrote up a great Instructable and kindly provided all the cut files. My son is only 4, so I still have plenty of time, but this is the perfect project for Maslow! I always make sure to download any files I may ever need just in case the website/page disappears for some reason. Hint, hint…

image

8 Likes

P.S. I submitted the quote to the guy for the sailing rowcruiser. He’s going to mull it over. FYI: It’s almost $10K all in for parts and labor. You would save about half that if you built it yourself.

3 Likes

A nice alternative to the Optimist is the Firebug from NZ designer John Spencer. I had the good luck to sail the very first one in the late 80’s and the class has been slowly growing. John lived in my home town and was a regular down at the boat club where we spent our days messing about in anything that floated.

They are quick little boats and are capable of getting up on the plane, whilst also being perfect home build projects. The kids and I are going to build one this summer, albeit without a Maslow to cut her out as my shed is too small at the moment.

http://www.firebug.co.nz/index.html

1 Like

Nice. I remember looking into the firebug. Thanks for posting that. This takes me to the Mirror Dinghy. A favorite trainer across the Pond and elsewhere. The mirror is designed to be built by a parent/child team. I love the sloop rig and it can even fly a spinnaker!

CKD Boats was the first to offer a Mirror as a CNC cut kit.

I actually found the plans somewhere online in that old Popular Woodworking style. It was several pages, showed the cut list, assembly, cross sections of chines, etc. It would be a cool build, but you’d probably have to build two since it might be difficult to find another one to race.

7 Likes

They are quite possibly the cutest spinnakers I have ever seen!

5 Likes

image

The Passagemaker Dinghy from CLCboats.com is the big sister of the Eastport Pram (see above) and is the boat I’m currently building. It’s basically scaled up from 7’11" to 11’7". As such, the parts all fit within 8’ and 12’ sheets of plywood. This means scarfing the half sheets to the full sheets. I’m actually in the process of doing this right now. As I write, the epoxy is curing on my scarf joints.

image

While available only in paper plans form (unless you buy their CNC cut kit), it would be a pretty serious undertaking to do the takeoffs to produce a digital cut file. The good news is that half the parts are symmetrical and the ones that aren’t, you make in pairs. I made masonite/tempered hardboard templates of everything, so I can make additional boats as needed, but it would be a very interesting concept to produce cut files to save the hours of laying out, cutting, filing and sanding. Having Maslow cut out the parts that are perfect the first shot would be a huge time saver.

Since some of the parts are cut out of the 12’ scarfed panels, it would be an additional step to tile the cuts successfully, but that would still be a worthwhile endeavor. Another huge benefit would be the ability to nest the parts to optimize the rather expensive marine grade plywood.

The parts are cut out of 6mm & 9mm plywood (some of which you have to laminate to make 12mm & 18mm parts). I’m under a time crunch to get this boat built before it gets warm so we have all summer long to enjoy it as a family.

image

This dinghy also has a take apart version, which means at some point at the end of the build, you cut the front third of the boat off. This is to make the boat more portable and easier to store. I’m not building the take apart version for several reasons that I won’t go into here.

This boat also comes with two sail plan options. One is the classic gunter sloop with a jib and a triangular main, while another option is a standing lug four corner sail. While simpler for the novice sailor, it’s also slightly less performance upwind. I’m opting for the sloop rig since I need a bit more performance.

I’ll post my progress on this thread as the build progresses, even though I wasn’t able to Maslow it. I could even document making a cut file of a single part if there’s any interest. The work flow would consist of recording the offsets from a baseline (the edge of the paper), drawing it in a CAD program, then converting the DXF to an SVG, generating the g-code or importing into GC/Easel. These basic steps would be the same with any paper plans your purchase, thereby making just about any boat Maslow-able.

1 Like

are the offshore sailing classes for adults?
do you know of any overnight sailing camps for kids in the area?

1 Like

I’ve never been sailing before, but this tread is really making me want to make a boat.
I have this disability that, while i’m fully aware of it, i always massively overestimate my own abilities, or the time a project would take.
That said, building a boat doesn’t seem that difficult, i’m sure it wouldn’t take me more then a month, and then another week or so to learn how to sail. :smiley:

7 Likes

My classes are primarily for adults. Sometimes their kids tag along. I don’t know of any kids’ overnight classes. They usually have a week’s worth of days on the water, going home every evening. You might check out on the various San Juan Islands, there are a ton of places out there that run week-long camps that I’ve never even heard of.

1 Like

I will be following your progress avidly :slight_smile:

1 Like

This is an interesting Facebook page to follow. This guy is making one of Dudley Dix’s catamarans on his own home built CNC - not a Maslow but surely inspiration for the rest of us anyway.

They are making really good progress in what would be a 3+ year project.

My wife is keen on doing it as well if we can locate a suitable build spot, and a ton of spare cash!

2 Likes