What are the finished dimensions of the frames? I am trying to see if the frame will fit in my shed or i will be occupying the garage until I can build a bigger shed.
Which frame were you planning on building? Do you need to work with full 4’x8’ sheets of plywood? To some extent you can adjust the size of your frame to fit your situation, but if we know which design to check, we can measure the CAD.
Full sheets is what I will be doing. Not sure what setup I’m gonna do… how tall is the tallest one?
whatever you want them to be 
the stock design is 10’ wide (go wider if you can, longer chains required if you
do), a little over 2’ deep (not counting the router sticking out) and a little
over 6’ tall (less than the 6’8" normal doorway)
it’s cheap lumber, so measure your shed, build it to fit, and live with whatever
effective cutting area you have. Then when you build a better sled, you can
rebuild the maslow to fit.
I am trying to see if the frame will fit in my shed or i will be occupying the garage until I can build a bigger shed.
I just measured ours, which was based on the original frame, but then I added some extensions to make the motors ~10" higher and ~3" wider for better accuracy in the problem areas. Our dimensions: 81" tall x 126" wide x 25" deep. Hope this helps!
@jwolter did you have to lengthen your chains with your 10 and 3 inch extensions?
If so - I have 2 extra chains, is it possible to just add links to lengthen one of my chains?
Nope, the stock chains just reached. If you do need to extend, you will need to extend both, since each needs to reach down to the opposite corner. There are two methods of extending chains, both of which will work. 1) Use a master link, or 2) use a chain tool to remove and reinsert a pin to link them together.
Which frame has the right plans to make the one you made?
Are the 10" & 3" adjustments on any of the existing frame designs on the site? Or do i just have to add that myself?
The frame is the “Deluxe Frame” that I posted waaaay back when. The 10" & 3" adjustments were done on the fly and not reflected in any designs.
If I were to do it all over again, I would have built it with the upper unistrut higher from the start. The unistrut is uncut, so to go wider, one would need to extend it, but then it would be more resistant to changes in the distance between motors. Also note that this design uses a sheet of 3/4" plywood as part of the frame. Most modern designs have gone away from that, I think because flat stock is subject to flexing. Still, I regret nothing, because I have a working Maslow!
Edit: Just realized the Deluxe Frame was posted in the old forums. I told you it was long ago! I can post the Sketchup file on this thread, for anyone who is interested.
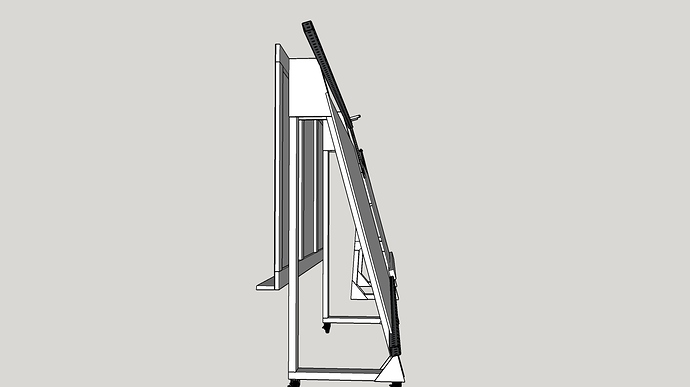
Here’s my Deluxe Stand. The deluxe part was that I incorporated 1) casters for portability, 2) panel storage, 3) unistrut for a future panel saw option, and 4) a whiteboard on the back for design ideas.
Sketchup file: Deluxe Stand.skp (2.9 MB)
Deluxe Stand next to Original Stand on which it was based
Panel Storage View
Rear View
@jwolter could you share pics of your frame? You mentioned to extended the top strut. I’m curious how you did it.
Already did! See Meet Major Tom, the Berea-Midpark High School's Maslow
The extension we did adds height more than width, but both are useful in reducing errors in the non-orthogonal zones.


