Slab Flattening - Router Sled Jig - Design and Construction

You may have already seen, but I’m working on a kitchen table for my apartment. Part of the discussion last week was how to flatten large slabs without a large planer.

As a follow up to that discussion, I wanted to post my approach to the problem, and how I used the maslow to help solve it.

First, here’s the overall design I drafted in fusion 360:


Next we have the basic dimensions of the jig. I designed it to fit over a set of 24-30in slabs, assembled with 18mm plywood:


I built a new tensioning system that pulls it tighter into the lower corners to improve accuracy, and it seems to working fairly well:

Tensioner detail:


I assembled the sled with a mallet and nail gun, then gave it a quick sanding to smooth out the edges. The two slot joints on the end were pretty tight, so the amount of sanding you need to do may vary.

Not Shown:
The smaller sled that rides inside the large sled to keep the router running smooth and stable. However, it is included in the cut files if you are interested. Every router is different, so you may need to adjust the router mounting holes accordingly.

(After a few passes, I removed the smaller sled to get the bit lower in the assembly, but the removal didn’t cause too much of a problem.)


And here it is in action, resting on two 2x6 boards that sit on the sawhorses and then are screwed into the edges of the slab to stabilize everything.

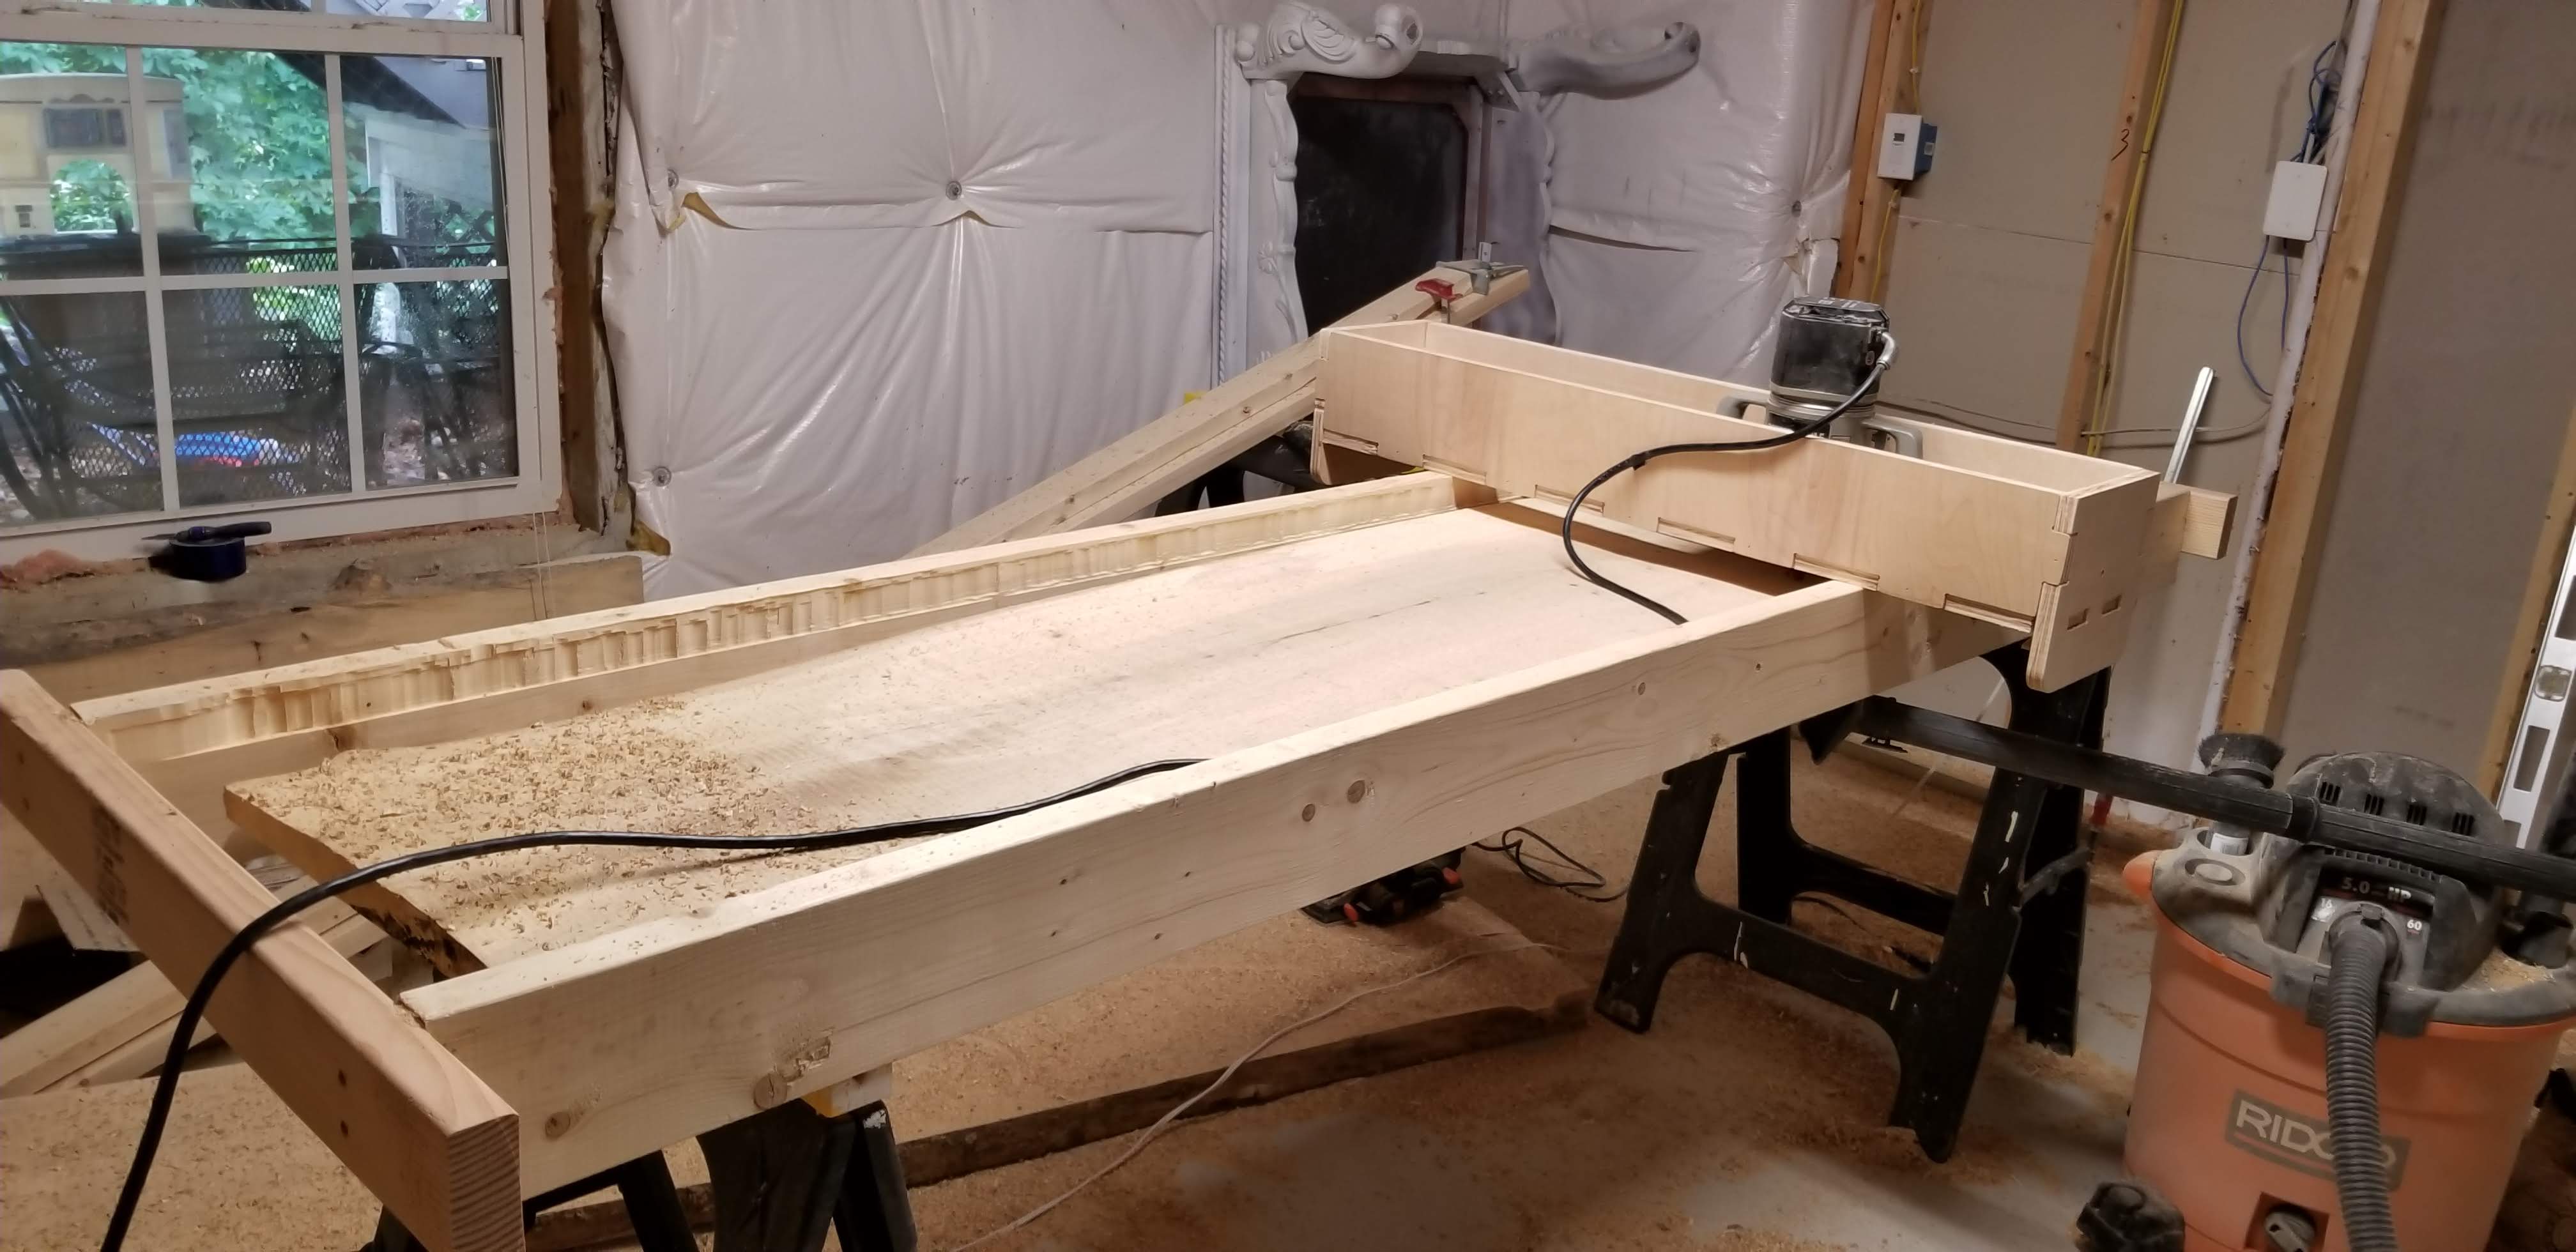
As you can see, I’m using a different router than my maslow one, but this design would work with any routers that are 7" or smaller at the base, including the Rigid R22002.

Design Files:
Router Sled - Flattening Jig Drawings.zip (75.7 KB)

Cut Files:
Cut Files-20180603T202505Z-001.zip (4.5 KB)
(Note: The cut files work fine, but something in the g-code I generated was causing the z-axis to raise and re-lower at each depth change, but it only added a few minutes to the cut if that doesn’t bother you)

Hope this proves useful to some of you; have a great week!

-J

16 Likes

A great project-within-a-project, I love to see tools building tools!

1 Like

Wow, wish I had the space. Would copy it. Thanks for sharing. Just looking at it is also nice.

2 Likes

Awesome! I would like to do the tensioner. Can you provide a little more detail? What is the rope/bungie. Maybe a few more pictures of that is all I would need or any info you think would help me recreate it.

1 Like

This is really the best approach to flattening large slabs, great work.
The bottom tensioners seem like a good idea, could you completely remove the bricks with a system like that?

2 Likes

The bottom corner tensioner is something I have seen mentioned elsewhere… when the sled is up high, is there excessive tension from these? I have to admit that this upgrade would solve a lot of problems in the lower corners… the dust extraction hose on my system can cause the router to go astray a little bit when down there.

This makes me wonder if this sled idea could be combined with the Maslow. Imagine that you mount that slab vertical on the maslow workspace, Including boards like the 2x6’s So 2 options we could think of your sled as the maslow sled, so what we need to do is make and extended base that attaches to the maslow base, which would have to be 2x the width of the slab or 2) make something more intricate like your sled here but without with the high sides and only 3/4in walls that instead of the holding in the handheld router, the whole maslow sled sits in it.

3 Likes

Shhhhh, that’s gonna be one of my next project posts! :wink:

But yes, there’s a reason I picked the dimensions I did… Excellent thinking sir.

2 Likes

I’ll do a post in the hardware section this week to cover it in better detail. It’s not the end-all-be-all solution quite yet, but I’d be glad to open it up for suggestions and discussion.

I’ll tag you as a follow-up so you can find it.

-J

3 Likes

Cool, can’t wait to see it.

This is fantastic!

Would you be willing to post the files in the community garden so that the project doesn’t get buried in the forums?

1 Like

Definitely will! I already tried to submit a project earlier this week for the tablet holder revision, and it looks like it hasn’t taken. I must be struggling with the whole garden/github thing still.

3 Likes

It’s very much still a work in progress. I would love to know where the hang ups are so I can fix them :grin:

1 Like

how do you adjust how much pull there is on the bottom? or are you just trying
to increase force in the same direction gravity would apply?

1 Like

Please tag me too! I have been fiddling with this and I am waiting on some bungie cord and pulleys to something similar. Thanks!

That was a question I had too. It seems like it would either have too much tension at the top or not enough at the bottom.
I thought about trying something with counter weights like below.

3 Likes

This seems like a perfect solution that could elimitate the bricks from the sled completely. Essentially moving the weight of the bricks to behind the work surface and making the sled easier to construct. And without needing to figure out the differential pull in the various corners.

2 Likes

what is the advantage of removing the bricks from the sled?

For me, offhand:

  1. force is applied by the counter weight system into the lower corners at all times, helping to alleviate error due to the steep angle of one chain (bricks only provide force straight down)
  2. easier sled construction (replace the bricks with a couple of eye nuts to connect to the weights, do away with two countersunk holes and the bars to hold the bricks)
  3. no worry about bricks potentially falling out (this has never been reported, so probably not a concern)
  4. kit can ship with cord and pulleys for both chain tension and sled counter weighting, doing away with having to source bricks and providing a single solution (counter weighting) for both
  5. lighter sled to handle when not in use/placing stock to be cut

There may be other advantages

  1. force is applied by the counter weight system into the lower corners at all
    times, helping to alleviate error due to the steep angle of one chain (bricks
    only provide force straight down)

however the force is not in the right direction, when you are in the bottom
right corner and want to move right, you have all the force of the left weight
pulling you away from the direction you want to go, and only a small part of the
weight of the sled and the right weight working to move you to the right. This
is the opposite that you want

  1. easier sled construction (replace the bricks with a couple of eye nuts to
    connect to the weights, do away with two countersunk holes and the bars to
    hold the bricks)

if you are talking about similar amounts of force, an eyelet screwed into the
sled may pull out.

  1. no worry about bricks potentially falling out (this has never been reported, so probably not a concern)

as you say, since it’s never been reported, not a problem

  1. kit can ship with cord and pulleys for both chain tension and sled counter
    weighting, doing away with having to source bricks and providing a single
    solution (counter weighting) for both

so instead of bricks, what do you use for the weights? where do you source
those?

  1. lighter sled to handle when not in use/placing stock to be cut

countered by the fact that you have more things to detatch from the sled and you
can’t just hang the sled up out of the way to load plywood in, you have the
lower tension lines to work around.

If the lower lines were managed by the software to provide the right tension, I
can see value in them. As it is, I think they will make things worse in the
places they are needed the most (the bottom corners)

David Lang