#3 is a “wire size”. It is an alternative set of diameters that are often used by machinists. The usual time a “civilian” sees one is when he is drilling a hole to tap.
@Jim_Penny Thank you!
You’re mixing up your assemblies. You EITHER need to use the 3D printed dust chute or the plywood one. Both of the parts you have shown there are effectively the same part, or at least, they both serve the same function. They’re both used to mount the plexiglass window to the sled, and provide a place for the chute to meet with the sled. In your case, you want to use the 3D printed one, it will line up with the cut-out at the center of the sled. Dry fit all your parts before securing anything to check fitment.
2 Likes
I cut the maslowable version of the sled and the 3D printed one didn’t appear to line up. I’ll need to take another look at the files. Is the sled the same in all version or is there an alternate for 3d printed parts?
They are different versions. The shape of the two chutes are different, so the sled and the Z axis spine have some changes between the two versions.
Ok… Guess I’m cutting a new sled and Z Axis spine tonight. 
1 Like
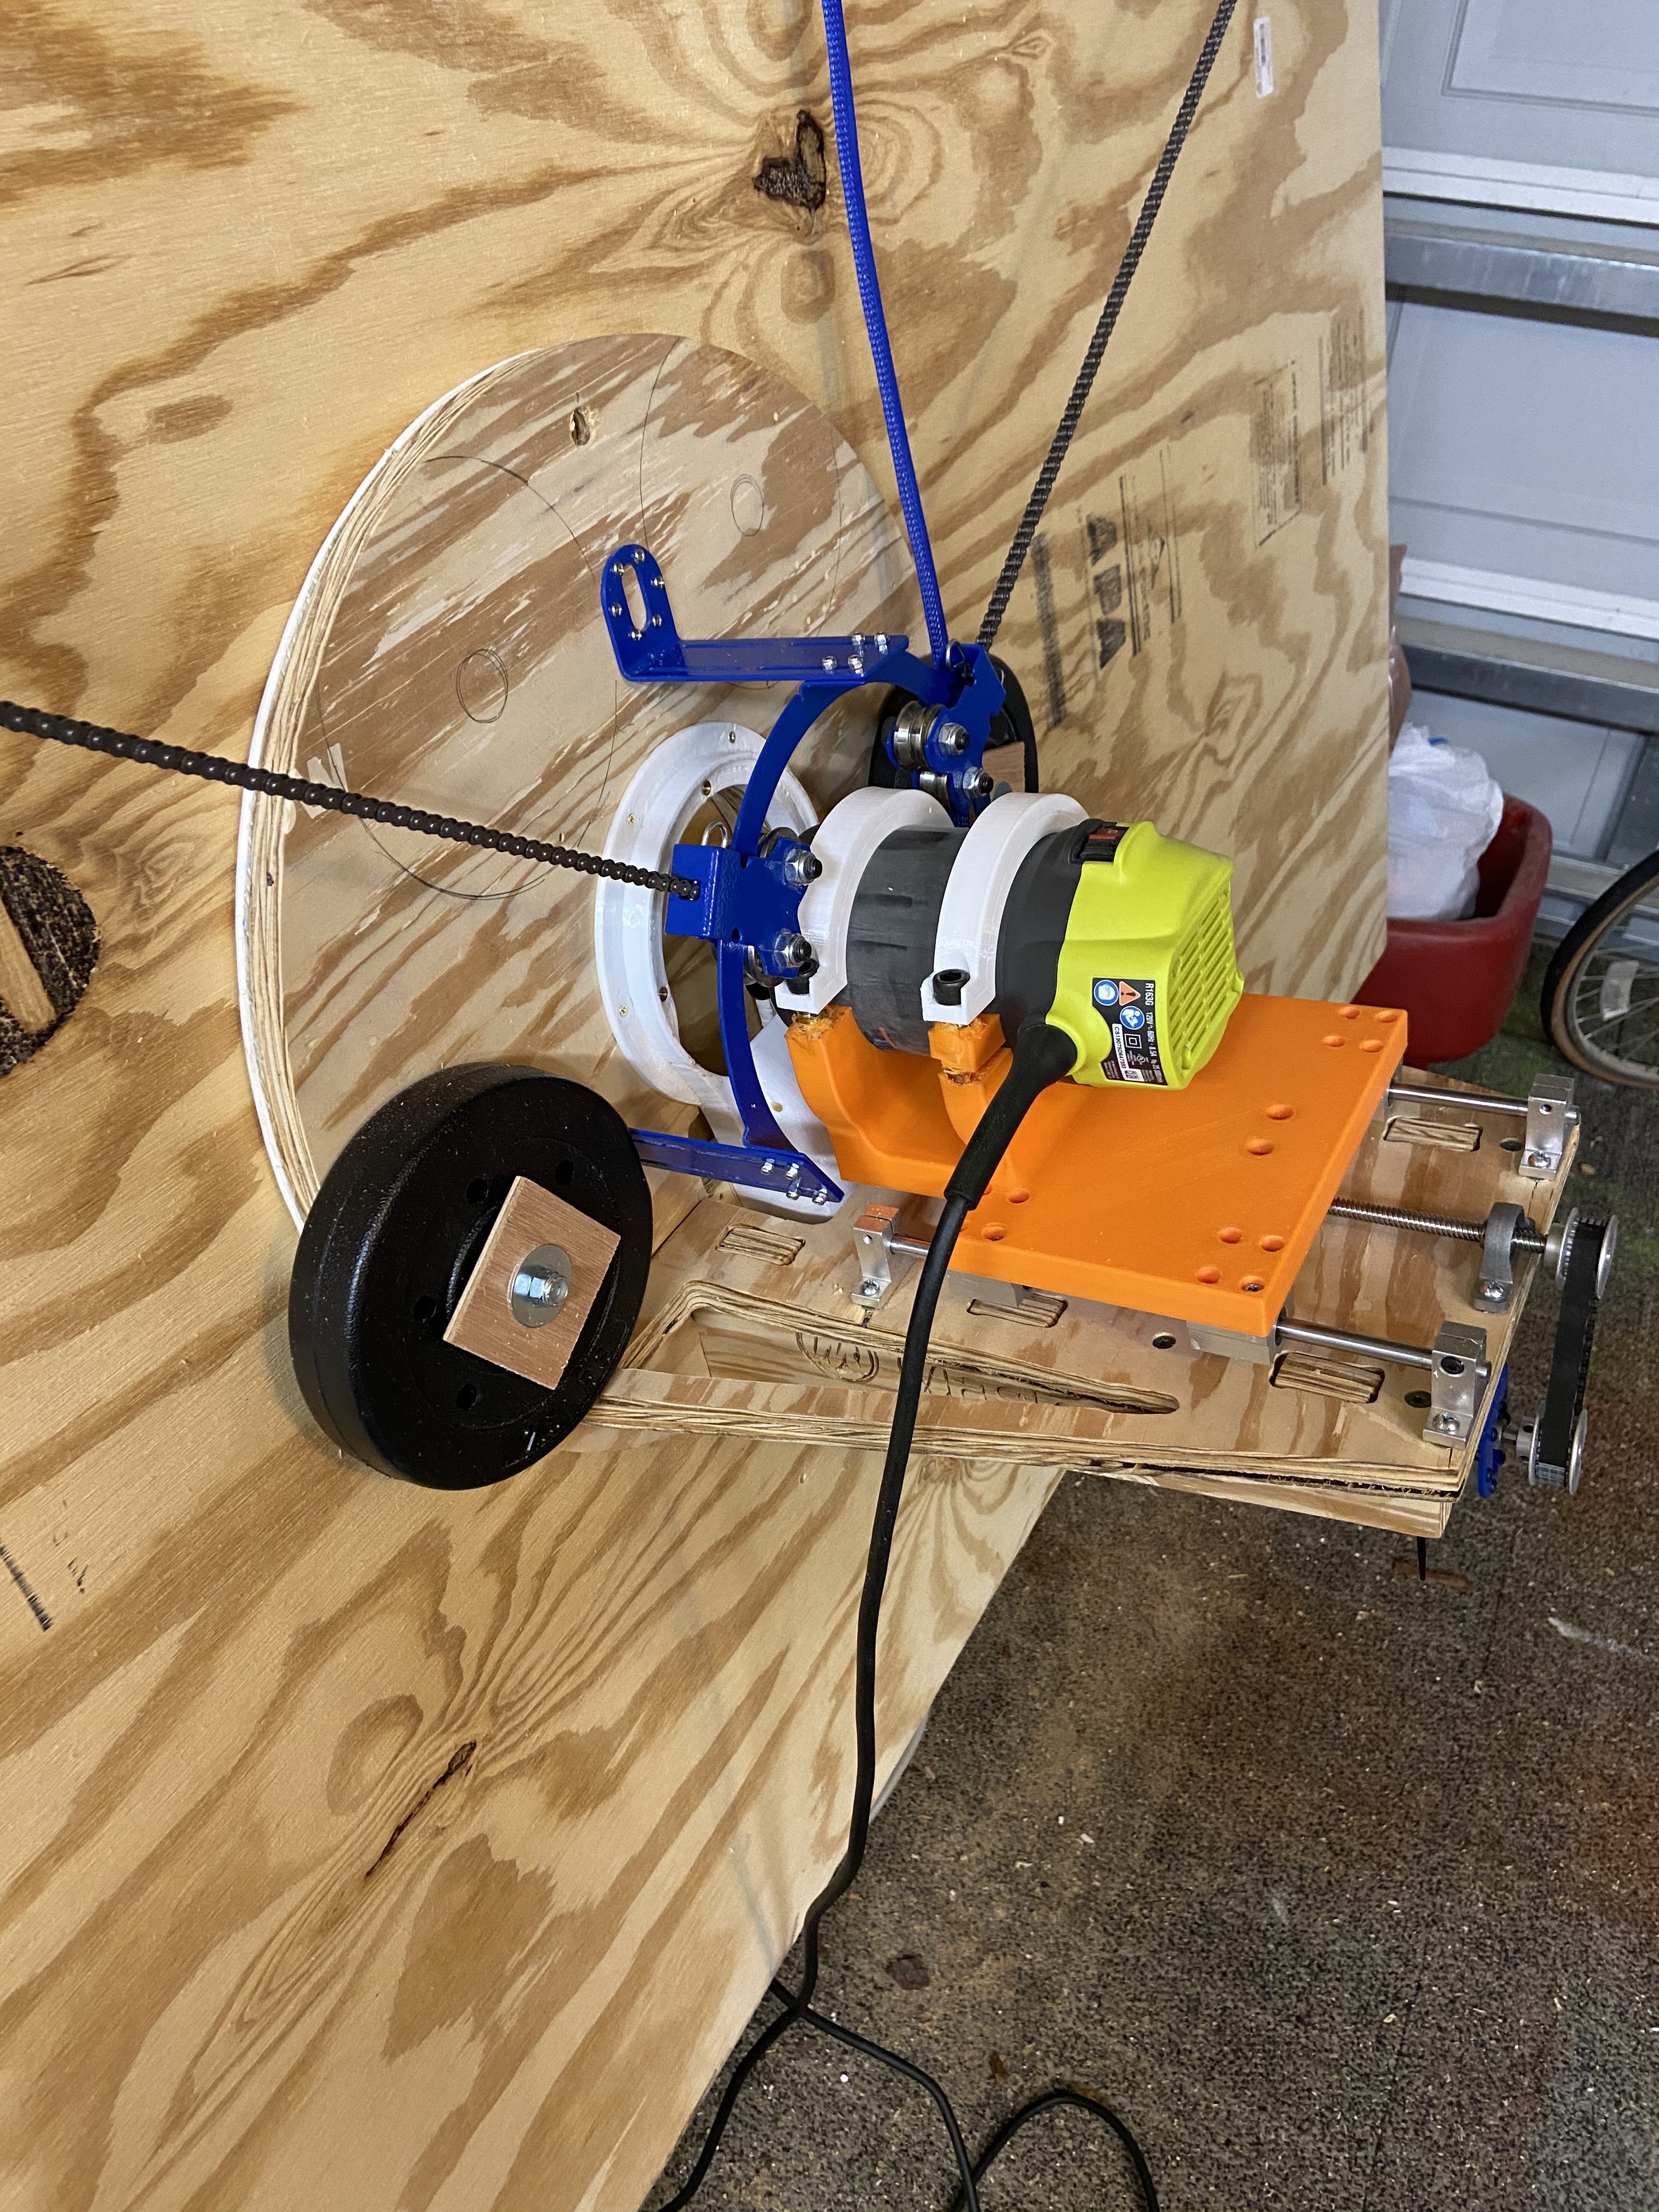
So, have been a bit absent over the last year. Partially because I have been learning my 3D printer and how to use that, partially getting my garage organized and situated (still no where close to where I really want it), partially job and real life, and a bit of just plain old procrastination (ok…maybe more than a “bit”). But I finally got my Meticulous put together and up.
I also learned a bit of Web Control (thank you to all who worked on getting that put together…I am just amazed as to how you guys know how to do that!).
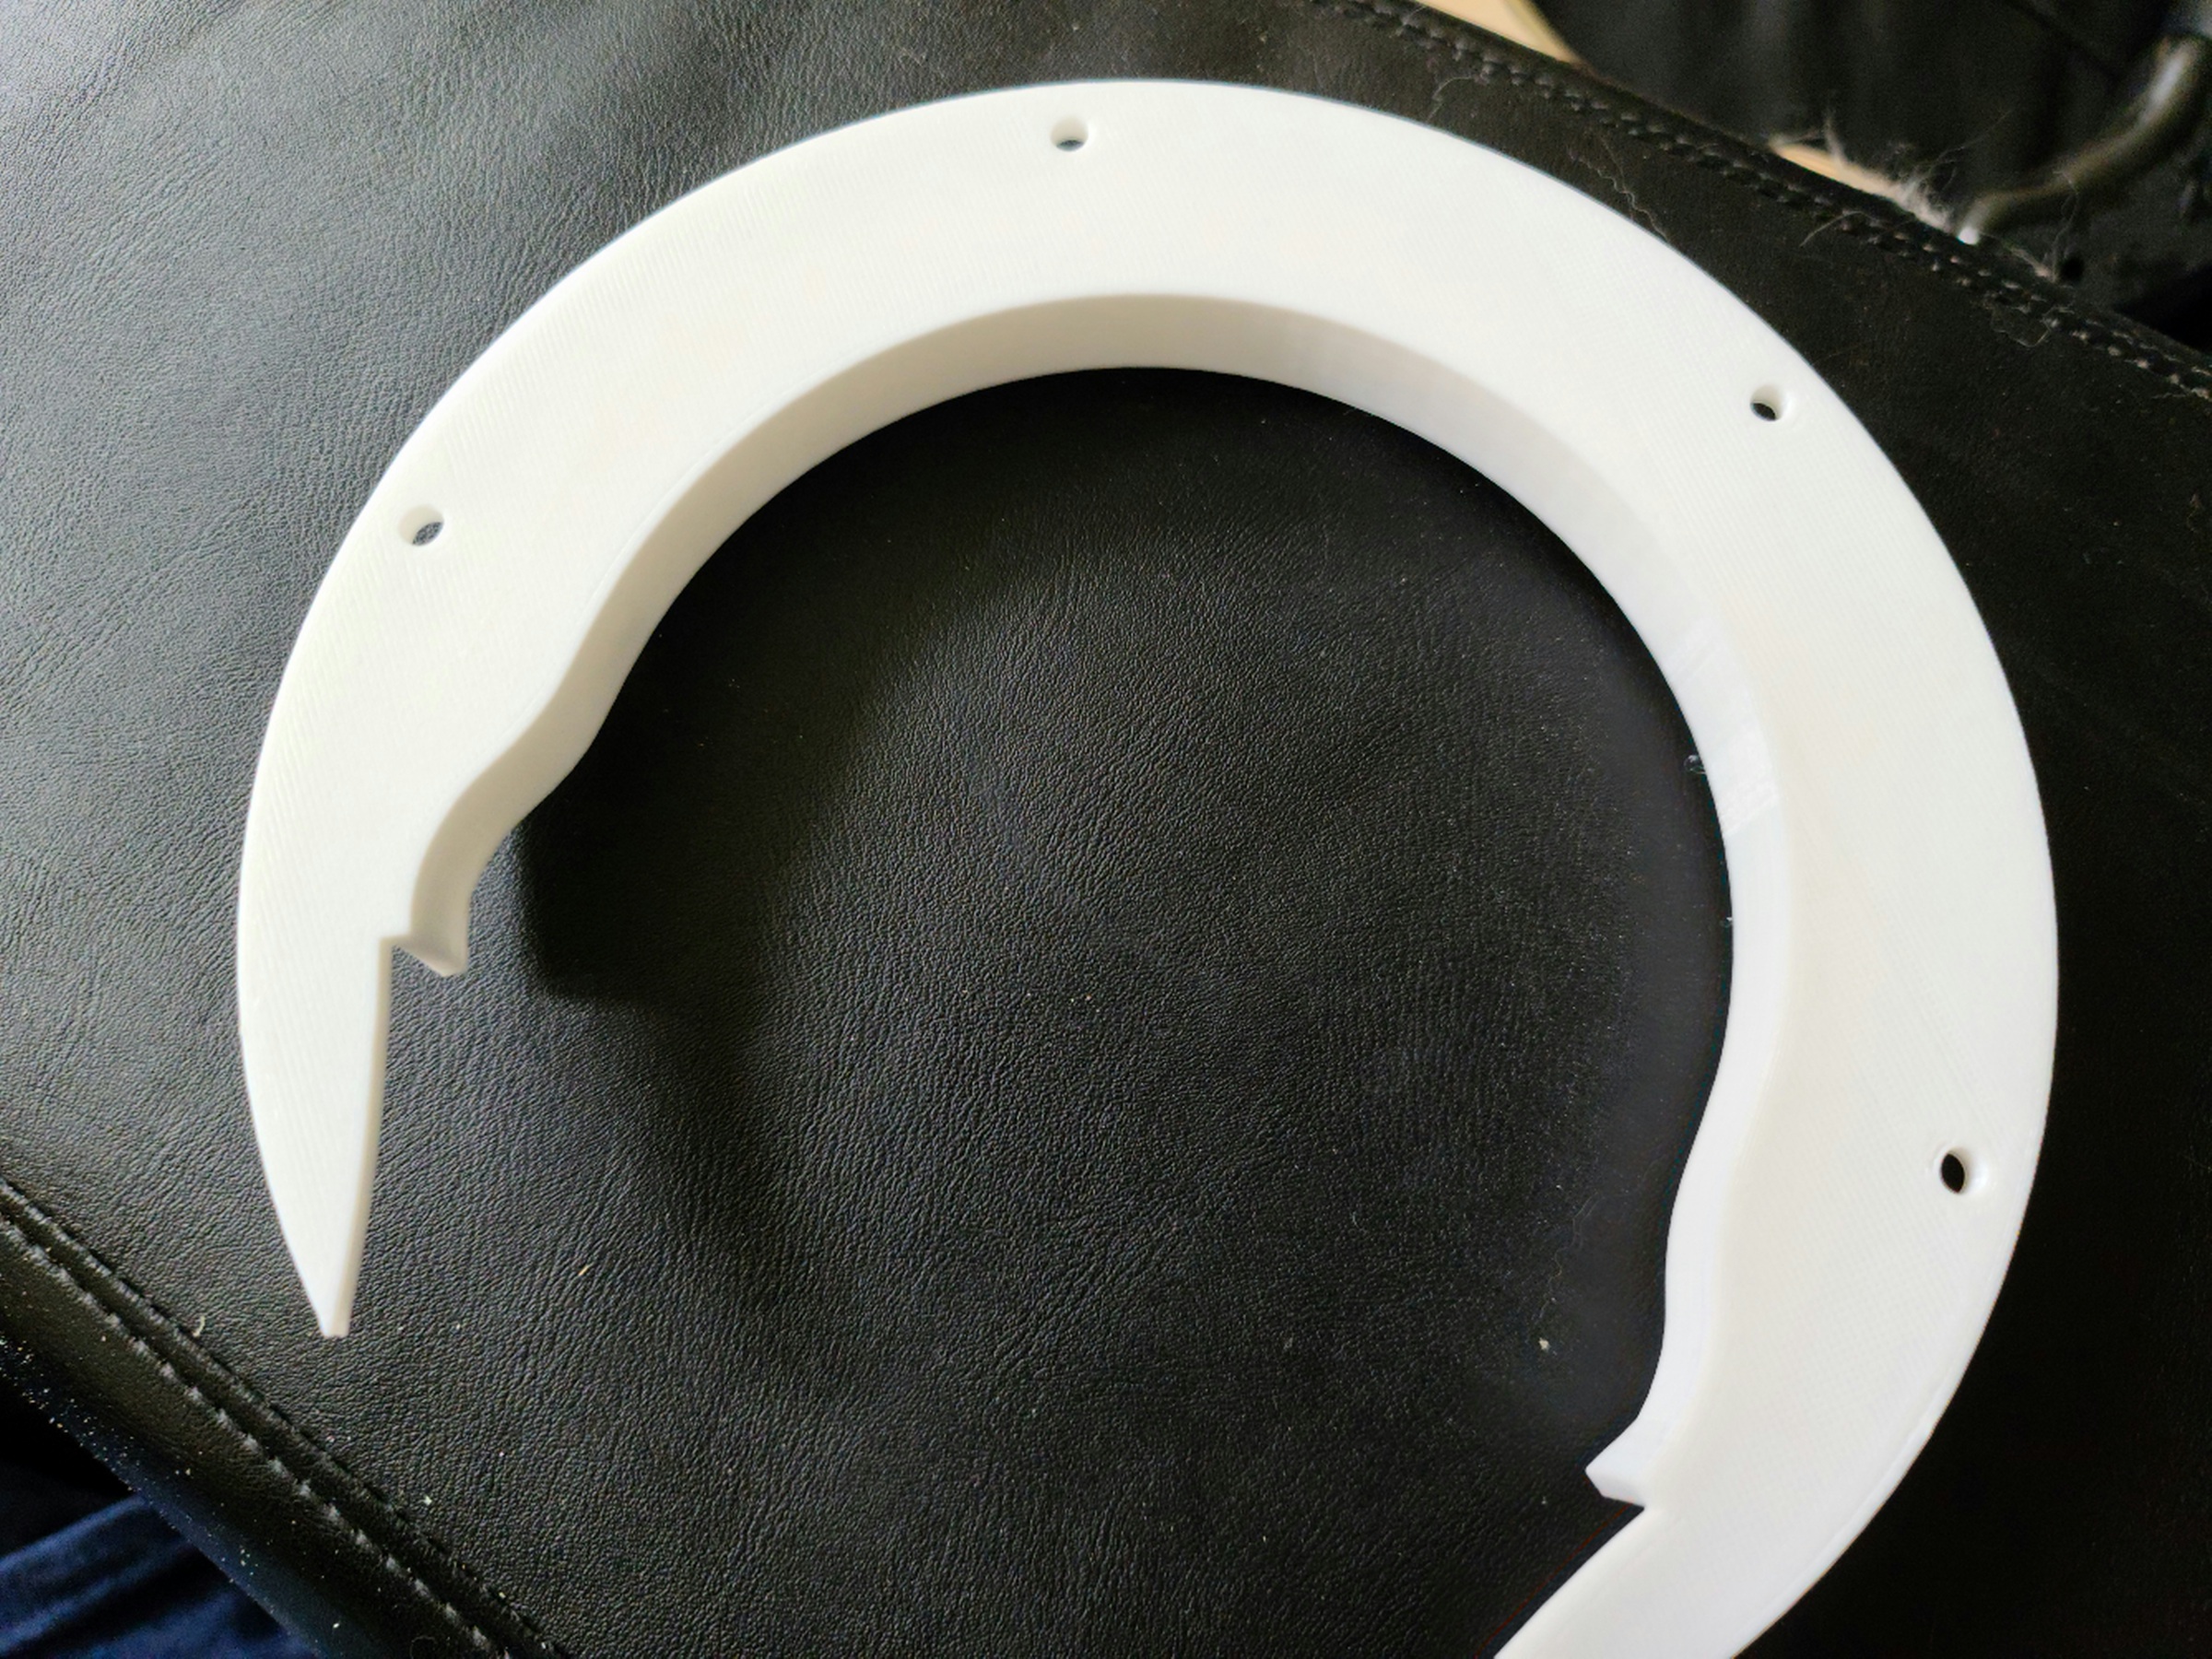
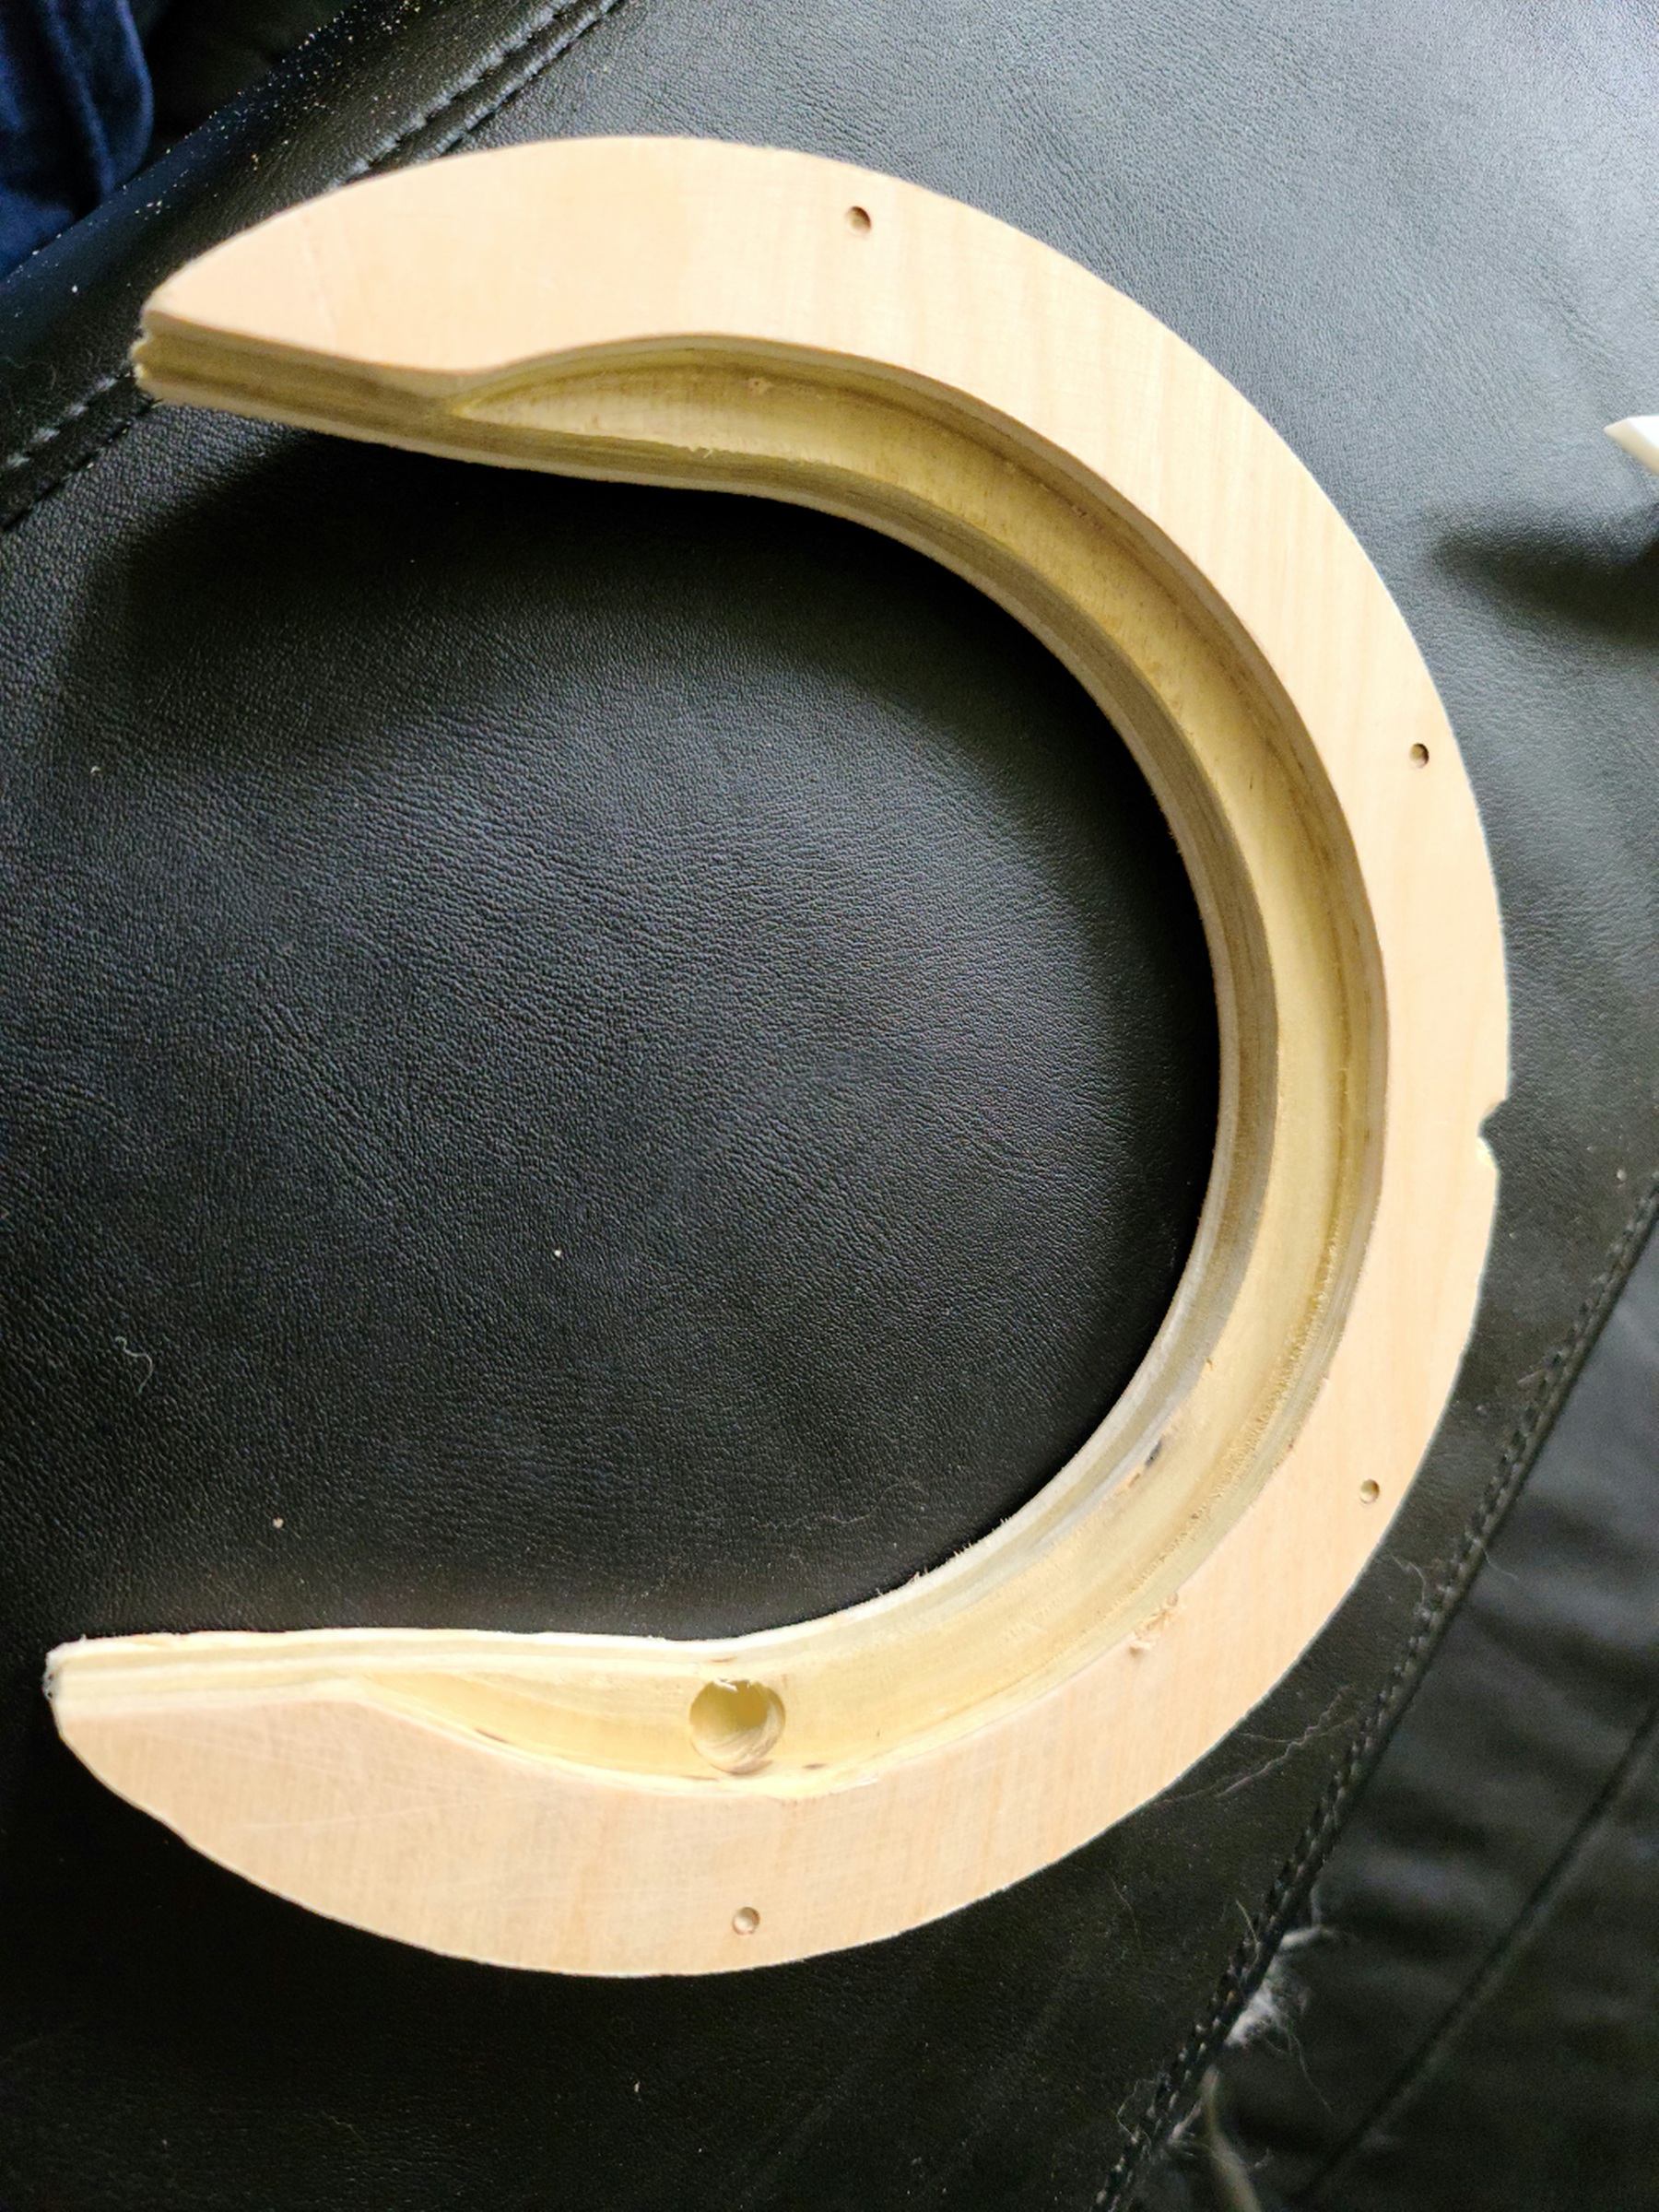
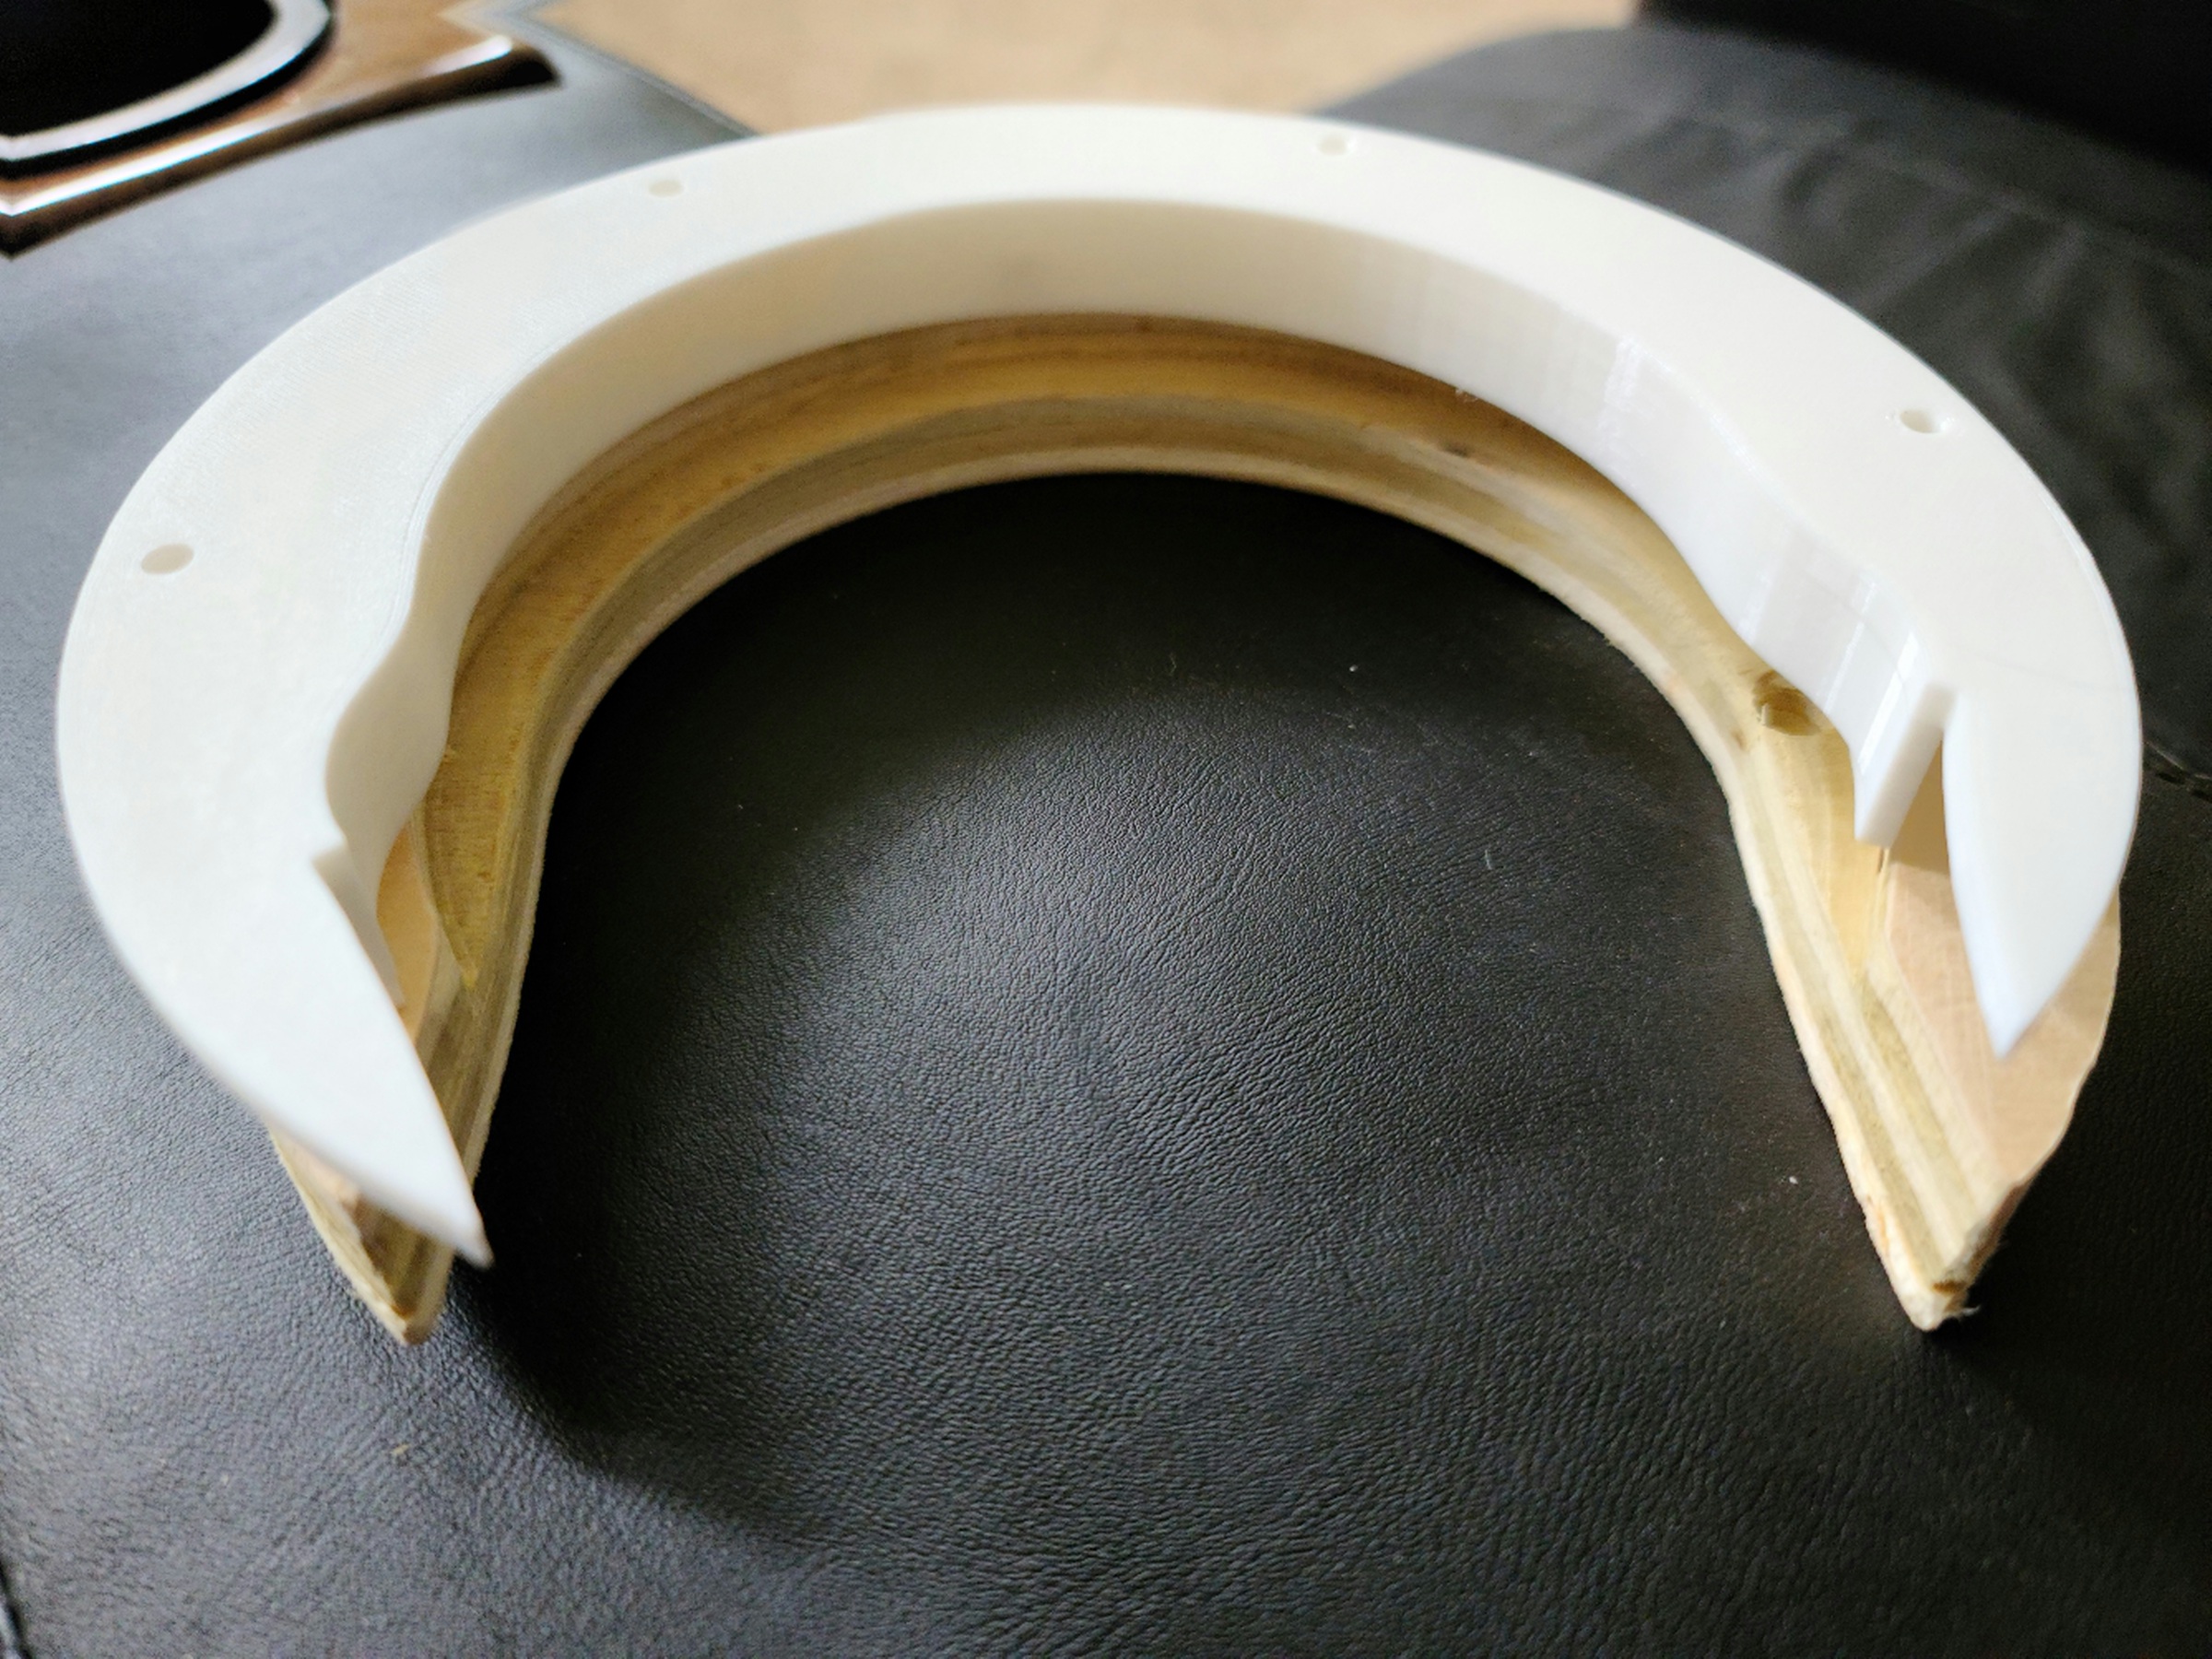
But alas, all good things can’t work as desired right away. After running the cut pattern of the Holey Calibration I found this:
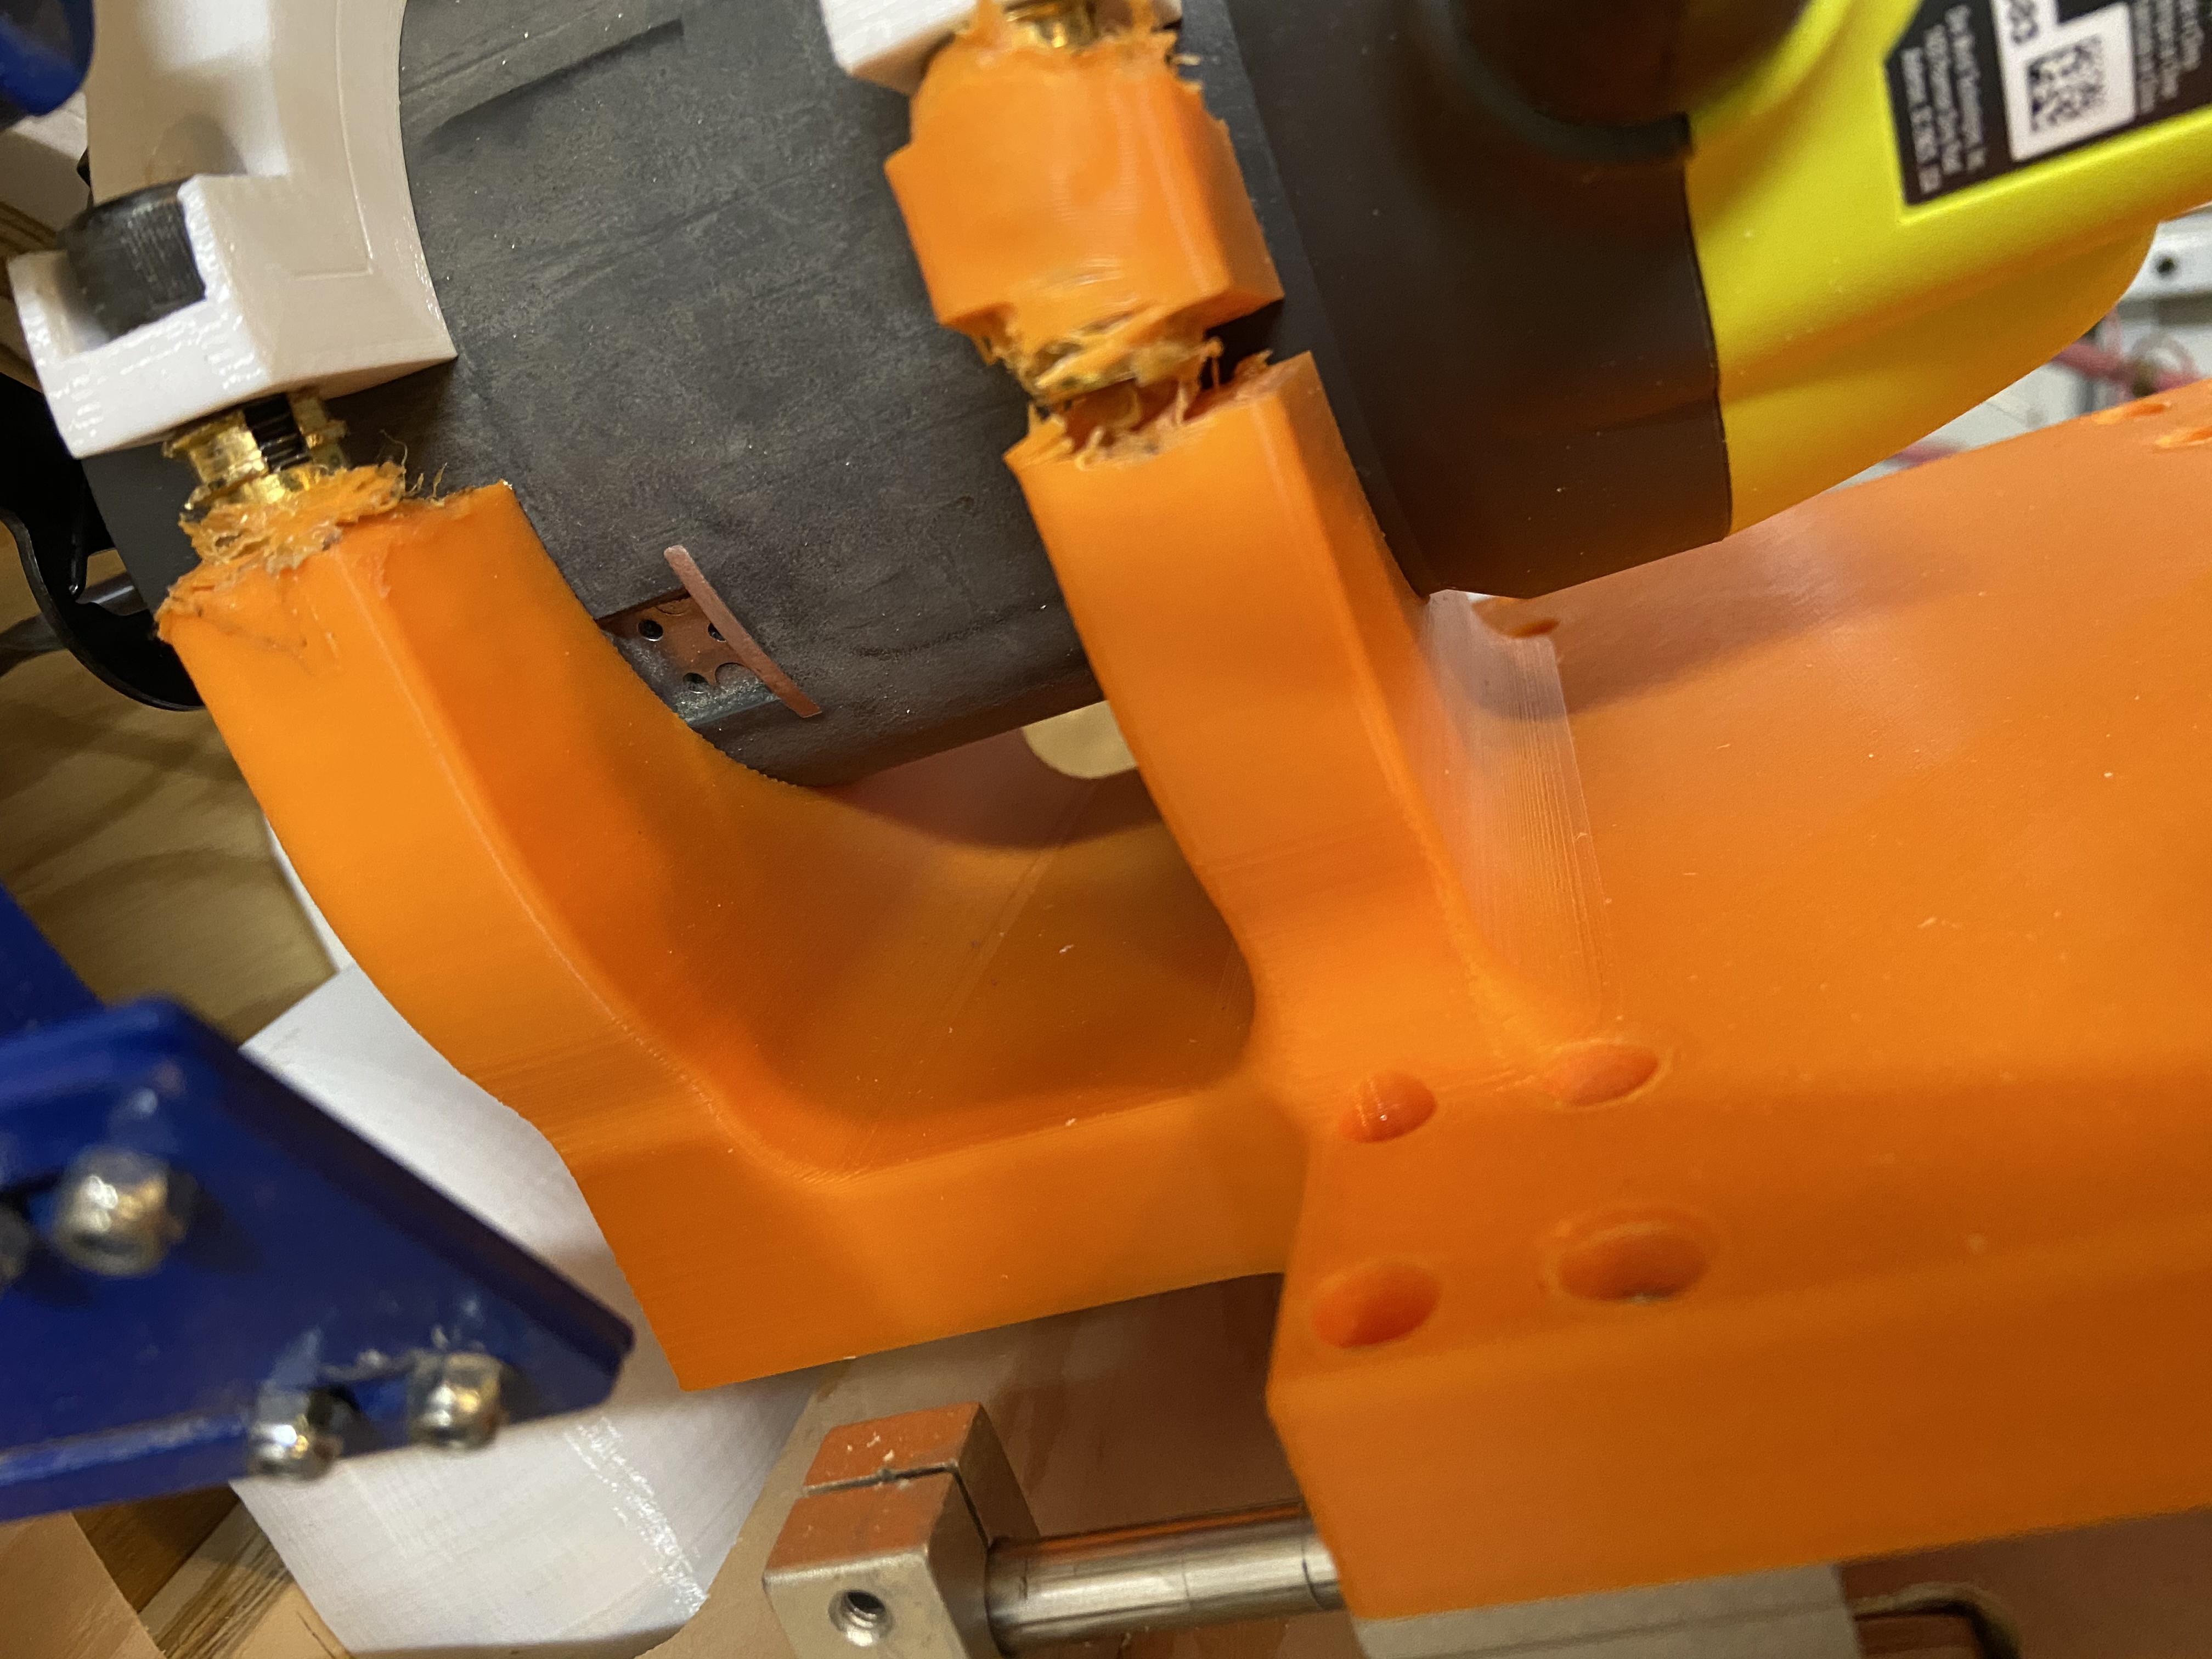
So I currently have a new one printing. I have the infil set to 35%, though I have changed the infil for the clamp portions to 75%. Cura says 1 day, 13 hours-ish, so I’ll let you know in a few days how it goes. I think I had inserts that were too big, and when setting them, it pushed out the walls of the print, causing it to eventually split, so I’m going to get some smaller ones (1/4 - 20) as @ShadyG stated would be the equivalent of what he designed it for. We’ll see. 

1 Like
that was a really nice looking print too. Sorry to see the thing come apart. Is that PLA or PETG?
Thanks! It was one of my better prints as I got my Machine dialed in (Ender 3). I did it in PLA. I haven’t ventured into the other plastics yet. I’ve read a little bit about how important temperature control is with PETG and ABS. I have so many projects going on right now that a DIY enclosure would be last on the list. Maybe by the end of the year.
The current one I am printing is PLA+(which is supposed to be better), so we’ll see how that works out.
I need to get a new extrusion tube for the higher heat PETG with my Ender3. The previous printer I used for PETG made very strong prints with just a base plate heater, but this one isn’t dialed in for that yet. I printed a bottom bracket tool to fix my bike once and it ended up looking like your bracket. Some things just aren’t well suited for plastic.
if you print mostly structural stuff like this getting a bigger nozzle like a .6 or .8mm will make your print times about 200% faster. Downside is the rough surface texture.
1 Like
This a textbook example of a layer failure. For this reason, all the spindle clamps I’ve printed have been oriented so that the layers run along the flat of the clamp. This runs the layers perpendicular to the way you have shown here, and you won’t have the same failure in the future.
However, that’s a little tricky using that clamp that you printed there. I recommend upgrading to @ShadyG’s clamp for better holding power.
1 Like
Based on my own experience I strongly recommend abandoning PLA for this purpose. It has almost no resistance to expansion and shrinkage from heat and cold. PLA works great for none structural parts, my maslow vacuum adapter and shroud are PLA and have been fine. All of my PLA router clamps have eventually failed, one failure allowed the router to spin in the clamp no matter how many times I tightened it. So far the ABS has worked perfectly and it has been brutally tested as my garage is over 110F most days.
1 Like
@Metalmaslow: I usually print small stuff, so my .4 nozzle is usually pretty good. I have looked into a larger nozzle, but so far this is the largest thing that I have printed.
@MeticulousMaynard and @ShadyG: I completely understand on the use and capabilities of PLA/PLA+. I was looking to get the print of the carriage in the other direction, but as you said, it is a bit tricky, and I was having some interesting issues trying to get the supports right. I finished the new print of the carriage, and I will say this thing is very hefty and stout (I’ll provide pictures here in the near future as I am working on getting it put back together. And that is partially a layer failure, but is was also self induced. With the finished carriage, I visited Big Orange today and found I had 3/8 - 16 inserts (waaayyyy too big for those clamp arms), so when I installed them, I pushed out the layer walls, weakening them, and eventually causing them to split under the pressure of the screw and clamp with the router. I got some 5/16 - 18 inserts (the 1/4 - 20 were too small for the recessed holes) and have installed them with no indications of bowing/pushing out on the outer walls. Not to mention I has the clamp arm area increased to 75% infil, as well as actually learned how to install the inserts the correct way, so we’ll see how this works.
I’ll look up @ShadyG’s design for his clamp design, as well as add an enclosure to my project list. I’ll keep you all posted on if I have any further issues. I’m just happy to finally have my rig back to some semblance of a working order.
1 Like
This is probably less expensive than making one: https://www.sainsmart.com/products/sainsmart-3d-printer-enclosure
How well it will insulate I don’t know.
That probably would be faster…maybe cheaper, but I have some scraps in the garage that need to be used up as well. The issue, as I am sure all here know, I have spent quite a bit over the last few months to get my garage up in working order to be my “shop” and some tools, so it would be more in convincing the CFO (aka my better half) to let me get it. There is the same one on the Amazons (https://www.amazon.com/SainSmart-Printer-Enclosure-Multiple-Filament/dp/B089VLHJT6/ref=sr_1_12?crid=BUX9UYDNW3KJ&dchild=1&keywords=ender+3+enclosure&qid=1595378543&sprefix=ender+3+en%2Caps%2C168&sr=8-12) for a little cheaper, as well as other choices.
My biggest problem is I have too much that I want to do, and not enough time to do it all NOW, dang it!! It seems every time I prioritize and get started on one thing to get things finished, the wife asks me to do something for her, or someone else, so it all gets put on hold. (no excuses really!!)
I’ll be paying very close attention to my set up as I work through everything. I don’t plan on doing anything big or massive in cuts, but I want to put it through some paces to test more than what I did earlier. I didn’t have bad performance before (aside from some z-axis issues, hence the desire to upgrade), but I want to see how much better it can be. I honestly do appreciate all of everyone’s recommendations, but I have been getting the looks from the wife on having it and not doing anything with it, so trying to do what I can with what I have at the moment! I’ll be sure to keep posting as I move along and see what I can/can’t do!
3 Likes
anyone know the hex allen key size of the 2 set screws on the pillow block that holds the lead screw? It looks to be 1.27mm or maybe1.4 or 1.5mm?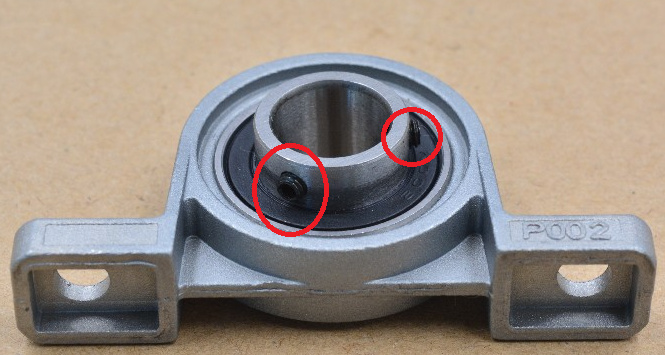
They are the same and I think they were 1.5mm. I’ll try again when I get home. The set I have only includes a few of the half sizes and I’ve never had a problem getting them to tighten. I do recommend threadlocker as well.
EDIT: checked my set. The smallest is a 1.3 mm, but the hex key in question is in fact a 1.5 mm.
1 Like
So i’m starting to put together my kit for making the upgrade and had a question about the back clamp. Is there any reason why the back clamp (right side in picture) can’t be notched in to accept a regular nut and bolt or t-nut and bolt? looking at the model it appears there is room but was wondering if this was tried at one point and abandoned? I have had the screw in threaded inserts pull out before and a t-nut or regular nut gives me more comfort.
