It is VERY difficult for me to mount and unmount this, I am in a space constrained area and I mounted the frame to the ceiling rafters. I have to crawl around under the plywood, use hammers on the pins etc.
I let out too much spool and the device is not centered before calibrating. I rebooted it and it forgot the belt lengths.
Edit: Is it possible to recalibrate from a manually jogged position and set x/y home?
Third time..I couldn’t wait, too antsy to get it going.
It was kind of centered…the calibration ran but it’s stuck on “fitness”
I will let it keep doing the calculation.
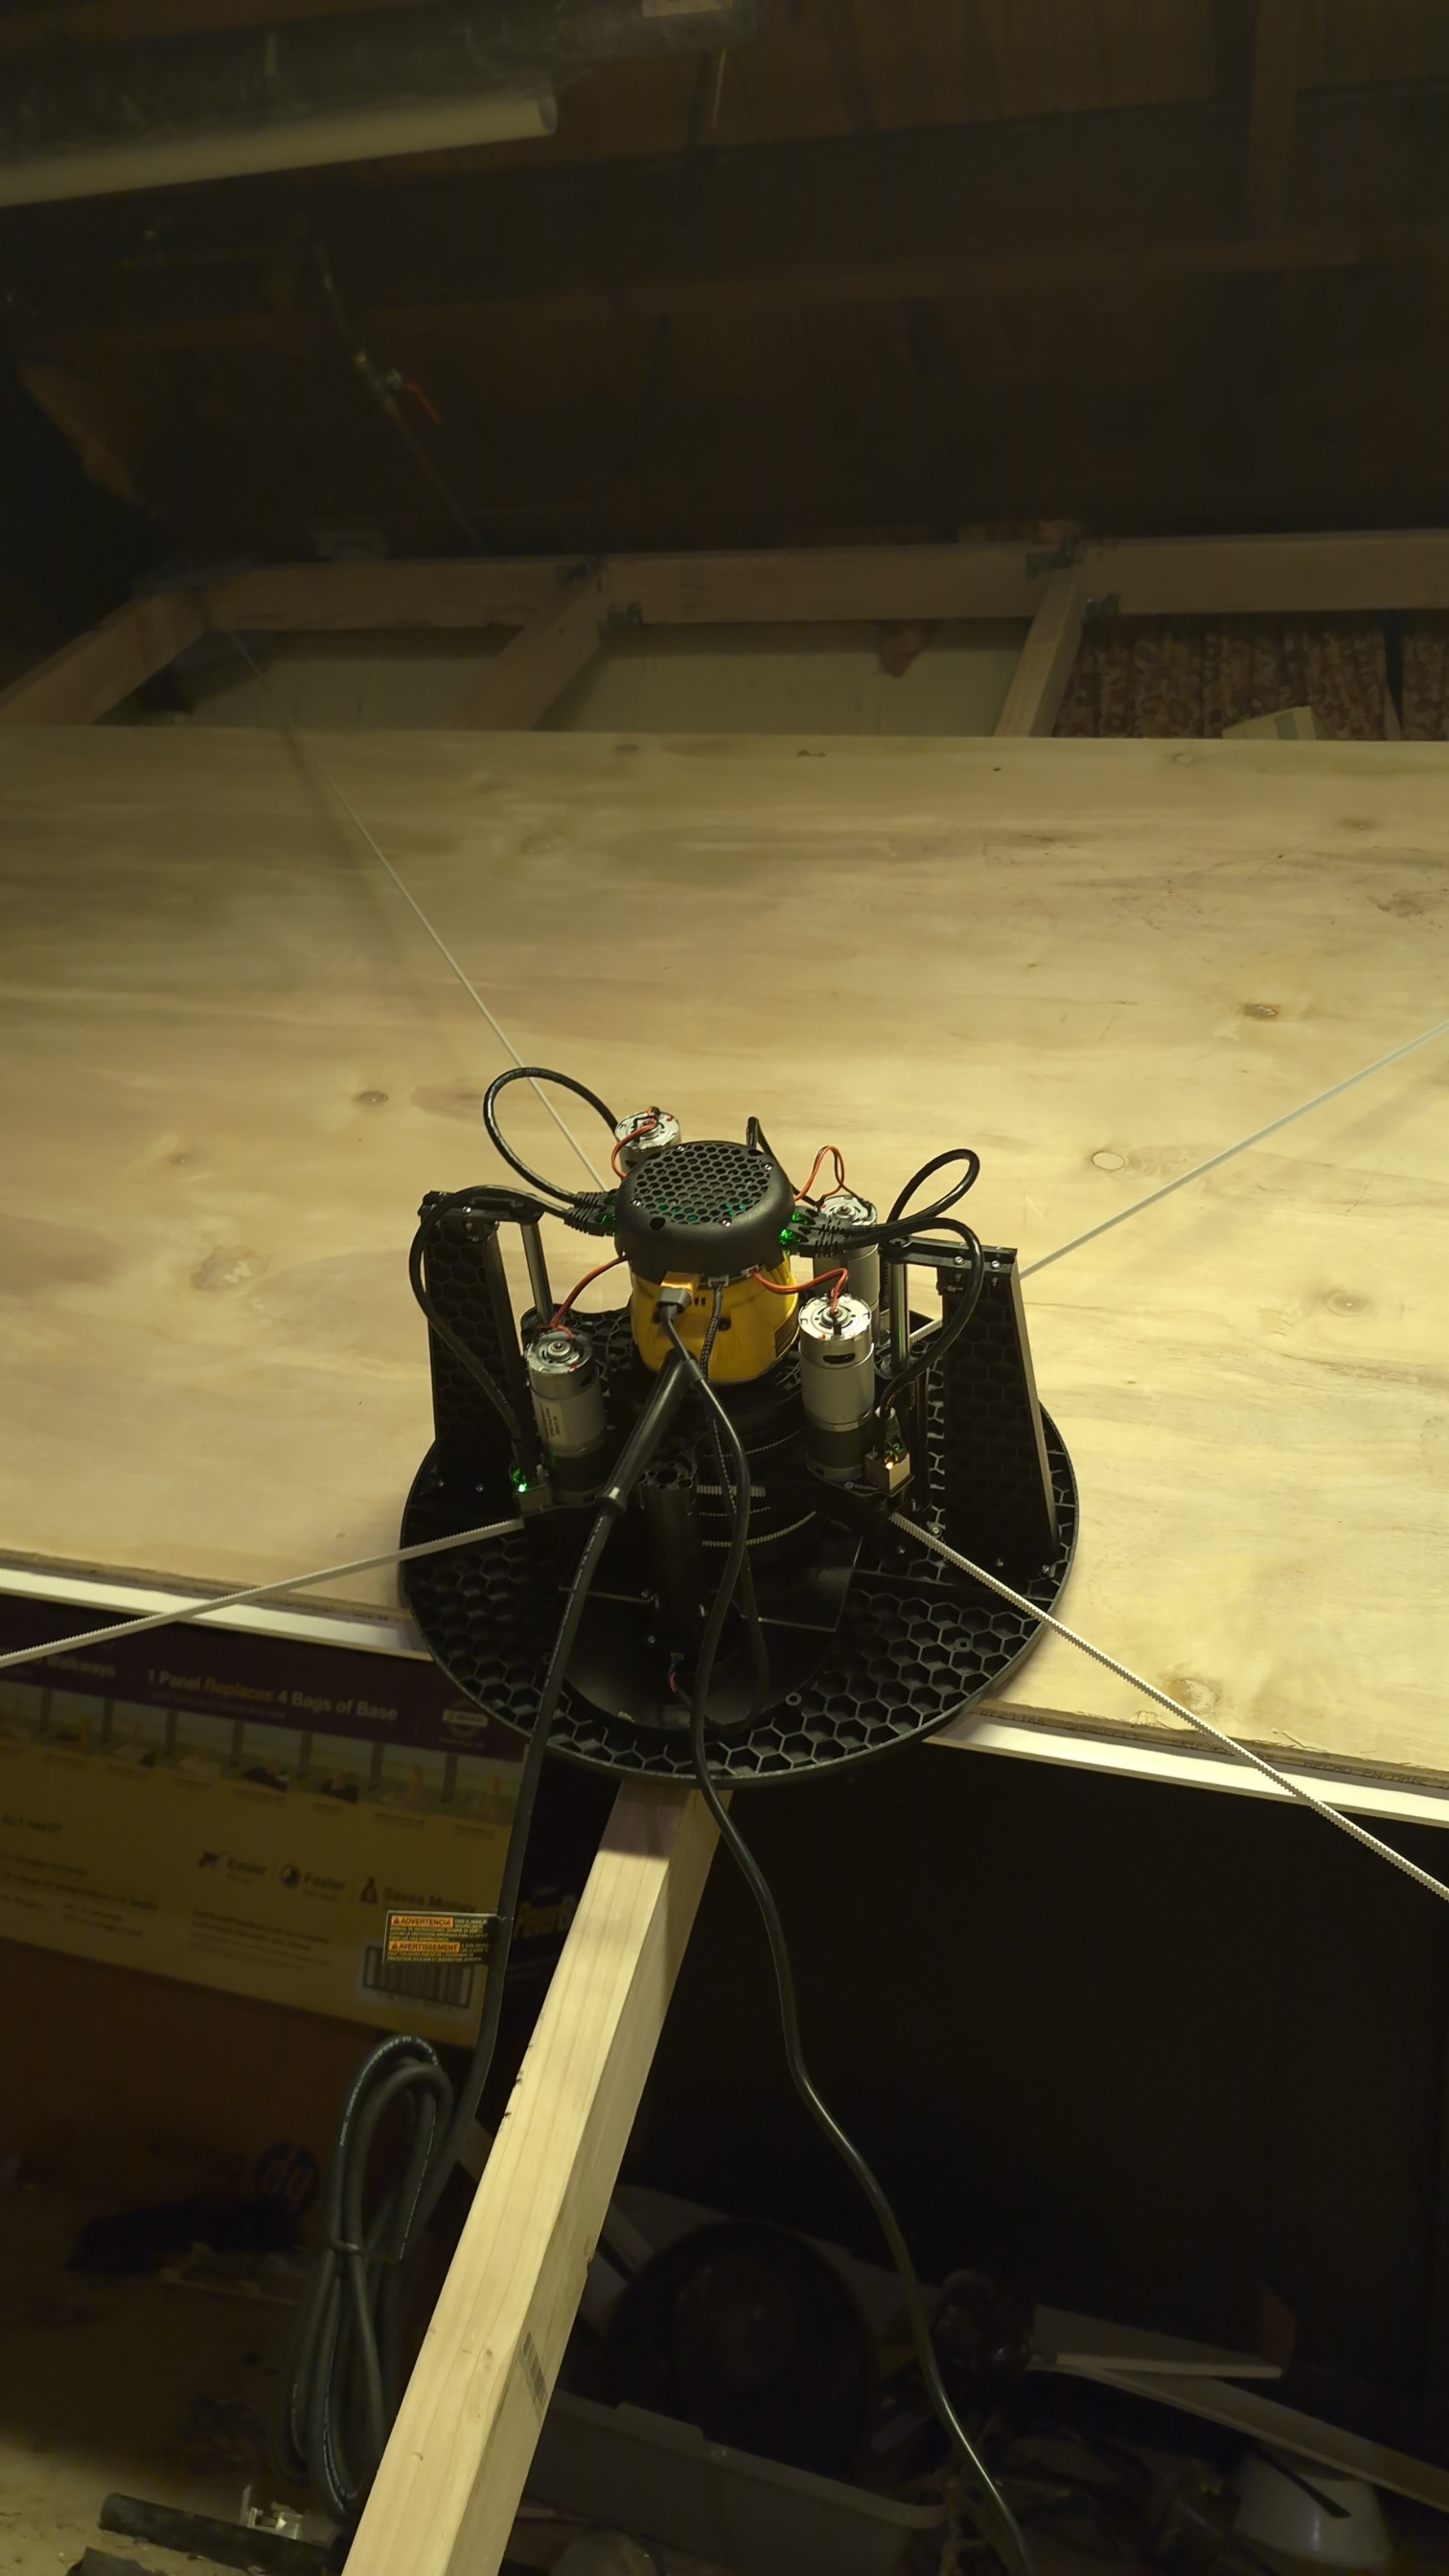
I visually witnessed a problem during calibration. The timing belt clips attached to the bolts were sliding up and down each time the belts loosened and tightened and that changes the length of the belt significantly.
I think the fix for this is to place a spring on the bolt, a spacer, and some nylon washers. This will keep it in one place.
I am hoping the calibration will complete and I can run it again after jogging the sled more towards the center and after fixing the sliding belt issue.
I was struggling to understand why the device needs to know the length of the spool - why can’t it assume infinite and just run off relative triangulated coordinates from a user set home point? Out of curiosity was that ever tried?
It is doing things like trying to measure bed warp it seems, probably possible because it knows original extended lengths of timing belt and how much it moved during calibration?
Doing all this extra stuff added accuracy?
This is a very cool project. I am going to get mine working. Unmounting and re-mounting the sled is just painful. If I save off my yaml file I shouldn’t have to do that much, right?
Edit: Calibration completed, but I am going to redo it - I hope without remounting the device - after fixing the sliding timing belt mount issue. Surprisingly it centered itself. It must have taken an average of what it wound up on the lower spools and what it over-did on the top spools and set all the spools to some similar position.
Edit2: The more I think about it, knowing the length of each spindle timing belt would let the machine calculate the frame size, and calculate how the offset of the belts on the Z axis impacts movement in the X/Y for a given distance. So it’s all very needed. Can’t use 2d math. And having the belt offset probably helps pinch the sled to the workpiece. So it’s all very good design that leads to a slightly convoluted calibration process but it’s not that bad.
every time you power it on you will need to detach the anchors, retract the
belts fully, extend the belts, connect to the anchors, then apply tension
otherwise it doesn’t know how long the belts actually are.
there is work planned to make it so you don’t have to do the entire dance for a
graceful power cycle, but any time you lose power or hit e-stop you will have to
do this as you will be starting from an unknown state.
it asks for a length of belt to extend so that you don’t have to feed out the
entire 14’ of belt and retract it (while managing the extra length to keep it
from tangling or getting caught in the gears inside the arm). Also, if you
try to extend too much, the belt starts wrapping around the spool the wrong way,
which also causes bad things to happen.
having the belts slide up and down at the anchors will cause you problems as you
guessed. Also make sure that you have no bit in the router and the router all
the way down when you calibrate. If you are still having problems, check that
the Z offsets (height of the belt at the arm - hight of the belt at the anchor)
correct for each arm.
Sorry for posting so much
Maslow_tlZ: 100.000000
Maslow_trZ: 56.000000
Maslow_blZ: 34.000000
Maslow_brZ: 78.000000
These are defaults. Is the Z measured from the bottom of the belt, center, etc?
My spoil board is 18mm or so. The belt end is maybe a couple mm lower than that.
How do I know if this is good\where do I measure from?
Edit: Whatever these values are, it’s likely seemingly measuring to the bottom of the sled. I added my spoil board thickness + the additional offset I have on my Z. It calibrates incredibly fast now(1300 loops vs 100000) so that is probably right. Same fitness at .7 or so which seems fine.
Can you update maslow.yaml for like workpiece thickness? No need to reboot and recalibrate?
I think I’m in pretty good shape now.
Going to print that pencil holder to test how accurate it is before actually making some chips.
Edit: A little infuriating…BL really needs to be higher up. If you move the maslow to the left it will hit the dust collection port from the 3d printed not shop. Sort of close to the distortion zone but not that close.
The image in the build guide…has the bl arm closest to the bottom
My last calibration fitness was 1.05 and it was looking good. Accidentally hit the power button unplugging my laptop…so have to redo anyway! But I think the setup is all good.
So I’ll probably disassemble and fix this too…can the build guide be updated?
Sorry for posting so much
Maslow_tlZ: 100.000000
Maslow_trZ: 56.000000
Maslow_blZ: 34.000000
Maslow_brZ: 78.000000
These are defaults. Is the Z measured from the bottom of the belt, center, etc?
it doesn’t matter, as long as you measure the same on both ends (if you measure
the bottom of the belt at the anchor, use the bottom of the belt at the arms)
My spoil board is 18mm or so. The belt end is maybe a couple mm lower than that.
How do I know if this is good\where do I measure from?
measure from the belt to the floor at the anchor, then put the sled at the edge
of your spoilboard/workpiece and measure from the floor to the belt for each arm
subtract the measurement at the anchor from the measurement at the arm and enter
that as your z offset for that arm.