First of all big thankyou to Hanna, Bar and all the contributors, it is amazing what even someone like me can do with what you have all created.
I thought I was pretty slick until I tried to cut my final sled out last night and the Z axis hung after the first drill operation, smoke sparks and lots of profanity. I had completely forgot about the recommendation to put spring tension on the top of the router to take out the play in the ridgid system.
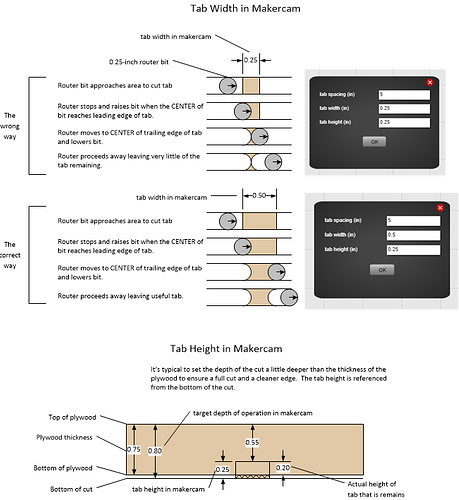
Regrouped tonight, re-zero’d, Mac Gyvered a spring tensioner for the router and got the final sled cut out. I modified the file to add tabs but it was useless as I am using 23/32 plywood and I set the depth of cut to .75" and the tab height and width to .25, add in a litte off on zero and your tabs get cut off or are just too small to work. Must remember to make the tabs a little longer and add on the depth of the overcut to the height of the tabs.
I feel like a dummy but I’m really excited about getting to know the proces and machine better and where it will lead me. What an adventure.

