I primarily make furniture with my Maslow. I use Fusion360 for everything. My process is as follows:
- Draw/model the item to be made. Using a cabinet as an example, I draw my end section on the YZ plane, detailing toe kick, deck, back, shelf(s), stretcher(s), and drawer(s). I generally set my basic cabinet dimensions as User Variables Once I’m happy with my cabinet section, I extrude the side and then cut in all the dados and holes. After that, I make an offset plane using the cabinet width variable, and then repeat the process for drawing the other side. Then I fill in all the various components. Lastly, I’ll make a sketch on the front of the cabinet and add in my doors and drawer face(s). The length of time this takes is entirely dependent on how complex the cabinet is. This, very simple cabinet, took me less than an hour to draw:
User Variables:

End Section:

Doors:

- After modeling the cabinet, now all the parts need to be nested. I go around and use Joints to get all my spacing right and arrange the parts to fit on available stock. They will all be grouped based on the sheet of plywood they will be cut from. There is also a plug-in that automates this process. This cabinet would take me about 15 min to nest.
Slightly different cabinet, but based on the same section. I just made an entry hole for my cats:
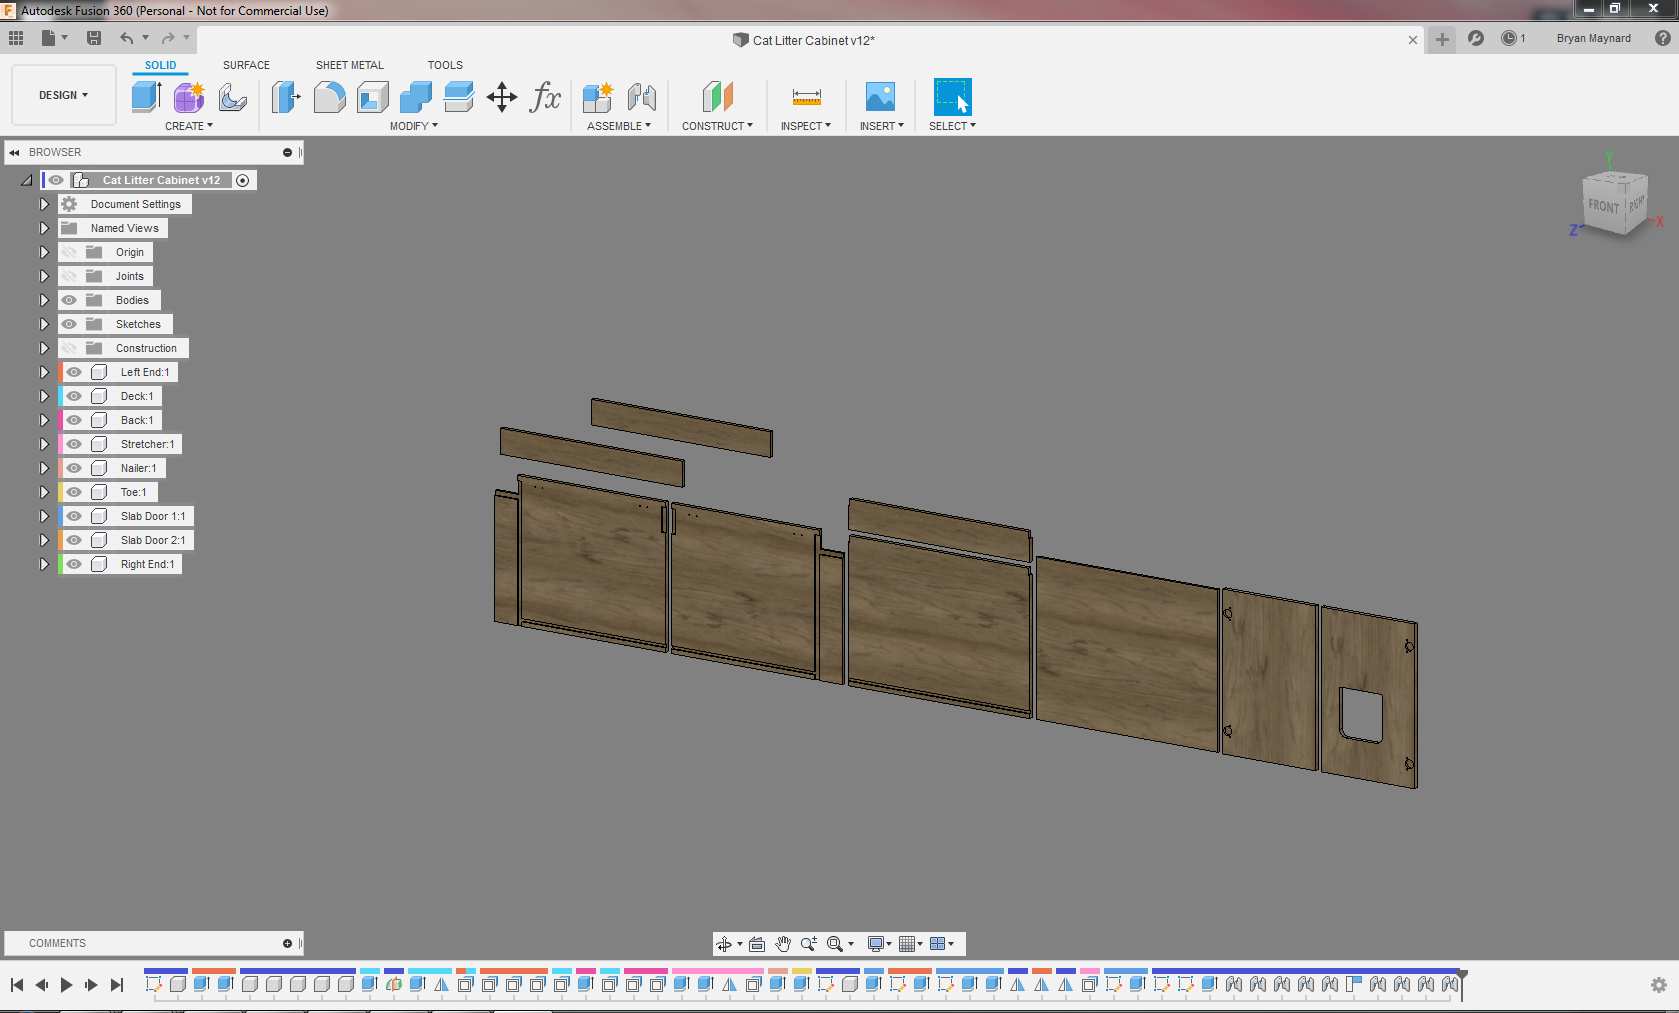
-
Next I go through the CAM workflow. The idea here is that you make a setup for every different sheet of plywood you would run. I was trying to use up a bunch of scrap, so this is actually several pieces. In your setup, you define your machine, origin, and workpiece dimensions.
-
After making a setup, I then go and add in all my toolpaths. I have a particular order of tooling, typically it goes drill(s), engraving tool(s), large endmill(s), small endmill(s), and then ball mill(s). That being said, when possible, I try to limit my programs to 1 tool. This eliminates the need for tool changes, and you can pretty much just let the Maslow cut it in one go. In this case, there is a drill step on the sides and doors, and everything else is cut with my workhorse 1/4" single flute bit. I start with dados and other shallow pockets. Then I do through pockets (if any). After that it’s inside contours, followed by outside contours. All of my default toolpath strategies are saved into Fusion, so I don’t have to spend long messing with the settings. I just pick my paths, locate any tabs, and I’m good to go. This cabinet took me about an hour to program. This stage can get much longer with more complicated setups or parts that require a lot of machining
I do go into more detail with toolpath settings in this post: Fusion 360 confusion - #9 by MeticulousMaynard
Cabinet side programmed, you can see all the other setups for each piece of plywood I’ll be running:

-
Post this. Again, with my machine setup, it knows what post processor to pull and where to output my file. I use the Maslow post processor, and it’s given me great results. I output to a dropbox folder so I can easily access it on my Maslow.
-
Boot up the Maslow. Load on the first piece of material and secure it. When I have larger sheets, I like to use my quick pinch clamps, but with smaller pieces I’ll get out my nailgun and brad it in place where it won’t be near the bit. I open the needed program in Ground Control
Older setup, but it’s the same idea:

-
Home! I move the machine to where it needs to be to set the work origin based on my CAM and set that as my home. If needed, I’ll touch off my first tool. At this point, I’ve spent 15 min tops at the machine.
-
Run! I run my machine with a dust collector, so I turn that on just before telling it to start cutting. Typically, the run times can be for a significant chunk of time, so rather than sit there the whole time I usually find another task to do in my shop. I never leave earshot just in case something doesn’t sound right, but my machine has been fairly reliable in the sense that I can just let it do it’s thing and not need to intervene. I have certainly sat there and watched it work for more than I would like to admit, it’s just so mesmerizing to watch.
-
Clean up. I park the machine, then vacuum up the mess that fell to the floor. I cut all my tabs with a hand saw and then clean them up on a belt sander. I will usually test fit all my parts to make sure all my CAD was in line with reality. From there, all the parts will need a light sanding before finishing them. I start at 120 grit and go the 220 or 320 depending on if I need to or not. This can take as little as a half hour, but the light sanding step can take quite awhile if you have a complicated assembly. A random orbit sander helps massively if you have a lot of square footage to cover.
-
Finish. This should be pretty self-explainitory to most woodworkers out there. I like to use Tung Oil, unless staining is required. Tung oil is an requires 2-3 coats, each one takes about a day to set.
Sanded and oiled cabinet parts for my kitchen (Doors thrifted, not Maslow’d):

- Assemble. This is a really satisfying step, especially if you remembered to test fit everything earlier. Otherwise, it can be really frustrating. On the cabinet below, that took me 20 min to assemble.

From there, you would install the cabinet. Hopefully this isn’t just a wall of text to readers. I wanted to be detailed enough but also be concise. It’s a hard balance to strike. Sorry for jumping around on these pictures so much, I haven’t documented my entire workflow on just one job, so I had to pull from a few similar ones.
Happy chip-making everyone! 