First Run Troubles

I completed my temp frame yesterday and made it through the intial calibration process! All seemed go, so I set out tonight to start cutting out my final frame. I ran into several issues and am going to put them in this one thread (hopefully that’s okay).

I started out in MakerCam and decided to do the first half of my frame, not wanting to attempt it all at once. I manually deleted a bunch of the pieces, and followed the instructions here to create the gCode. After loading it into GroundControl, I realized that I was potentially biting off more than I could chew, and decided to go back and just do the two arms on my first try.

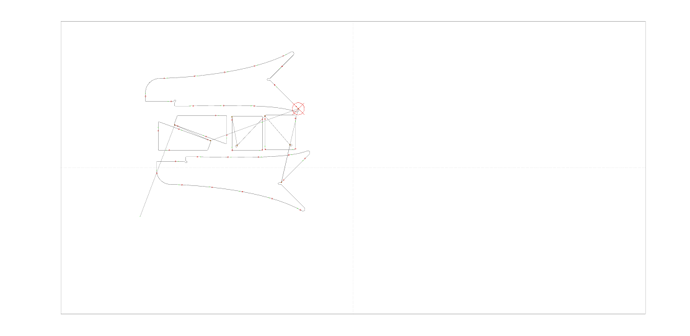
I followed the same instructions, and loaded the file in maslow. Except that this time, my first arm had an outline and the second one didn’t!. Thinking this was a fluke, I tried a few more times with similar results. Finally, I decided to try just one arm. Here’s what that looked like in Ground Control:

Does anyone know what’s going on here?

Okay, second issue is with my Z axis:

Excited to get started, I re-loaded my first G-code containing half of the Maslow frame and decided to jump in.

However, after the first to pieces were “cut” i knew I had a problem. Maslow wasn’t making it all the way through my plywood even though I set the depth to .85". I started watching ground control and keeping an eye on the Z axis. It seems that my machine isn’t able to get the router head low enough. The adjustment screw turns but the router doesn’t seem to go lower. Even though ground control showed the final pass at .85", my cuts are only about 3/8" deep.


Has anyone run into this issue? I suppose I could just extend the router bit a little further, but shouldn’t Z axis be able to lower the router all the way?

Okay, that’s all for now. Thanks for your support! I definitely realize now that I should have waited to start cutting until I was more confident in how things were going to turn out.

1 Like

do you have anything pushing the router down to the sled (a couple pieces of
strechy cord or similar), there is a lot of play in the adjustment and if you
don’t have something pushing it down, it won’t go that deep (especially
initially, it may go deeper later)

or it could be that there is something else wrong with the g-code you used. Can
you post it?

@icedub

Congratulations to the temp build completion !

I’m not sure about the rest of the issues but I think I can answer the why isn’t it going deep enough problem. - First you are setting Z to zero with the bit touching the wood correct? You need to help the router moving down. A) you have adjusted the clamp so when it’s closed it allows the router to move but not too much? B) You need an elastic puhsing the router down.

See:

Z-Axis Bungee To Ensure Correct Depth

Thank you

AH! I totally forgot about the bungee. I remember reading about it months ago but that should probably do the trick. I did take the router off the base and extend the bit a little bit and tried the first to pieces again. It got a bit deeper, but still not all the way.

Here’s the “good” G-code that has the outline: part1.nc (49.2 KB)

And here’s a sample of the G-code that doesn’t have an outline:
justarms1.nc (35.3 KB)

Thanks @Bee and @dlang for the bungee reminder!

I’m happy to say I know exactly what’s going on with the missing outline and it’s totally my fault, you did everything just right. There was an issue in 1.00 with the new UI look where sometimes the line color would switch back to white and so some parts would become invisible. It’s one of the many fixes which will be part of the new version which is coming out next Wednesday, until then a work around would be to switch to the ‘dark’ theme in Settings and then restart Ground Control. If that doesn’t make all of the paths show up, let me know. If that fixes it it’s totally my fault, sorry!

For the router not lowering all the way down, is it possible that the motor mounting bracket on the z-axis is catching on the edge of the router? I’ve seen similar behavior when that was happening. The solution for me was to rotate the z-axis out to one side more where the router provides a little more clearance.

Overall it looks like a beautiful build!

3 Likes

Try moving the bit up and down using the manual z axis control to verify you can get to 0.85 inches. It’s a nice way to test to make sure you don’t have the bit set too deep into the router. I second what @bar said about the router getting hung up on the z axis mount. From the picture you posted, it looks exactly like how I had mine and the router would get hung up. Rotate it so that it’s “radially” aligned… It’s a matter if millimeters in clearance.

3 Likes

This has all been super helpful so far! Unfortunately, I won’t be able to get back to the shop until Saturday at the earliest to try this all out.

I still have ground control open from last night, because I know if I start the machine back up after making adjustments, I can have it go finish those cuts it started to make but didn’t get all the way through. If I quit ground control, when I open it back up, will the last bit of Gcode I opened still be there? And if not, is there any way for me to load this session back into Ground Control so I can finish where I left off? (I hope I’m asking this question in a way that makes sense)

I’m sure there are others that can answer mor elegantly than i. I have these notes from a discussion of power loss. Not quite the same thing.

Losing power while the machine is moving is going to mess up your home position. The position is saved to nonvolatile memory two seconds after the machine stops so a power outage while the machine is stopped won’t cause any loss of position
When you turn the computer back on and launch Ground Control the file you were cutting and it’s position on the sheet will be saved. To resume the cut you will need to do Actions → Calibrate Chain Lengths Automaticto restore the home position. You can then use these buttons:
to fast forward through the file until the point you want to resume.

<<

I think it might be enough to get you where you are going.

Thank you

Its probably a good idea to leave Ground Control running. In theory, it will reload the program with the same “home” point when you start it up again. If you’re asking about keeping your place in the program, you will need to write down the line number you are on and use the “go-to” button right under hold to get back to that line number. Be careful with this, because if you load from the wrong line it may miss a Z move and either not cut or cut where it’s not supposed to.

In the future, however, it would be advisable to cut your parts start to finish in the same sitting. I know that isn’t possible with this situation, but I just wanted to convey this warning. I had an issue with a recent project where I tried to pick up where I left off after shutting the machine down overnight. Before shutting the machine down, I drilled a hole right at the home I defined for the program so I would know if I was working from the same origin when I started up again. The next day, I noticed the tool was 1mm to the right and .5mm down relative to my origin hole. Either the panel shifted or the sled “settled”. Since the gearboxes don’t backfeed I think the panel I was cutting was actually the culprit here. Things were close enough for me to finish cutting the parts, but it certainly would be worrying if I had something that needed high precision.

2 Likes

I finally had some time today to continue working on my final frame. I know that it’s not really recommended, and I plan to build a top beam frame next, but figured since I already started it and needed some practice cutting, why not finish it?

I had mixed success with most of my troubles still coming from the Z axis. Since I last updated this thread, I rotated the Z axis motor mount slightly so that the router can pass by. I also added a bungee cord and adjusted the bolt on the clasp for the router collar so that it could be closed but with minimal pressure.

The main problem I had was lowering the Z axis- particularly into negative numbers to get it to start cutting. The little arm piece would slide past the divot on the router body, despite the bungee:

If I gently pressed on the router in this situation, it felt really stuck. If I pressed on it hard, it would suddenly jump down to where it’s supposed to be.

It’s really hard to tell where the router is getting hung up. Perhaps someone with a fresh set of eyes sees something that I dont? I think I have the Z axis in the right spot but it’s so damn close!

Another issue I had (definitely Z axis related), was that at the end of a piece, despite having the safe work height set to something like .3 inches, the z axis wouldn’t get the router back up to the right height, and it would start moving to the next work piece with the blade still dragging. This happened several times:

Note that these pictures are both different attempts. For the pieces that have that random squiggle, I again don’t quite know what happened (both times I was looking at GroundControl. The sled must have somehow gotten hung up and then essentially fallen back to where it was supposed to be. Both times that happened preceded the Z axis troubles just described (moving to the next piece with the router still in the wood).

The arms came out perfectly, as did the two motor mounts. I will say, its a HUGE rush to watch the Maslow cut. I’ve never used a CNC machine before and it is so mesmerizing. It’s like magic! I can’t wait to start building amazing things.

But in the meantime, I’d really appreciate any feedback or ideas of things to try.

1 Like

try poliching the router body and wax it. from the marks on it, it doesn’t look
like it’s moving smoothly at all.

2 Likes

To me it looks like the top of the router is rubbing the motor. Maybe a slight difference in size between the R2911 vs R22002 is contributing to it getting caught up?

Regarding the off-track cuts, what version of GC/FW software are you running? Are you using makercam and are you using mm or inches with it? Also, what feedrate are you using?

2 Likes

@dlang I’ll give that a try! Would beeswax work?

@madgrizzle I’m on the latest available GC and FW (1.03). I used Easel for these cuts in Inches, with a feedrate and plungerate of 30 in/min. http://easel.inventables.com/projects/w-33KqI8y6jngD9BVx8nNg

In case you’re curious, here’s the gCode: https://drive.google.com/file/d/1lTxtLsZPOLc36FAShxE5txkZAxUkAH7C/view?usp=sharing

It’s funny, I never noticed that my router said R2911 and not R22002, because I know I specifically ordered a 22002 from Home Depot. Interestingly enough, on the HD page for the 22002, if you zoom in on one of the product shots, it says 2911 on it:

I’ll have to check mine. The R22002 may be a package of an R2911 plunge base? + RXXXXX motor + Rwhatever.

Regardless, all of my Z-axis issues have been because either that motor bracket hits the lip of the router’s “head”, because the silly clamp came undone, or I didn’t have enough pressure from the bungee.

2 Likes

Thanks. I was doing all this troubleshooting with the sled still attached. I’ve gotta take it off and put it up on the bench and really look at it.

Any tips for how to take the sled off with one person? I’ve been lowering it until it touches the ground, and then disconnecting the chains. Still haven’t figured out anything good to do with the chains so they don’t get all dusty yet.

I lift it up to get slack in the chains and use my body (torso/belly) to hold it against the plywood frame and then disconnect the chains. Friction holds it there. Not hard to do.

I’ve hammered a couple finishing nails along the top edge of the frame where I slide one of the chain links through to suspend the ends of the chains so they don’t drop down and get tangled upon themselves

2 Likes

I drilled a hole near the top edge of my sled and put a sturdy nail in the top bar to hang it on.
Recently, the top-mounted linkage gets in the way of that, so I put a loop of rope on the top bar and a hook in the linkage support.

2 Likes

I was thinking eye-bolt into the linkage support and a nail on the top bar

but whatever works :slight_smile:

Forgive me if this is a silly question, but have you tried adjusting the tension on the nut here:

image

It will let you set the latch tension and make it so the router is more free to slide up and down. I would recommend backing it off until you are sure things are moving smoothly and then gradually tightening it to reduce play in the system