
Project 2. Wanted to try something more ambitious than a flat sign. Neighbor had a particle board cabinet in the trash. I wanted to try out Abundance software. Came out pretty well. Good technique that is a bit forgiving if pieces slightly inaccurate. Good way to make a computer polygon model out in the real world. Would be a good technique for strong furniture with plywood and paracord. Might give it to a friend who likes decorating for Halloween.
Take aways.
Abundance and parametrically programmed design is interesting.
The robot worked well.
Trace boundary function was great for salvage wood.
Cut one set of panels faster and they had more blowout on the back but worked well enough.
Sewing together was very fast and strong.
My fold up frame worked great and seemed stable for all of the cuts.
I want to do some accuracy testing. It seems like some of the drilled holes and cut lines are closer in some parts and further in others.
Will probably use the techniques again.
Maybe good for a boat or for furniture that will have annoying hard to dust edges but be very strong.
I really liked the three d shapes in abundance if I can figure out a way to pull those out, it would be exciting for the robot to cut angled edges for large wooden polygons to fit together well with gluing.

The exact technique I used is only good for convex things not concave things.

https://abundance.maslowcnc.com/wouldchuckit/SkullHalf
Started in Abundance. Wanted to make planes that would intersect and then slice through each other to define the polygons. I couldn’t figure out a good way to do that so I built a molecule that was a hexagon panel with a volume behind it that I labeled as “keep out” I made lots of these panels and then pushed them out into space at different angles to make the skull shape.

I then Extracted the keep out volumes from the panels

And created a void around the skull that would cut all of the panels off.

This only works on convex things not concave ones. I may play around a bit more. Abundance does boolean operations so it feels like the right collection of those would do the same thing with just the panels.
Once I had the basic half skull shape, I made a plane to cut it cleanly where I would want the middle to be.
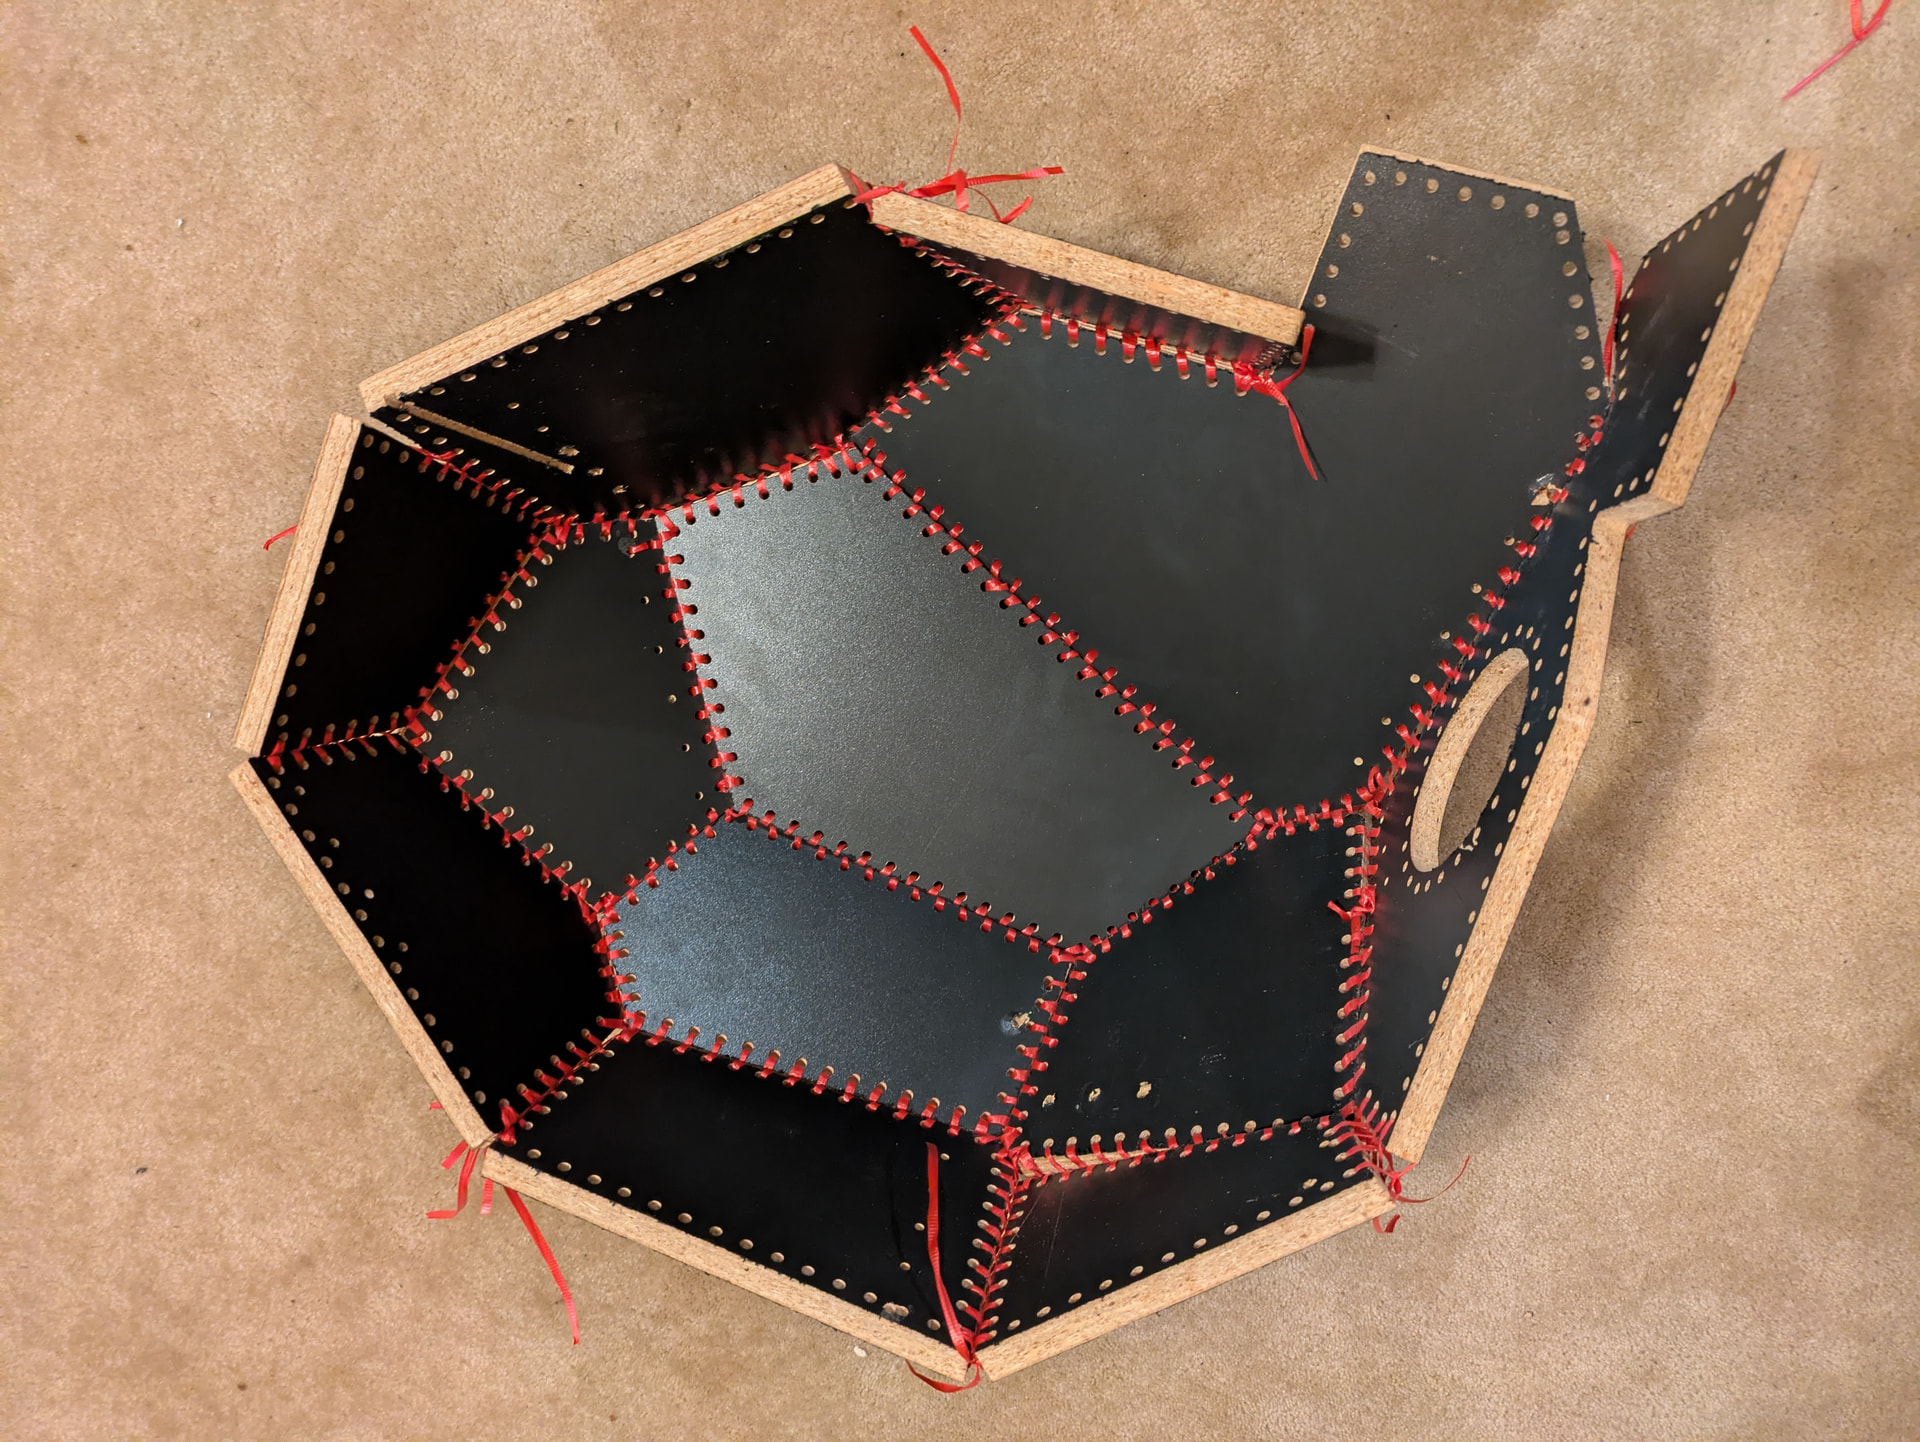
I then exported the three D .stl model to blender where I could delete the inside surfaces of the panels, just leaving the 2d outside of the skull. I exported this using the amazing “paper unfold” tool by Addam Dominec. I could have used the pay program pepakura designer which is pretty wonderful but I haven’t paid for the program for this computer.


Here I am comparing it to the abundance model. It can export with or without paper folding gluing flaps. I eventually exported them with no flaps but kept the numbers.
I then uploaded the .svg file to inkscape to arrange the pieces to fit on the board that I had. I also had inkscape inset a pattern of circles inside each shape. I used inkscape to color code the drilling circles as a different color so that the cnc program would know they were a different operation. Most Cnc programs interpret different exact colors as different layers or operations.

This was ready to export as a generic .svg (not inkscape document) to Krabzcam on the web It would be fun to use a pen to label the numbers using the maslow but I haven’t figured out that part yet. It is good to check your design when you load it into the CNC Cad Cam program as sometimes curves get interpreted differently

Krabzcam was wonderful once I read the keyhints in the back of they yellow screen. I made an operation for drilling the holes and then cutting the edges. I stepped down 2 mm the first time which was slow but did make a clean cut. Did 5 mm the second time which still worked ok but did blow out the back of the drilling holes a little. Difference was 5 hours to drill all of the holes vs 1.5

Exported the .nc gcode files from Krabzcam and uploaded them to Maslow.
Only other weird part is that when I upload to maslow I might start including a home drilling operation all of my files just as a simple dot at the origin that cuts to make sure that both the drilling holes and edge cuts are registered properly and cut in the same place relative to each other.

Cutting Yay!

It took 5 hours to drill all of the holes with a pecking (bit drilling and then lifting and then drilling) of 2mm. The second time I had it peck at 5mm which only took 1.5 hours but did break out the back of the holes a bit.
Then I cut at 700 mm/ minute First time at 2mm depth, the second time at 5mm
Not sure if dust build up on the surface is going to cause me problems. Having a board on the sides to stop the machine from tipping over was really important. I didn’t do it on one side ad the cuts there are pretty rough as the machine wobbled.


Fold up frame worked great for me. Had to take it down and put it up several times. about 20 minutes each but it seemed very reliable. I ran calibration each time with 1.13 it went very quickly.
The rest was sewing together with a yarn needle and balloon string from the thrift store. Whole project cost 3 dollars and electricity and time. Sewing was super easy with drilled holes though.

I used a baseball or butt stitch to sew up through each hole and then down between the panels and then back up through the hole in the other side. This makes a flexible joint kind of like the clicky clack wood and ribbon toys so that the panels can rotate around each other freely as a rotating hinge.


Numbers written on with pencil would help. I want to make the machine do this.


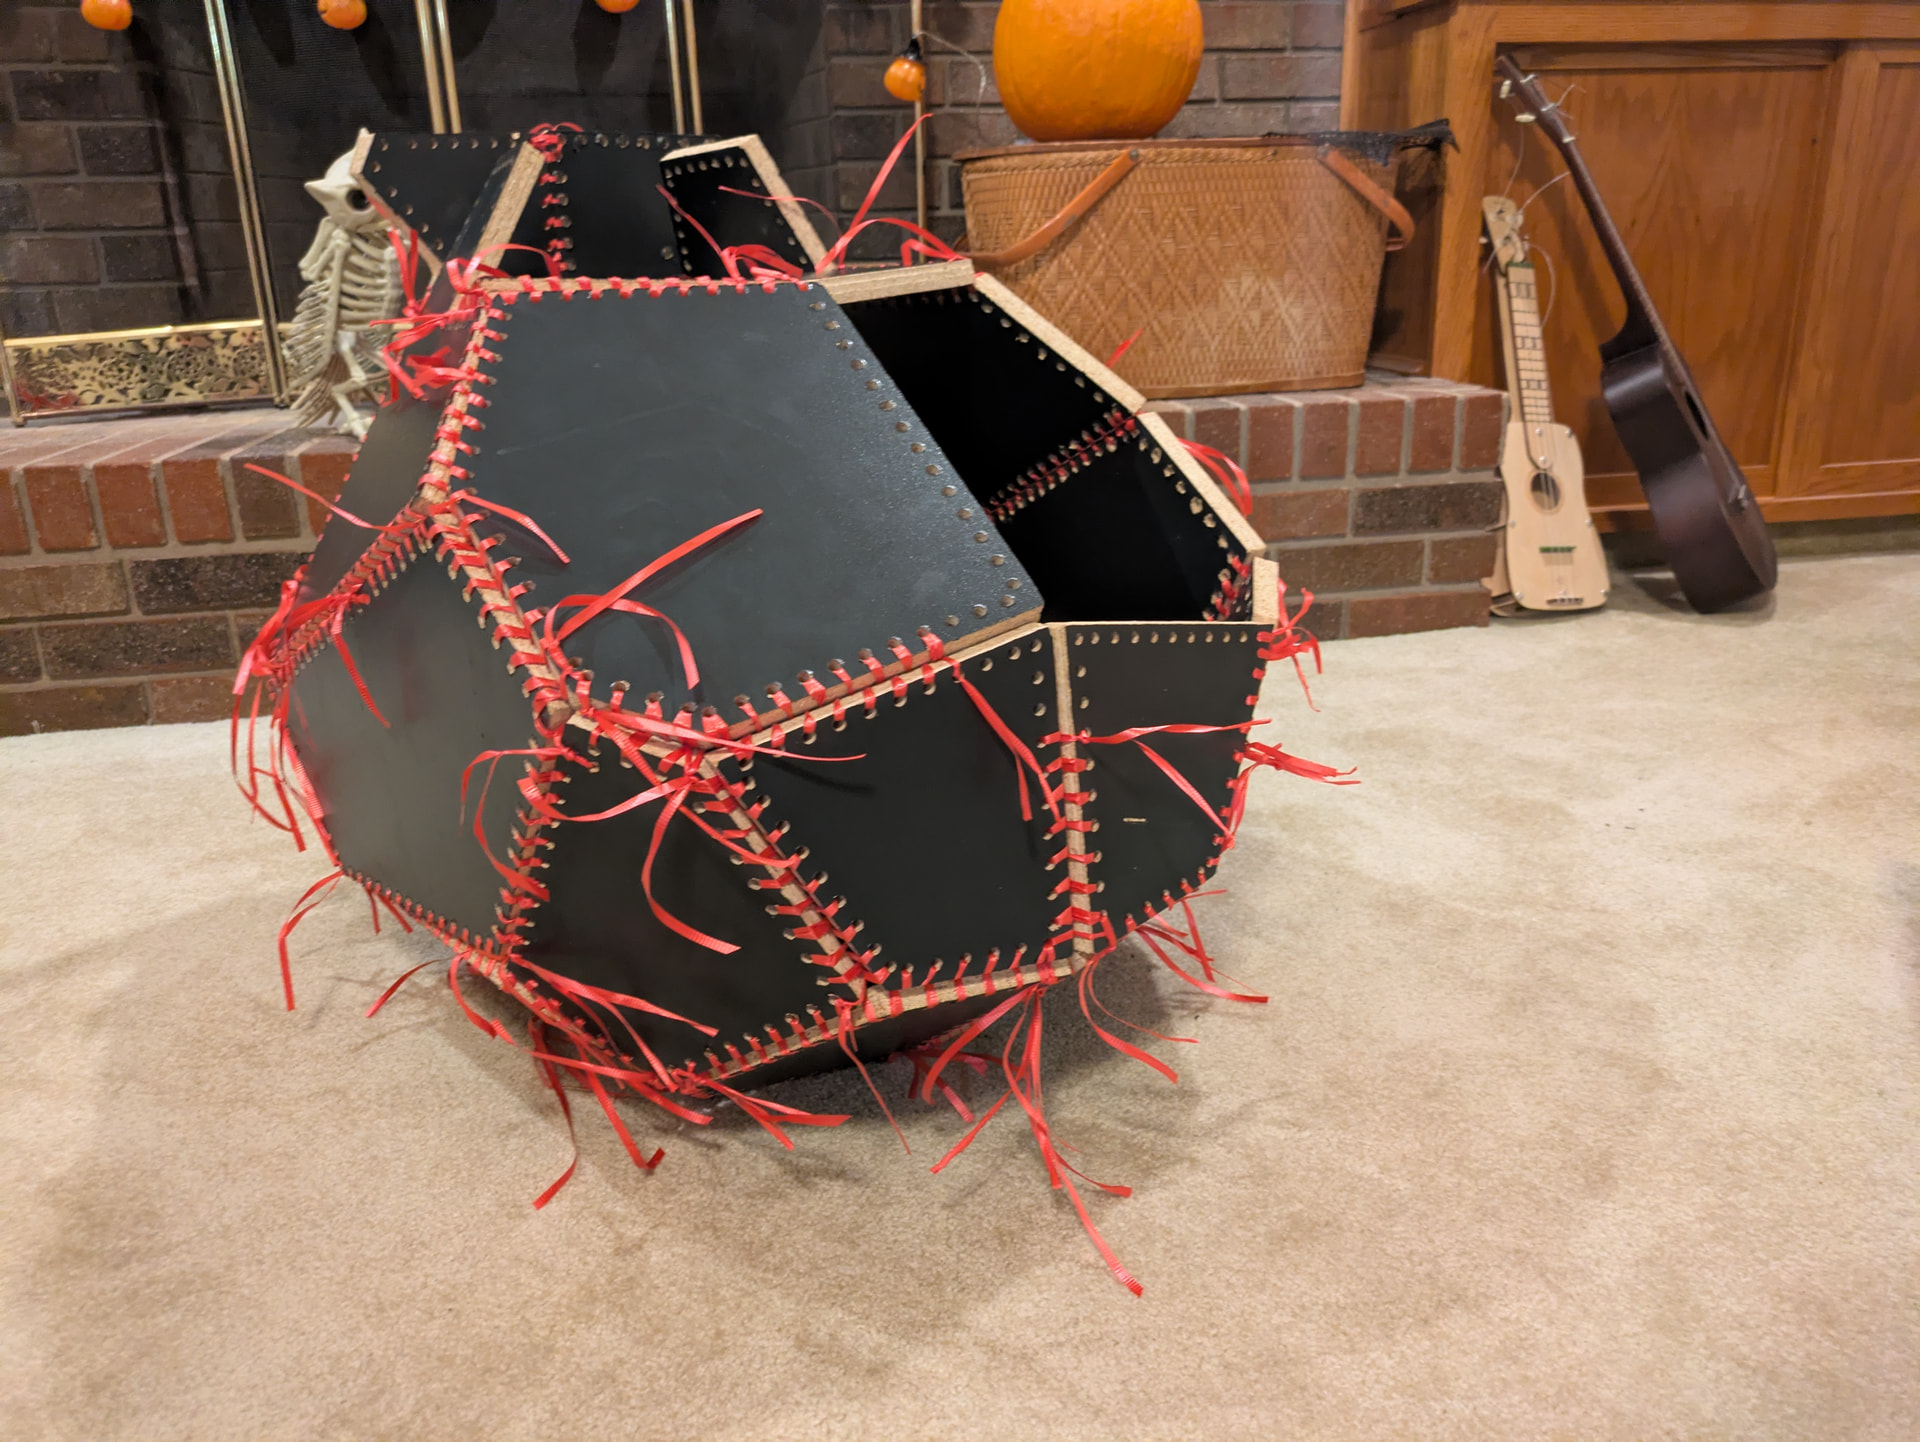

I am very satisfied with it. Not useful but fun.