actually, you will have problems, the calibration will be off and what should be
stright cuts will be curves
but 2mm in 1000mm is an error of 1 part in 500, so trying to measure to 1 in 50
or so is not insane.
I also think that current tape measures are going to be more accurate than 2mm
per meter, routine accuracy of even cheap manufacturing machines is FAR more
accurate today than it was 20 years ago, so even the ‘cheap stuff’ is as
accurate as the ‘good stuff’ was a couple of decades ago. I recently saw a
yourtube video something like ‘the source of accuracy’ that tracked the history
of accuracy and the development of gage blocks, and it talked about how the ones
make in WWII cost ~$5K/set (in 1940s dollars, several months pay for an
machinist) while today you can get similar sets for a couple hundred.
But as someone else said, how can you tell which tape measure is accurate?
can someone try several tape measures from different brands and see how much
they disagree at say 15 ft? I wouldn’t be surprised to learn that they all
match (or that they mostly agree with a few outliers that are obviously wrong)
The file i posted earlier are todays norms, most tape measures you buy are class ii, for a class i, i had to look online.
Those are european norms i believe, possibly there are other norms in the us.
Gauge blocks need very, very accurate measurements, tape measures not so much, so the norms are a bit more loose.
After took those photo’s a while back, i went and bought me a class i tape measure, and if i’m ever in need of a new one i go trough the shelve in the store with the cheaper ones till i find the one that is closest to my good one, the guy in the store had some wierd questions for me when he saw me do it
Seems like i misinterpreted the data, I said almost 2mm difference, that’s the ± 0,9mm most tape measures are class 2, and the most common tape measure is 3m (at least in my house, that’s the longest one that still fits easily in my pocket ) i must have misread and thought it was per meter, but appearantly its along the whole length. Tha problem i had was mostly with wooden folding rulers
Wow, you never stop learning in life do you? I never thought of this before. Very interesting! Looks like the temperature variation is the biggest killer with accuracy. I feel so betrayed by my trusty tape measure now - I’ve been lied to all these years thinking it was 100% accurate.
I was recently in the large local tool supplier KMSTools (kmstools.com) and they have great woodworking and metal working areas and of course lots of tapes. I was talking to an older gentleman who was re-stocking the tapes and I was trying to decide between a Starrett and something else so I asked him about accuracy. He wasn’t familiar with the idea of class I or class II and here in Canada I can’t find any markings suggesting that standard is respected. I didn’t do much better online.
The employee suggested that if measurements were key that a digital measure like the Bosch can get you to 1/16th accuracy, of course it’s use is limited but I do have one and it did give me the idea of cross referencing tapes to the laser to weed out any bad ones in my tool box…
Looking at this design again since my garage is clearing up. Is there a reason you didn’t use a trolley rail with hanger (think barn door track) instead of the ball bearings riding on the metal tubes? I’m thinking it may be a better alternative as dust will be less likely to gather on it. Just not sure if the wheels will cause issues with friction.
Barn door hangs vertically on the beam and there is only one - vertical - force component acting on the beam. Yes it works perfectly for barn door, but Maslow is inclined about 15deg from vertical and gantry rolls on two set of bearings - parallel and perpendicular to workspace components. The weight of gantry and sled is split into these components and bearings taking that load.
You cannot win with dust - you have to clean machine from time to time ;-))
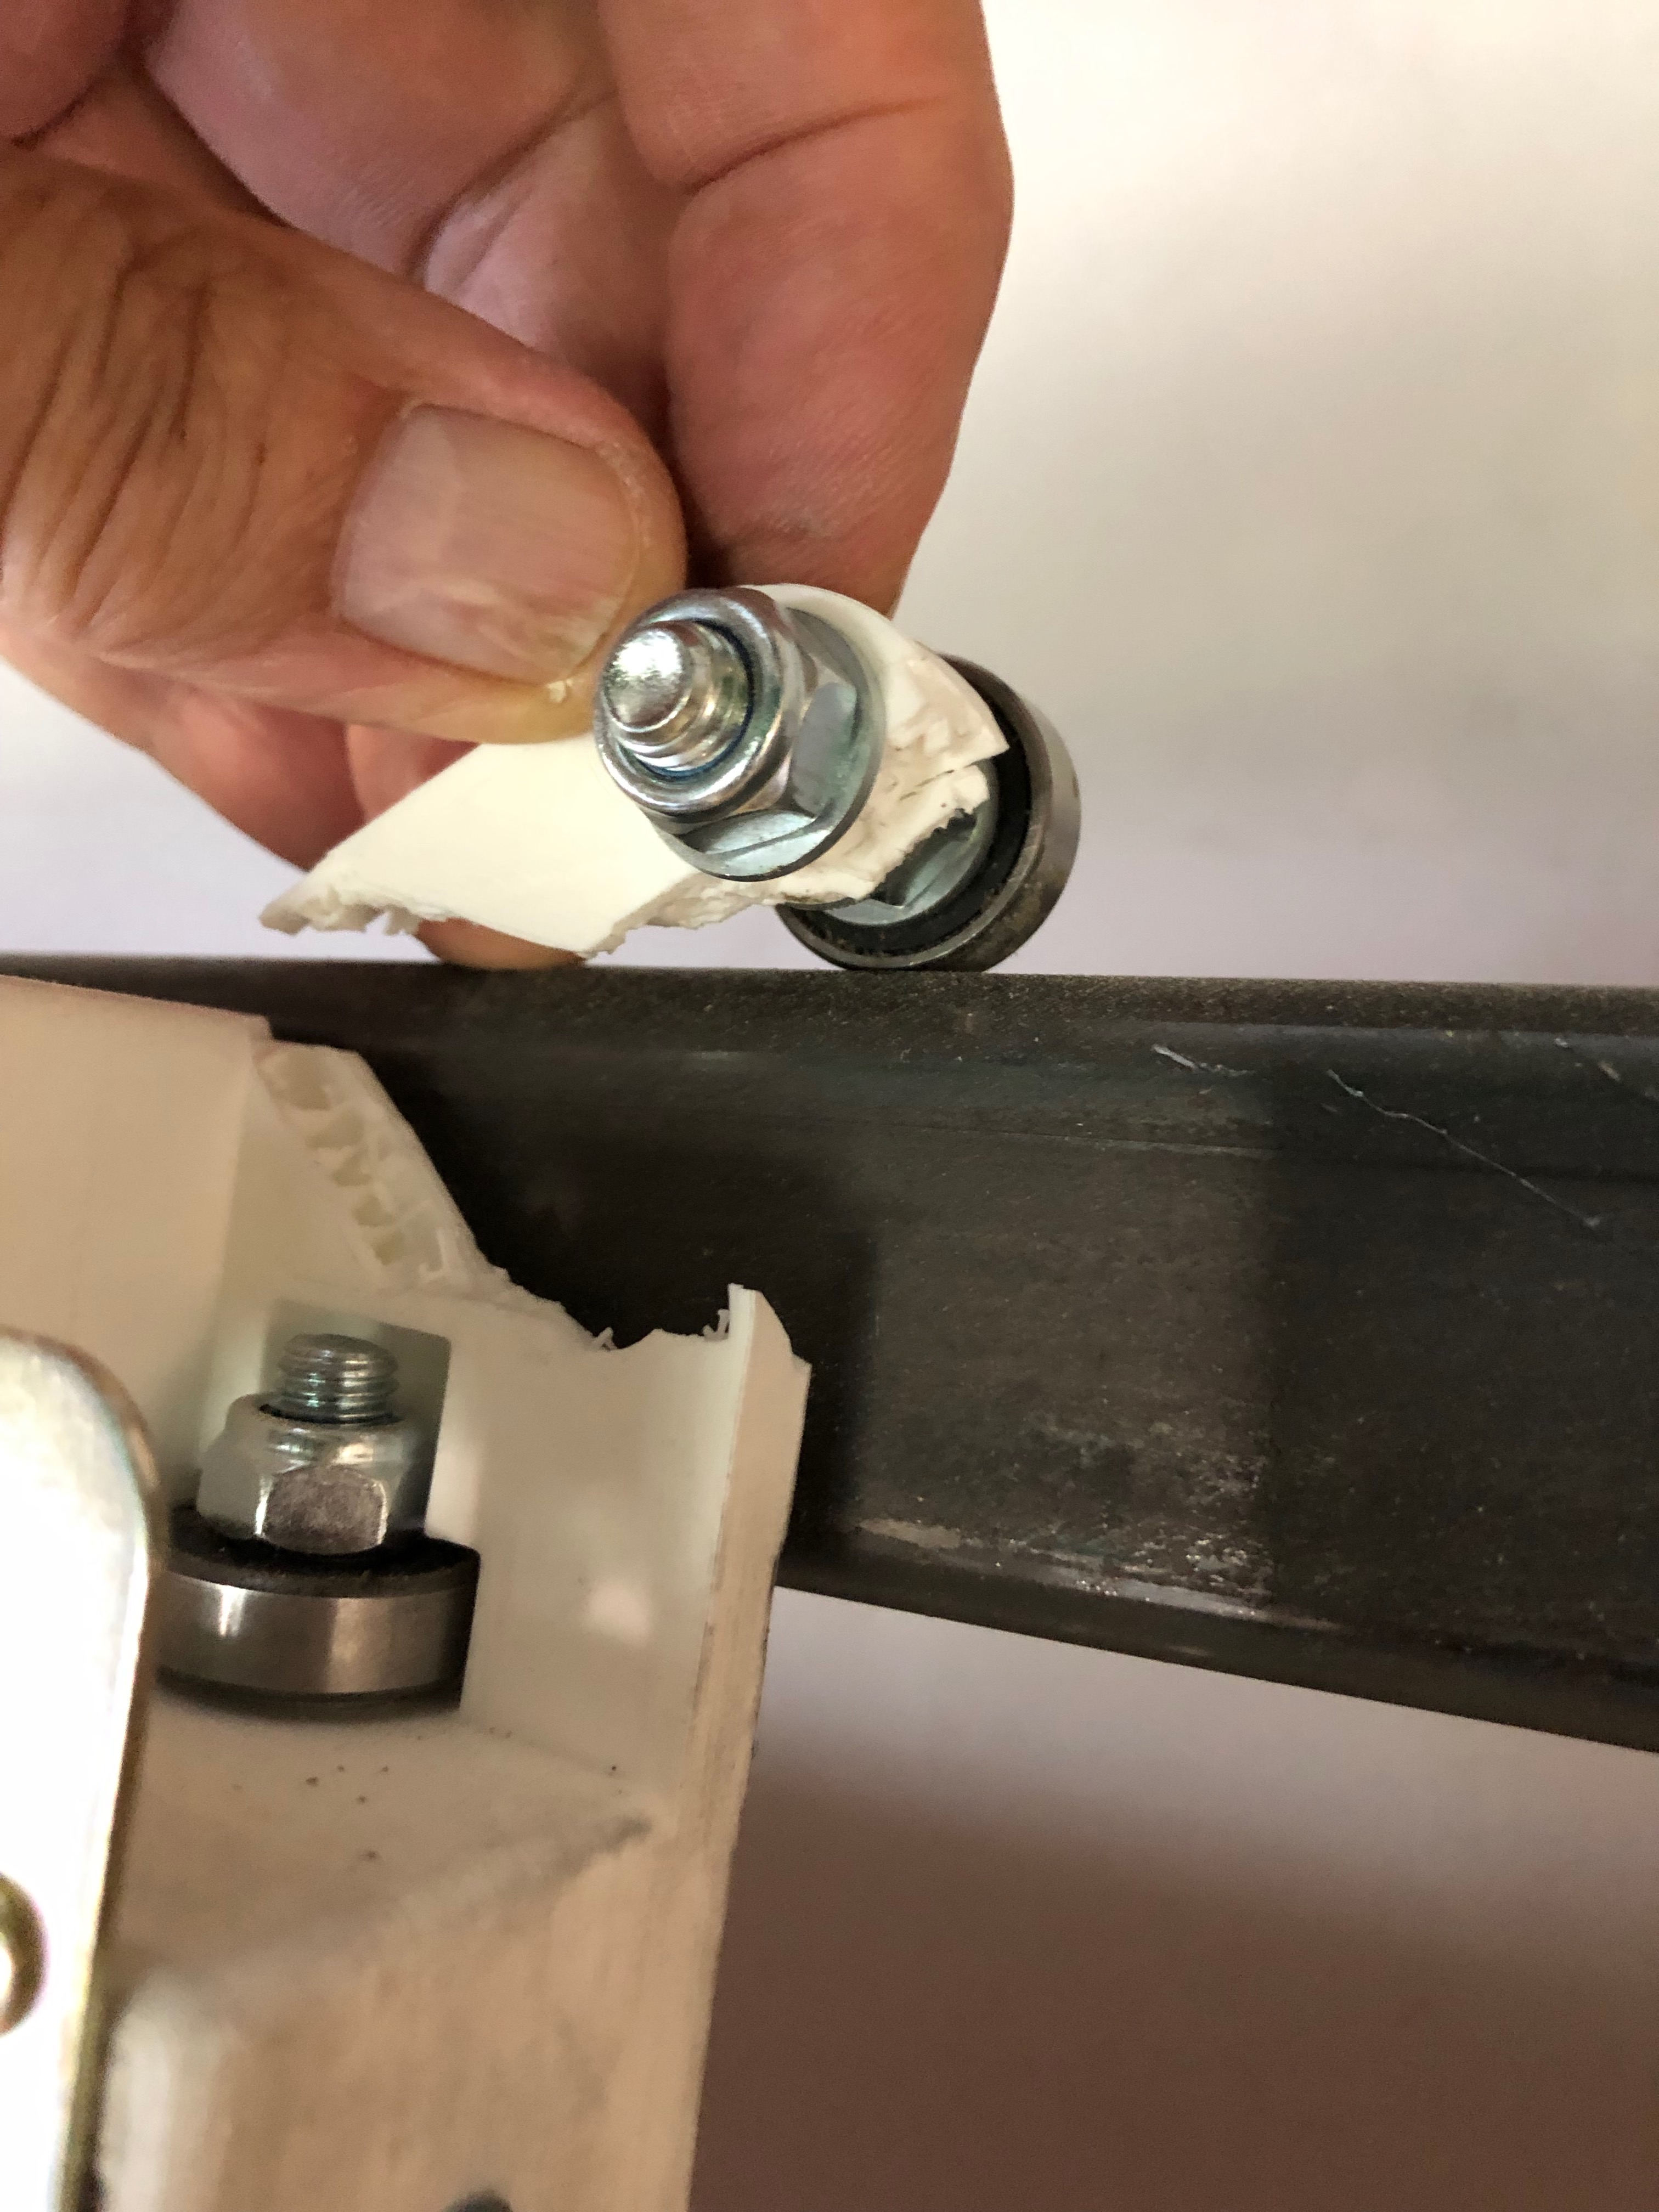
Disaster struck!
I was removing used sheet of 3mm plywood from the cut. Being lazy and rushing, I did not move gantry to the side. Plywood sheet slipped from my hand and sliding down hit bottom bracket of gantry. The TOP piece snapped!
Lesson 1. Do not rush job and always when exchanging material MOVE GANTRY on the side clearing space on the work top. Much easier to handle sheet of plywood/MDF and safer.
Lesson 2. Do not be cheap - I printed my part with 50% fill rate to save time. WRONG!
Lesson 3. What can go wrong, will go wrong. Probability that edge of plywood will hit lower bracket in the sweet spot was close to zero - but it happen. Luckily I have enough PLA so I already printing replacement
Lesson 4. Maybe printed parts are not the best idea after all…
Some sheet metal might be a good thing to add between printed part and the anchoring points, just to add rigidity. That way in order for the part to break, it would have to break at multiple places instead of the current single point of failure. Also, perhaps add some sort of positive lock that prevents the part from slipping forward off the rails unless you manually disengage it. Something like a spring loaded third wheel that rides on the back of the rail to keep it from coming off?
I have a Markforge Onyx here at work that prints with carbon reinforced nylon. I can even add fiberglass filament as reinforcement. That material would probably hold up better to the demands of your machine.
I might be able to print the part for you. Can you send me an STL file of the part? The filament can only be printed on the Markforged series of printers. And they are a bit pricey for the hobby consumer ($5k to $13K). But the material is really great for durable parts.
I really appreciate your offer - having professionally printed part would be great. I do not want you to incur any cost so let me know how I can pay you at least for material and shipment. I am living in Poland - or you can ship it to my UK address. Please let me know via my email zdm@me.com
Thank you very much
Tomasz
Just wanted to say it’s nice to see people being so kind to strangers here and helping out. Makes me feel a bit better about humans in a world where everyone seems angry these days!
Stopping anger starts with oneself…and helping a fellow maker and engineer is it’s reward all on its own. Also I feel that Tom has given us so much of his time and effort putting all this together the least anyone can do is help him out.