Going okay, not using any cutting fluid, first cut was depth first so then, I tried level first and I think it worked till it either crashed or I considered it good enough and turned it off, then I tired an outline it did fine except the entry points which I was wondering if we could put in the middle of our cutouts somehow so the edge would be smooth if anyone knows how to do that in krabzcam please help, and then I tried a edge cutout with squares and the same speed and it started making terrible burrs and lines so I think I may have dulled my blade accidentally, trying to get ready to do a 64x32 garden gate panel with squares and rectangles, would you all recommend trying to cut the corners o it with a 1/8” bit or just putting the tabs on the corners and doing them by hand at the end?


This looks do cool! I’m exited to see the gate once its done! Thanks for reporting on your test results. @mkrabset Do you know if there is a way to do what he is talking about? Entering the cut in the middle and then moving to profile inside?
try using wd40 as a cuttingfluid, it helps keeping alu chips clogging up the bit
Hi, this sounds like something similar to this issue if I understand correctly.
I’ve just added some (experimental!) functionality for creating an extended start-point outside (or inside) of the original toolpath.

Normal entrypoint can be set with ‘e’ (for profiles)
Extended entrypoint can be set with ‘shift-e’.
Alternatively, you can also use attack-method ‘Ramp’ instead of ‘Plunge’ to enter the material in a less aggressive way.
Hope this helps ![]()
Thanks! I’m excited to test it out!
I have considered it but its just that I have been trying to avoid cutting fluid because I didn’t want it to soak into the table and potentially stain any future wood projects, I was hoping i could just run it slow enough for the bit to stay cool, but I do think wd-40 would do wonders for its cutting ability & I do think I will use some soon, I would love a oil drip for it on the opposite side of the vacuum but i still have it in table format so i need to build a new design for the tilting ability because I used the M4 Hourglass Frame (which is an amazing frame that I honestly think should be added to the wiki if it hasn’t already been because its such a good table design but it hasn’t had a tilt table designed for it yet from what i can tell its just been used as a table so far, if anyone knows of a frame for the frame that would work on it to tilt it up please lmk, I will be designing and making one for it soon tho, I’m excited to share whatever design I come up with, I’m thinking like the ratchet gear design that they use for drawbridges made out of some wood possibly sandwiched between aluminum on both ends
That is amazing, that’s exactly what I was wanting, thank you @mkrabset, I’m looking forward to trying it out, I’ll lyk how it does


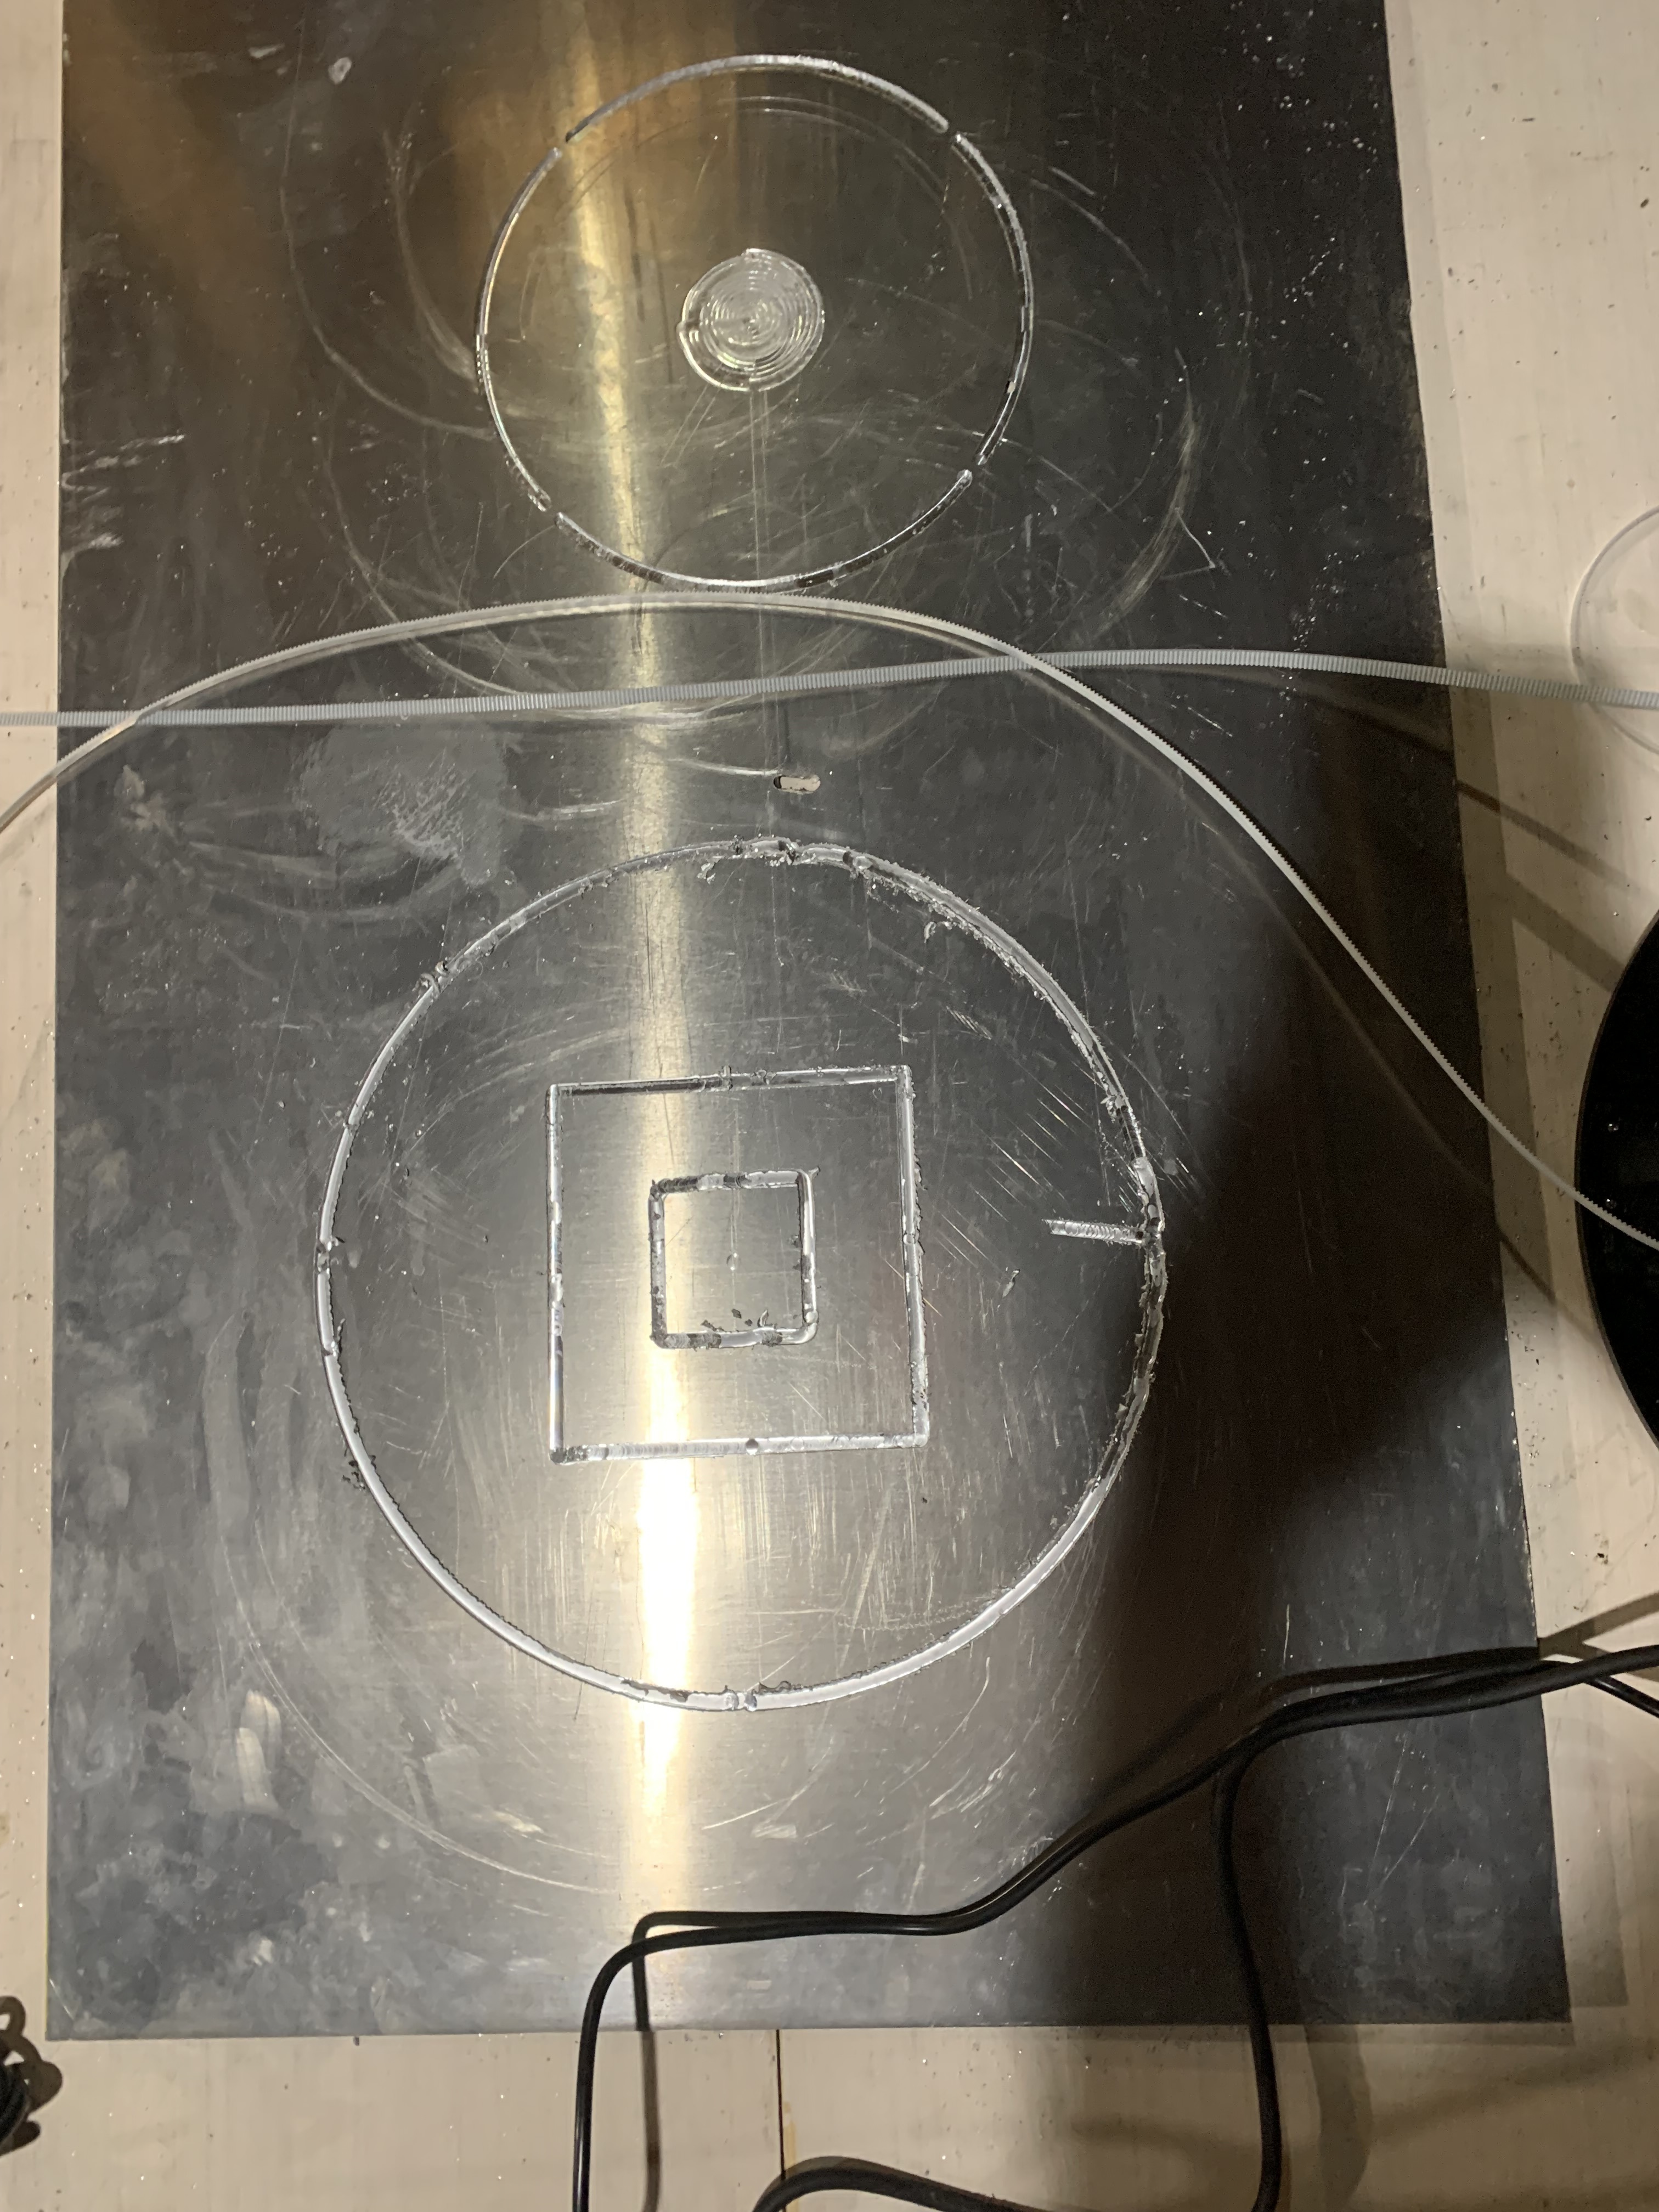
This is my test cut for the corners and tabs I didn’t have it screwed down just clamped on one end so I’m sure that didn’t help some stuff and it started making burrs after the first square but it did pretty good on the first one, the cross cut through was my first cut I had done not a discrepancy on the middle cut, it seems my bit got too hot after the small one then it was raised by the burrs so it didn’t cut through the rest of it, this is from the other day I need to run another with the experimental inside start cut tonight hopefully
How deep are you cutting with each pass?
.5 mm per pass and in only cutting 3.18 mm total but I’ve got it set to cut 4.18 to try and account for burrs and such
if you have an air compressor manually blast air at the bit to cool it and clear chips while the job is running
It seems counter-intuitive, but if you move too slowly, the bit rubs more and
generates more heat.
shallow passes moving fast ehough to generate chips is best (the chips carry
heat away)
David Lang
years ago i worked a sign shop and we cut aluminum all day long with a large multicam cnc. i did not run the machine i was a fabricator. but one thing was always important the alloy of the aluminum mattered alot. i believe the 3000 series [and similar] are too soft and melt and make a mess. i vaguely recall the 5000 series alloy being what we used most. feed and rotation speeds and climb vs conventional all mattered alot, but i do not recall what they did exactly. also, a lubricant was always used. it was thin viscosity and part of the machine works, but i suspect it was something like wd40 which might work well. when i have cut aluminum in my shop with a handheld router i usually use a thin oil. or a cutting wax. so for instance, i have a sharpie pattern drawn on a sheet, i sprinkle oil on that line and cut it with a tablesaw, jigsaw or scrollsaw. then [making what we called reverse channel letters–soemthing like a can with a face and sides. you bend the sides of .030 - .090 sheet. then glue or weld the face to it to make a ‘can’, then flush handheld router the overlap. these overlaps would recieve a little rub with cutting wax. easy peasy. i am not sure what alloy you are using, but if you are seeing that tear out it might be that it is too soft. a lubricant might help this a great deal. but a harder Al-alloy may prove even better. in any event, if you are determined to make this sheet work, i would try very skinny passes with lubricant. maybe a sheet of pressed caardboard, like contractor rhino sheet–over your spoilboard, could solve the oil contaminating future files. my gut is telling me that climb is the way to go. but thats a guess i dont remember what they did. excited to see how this turns out. oh, alternatively, you could cut the precise shape in wood, then cut the aluminum to within a 1/16-1/8" of target, and use the wood as a template and double sided tape to the oversized aluminum and flush rout by hand or on a router table. it is scary for first timers [and definitely a proceed with caution and assume the risk situation] but it was/ is standard practice in architectural sign making. even so, the softer aluminums are gonna be finicky and make nasty tearout. lighter passes and lube–also because the maslow isnt going to have the rigidity of a gantry type machine. good luck.