I thought I would share my suction bed design that I have been working on.
I will be using my Maslow for cabinetry (large parts) so was hoping not to use tabs on my parts and create a suction system that can still hold parts onto the spoil board after cutting through.
I cheated a little as I used the cnc at work to create the suction bed and spoil board sheets as these would be very time consuming done by hand. Even on our Weeke machine it still took over an hour to machine the suction bed board but if you had more time to spare, this could be done with a hand router and stops.
I used 32mm PVC pipe and split the internal suction area into 4 quarters so I can shut down sections not needed using the valves.
So I am just waiting for some pipe and connectors to arrive so I can finish the suction line and fit a cyclone. Also waiting on a new router to finally trial some cutting. Will post the results here.
Cons -
This frame has become very heavy. Was originally looking at putting on castors but not so sure now.
Doubt it will hold small parts as the cuts move through the full thickness of the board allowing the suction to escape. Be interesting to see in action.
That is splendid! I wouldn’t have believed that a regular vacuum would be able to hold the board like that.
I’m curious what you find out as you work with it more, like is the dust collection really good because it gets pulled through the holes and how small of a part can be held reliably.
I’ve looked into doing this and I’m really glad the shopvac works. I heard that they’ll burn out after a while because they rely on airflow for cooling and there isn’t much airflow through the board, which is usually a light MDF. What type of material did you use and what’s the cross section look like? Looks like you milled channels in it. Great work!
I have split the suction line, 1 to the bed and the other will be for the router. Using Ball valves I am hoping to regulate the flow so I get a small suction to the router allowing that air flow needed to keep the vac happy but not ruin the bed suction.
Still lots of trial and error.
With the vac trial yesterday I noticed the vacuum was still pumping out air from its exhaust as my system isn’t completely sealed and the suction was still very good so there is some hope
Most shop vac use a separate cooling fan for the motor and do not rely on air from the bucket. Also the less air a shop vac is pulling, the less work the motor is doing. That is way when you put your hand over a vacuum wand, the vac speeds up. Most people think this is bad for the vac, but just the opposite is true. The faster the motor is turning, the less work it is doing. This can be proven by putting an amp meter on the motor. When you put your hand over the wand, the current goes down because the motor isn’t working as hard.
wet/dry vacs generally use a bypass fan system (meaning separate cooling for the motor) so that humid air from sucking up liquids doesn’t pass over the motor. Also better quality shop vacs use this system. Cheap shop vacs and household vacs do use suction air to cool the motor. I hope I am not breaking the rules by posting a link to a different forum but check out this topic: Shop Vac keeps burning out motor bearings - Inventables Community Forum. This is a general discussion about shop vacs and dust collectors. Very informative.
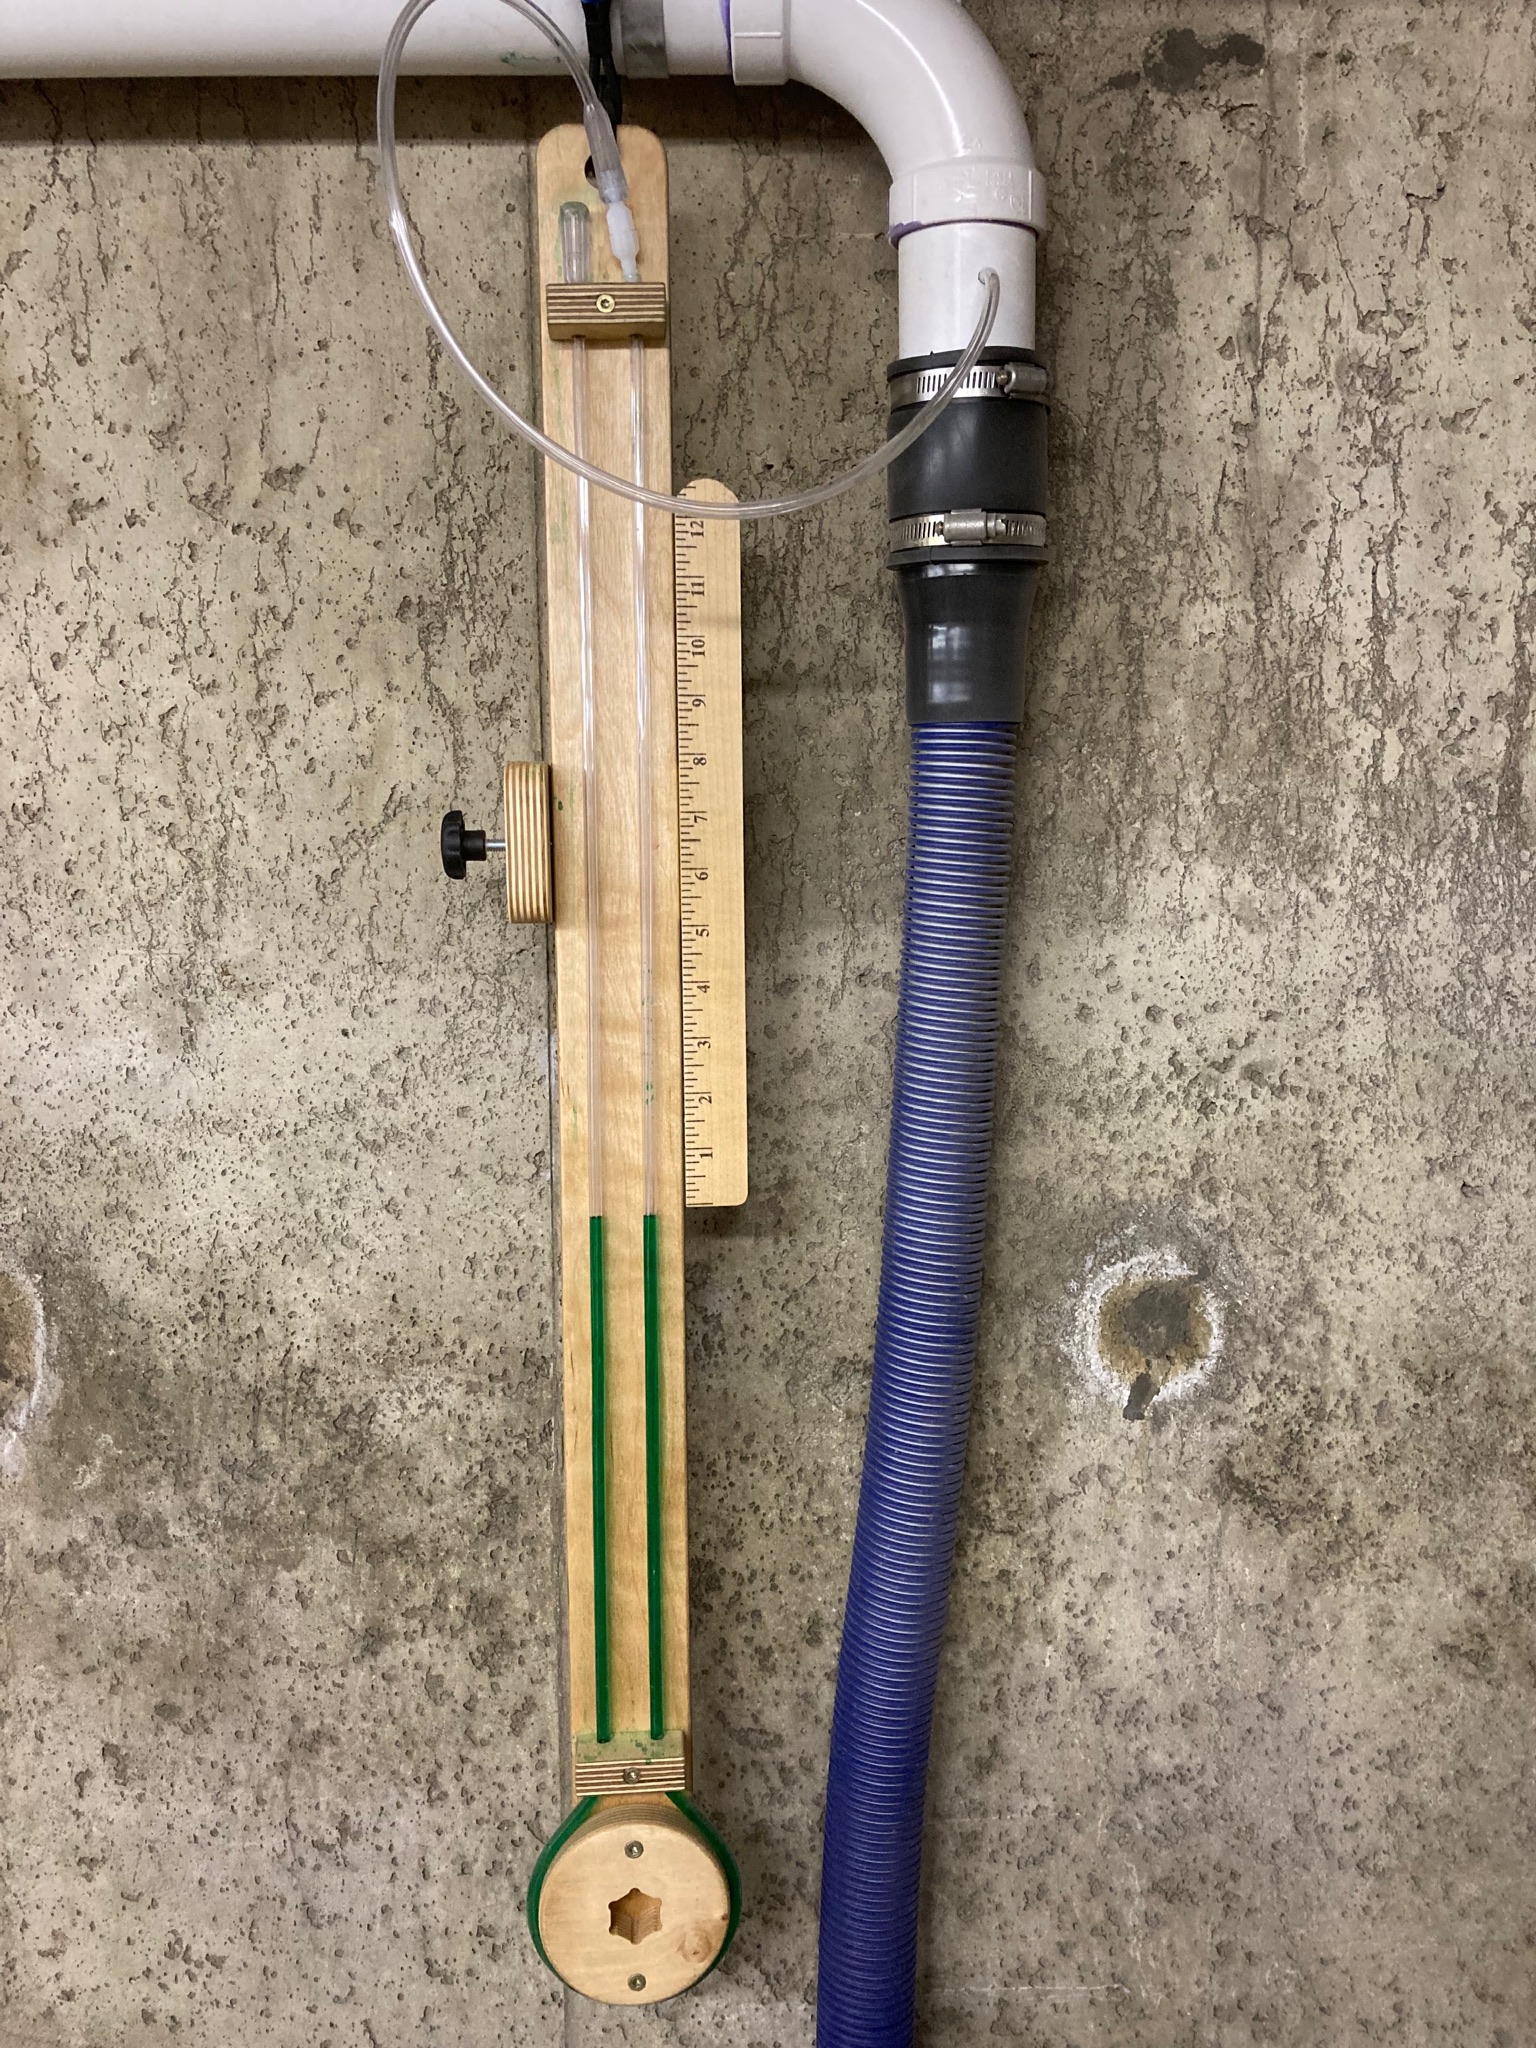
Since you already have the hard pipe pvc in place. Consider adding a simple U-Tube manometer to the vacuum line. its a good way to make sure you are not overloading the shop vac and starving it of too much airflow. I have one on my dust collection system and it really helps to regulate the air flow.
The first picture shows the manometer at a steady state with the system off. The second shows the liquid level difference with the vacuum on. Idealy the scale used would be large enough to measure the total displacement of liquid level between the pressure side and the atmosphere side. My scale is shorter because of … reasons. The scale is also in inches but in reality the scale used doesn’t matter because what you are after is a RELATIVE change indication anyway. In my case, I know that when the suction side of the manometer is less than 6 inches, I can run the vacuum for hours without it tripping out it’s thermal overload. It also provides me with adequate suction for my needs. In your case, You can use it to monitor in real time how well you suction is being maintained or lost during your cuts and you can also use it to balance the suction between your router and table. Also, these can be made pretty cheaply with some wood scraps, vinyl tubing, and distilled water with food coloring. Just make sure your scale can be moved in order to zero it out. The water in the tube will evaporate and you will need to slide the scale to adjust it to compensate.
Ok, I finally have everything setup and ran my first test.
9mm MDF, 300mm square with a 100mm diameter hole cut out to see if the small part holds.
End result, it worked a treat.
Things I learnt
I did screw the board to the bed just as a precaution but definetly doesn’t need it.
Still have my Z axis set incorrectly as it went far too deep but not bad for its first ever cuts.
I need to change to a compression cutter to stop the flaky edge that occured and had to sand down during cutting to stop the sled catching on it.
The 100mm diameter circle held its place nicely. Probably wouldn’t want to go too much smaller.
That’s awesome! I see why you did the bed in sections so the others would be easy to turn off. It looks like it works really nicely.
I wonder if it would be possible to build some sort of a floating ball valve which would turn off sections without anything attached to them automatically? If there was a lot of airflow through one section it would lift the ball and turn off the flow. Sections with wood on them would remain on because not much air could flow from them.
I like this idea! If the balls were spring assisted they would stay open more securely, making sure the section governed does not shut off by mistake through vibration or such like. Are there valves on the market?
Another idea is to have the suction holes shaped so they can accept stoppers. That way one could take holes out of service that are know to be under the cutting path.