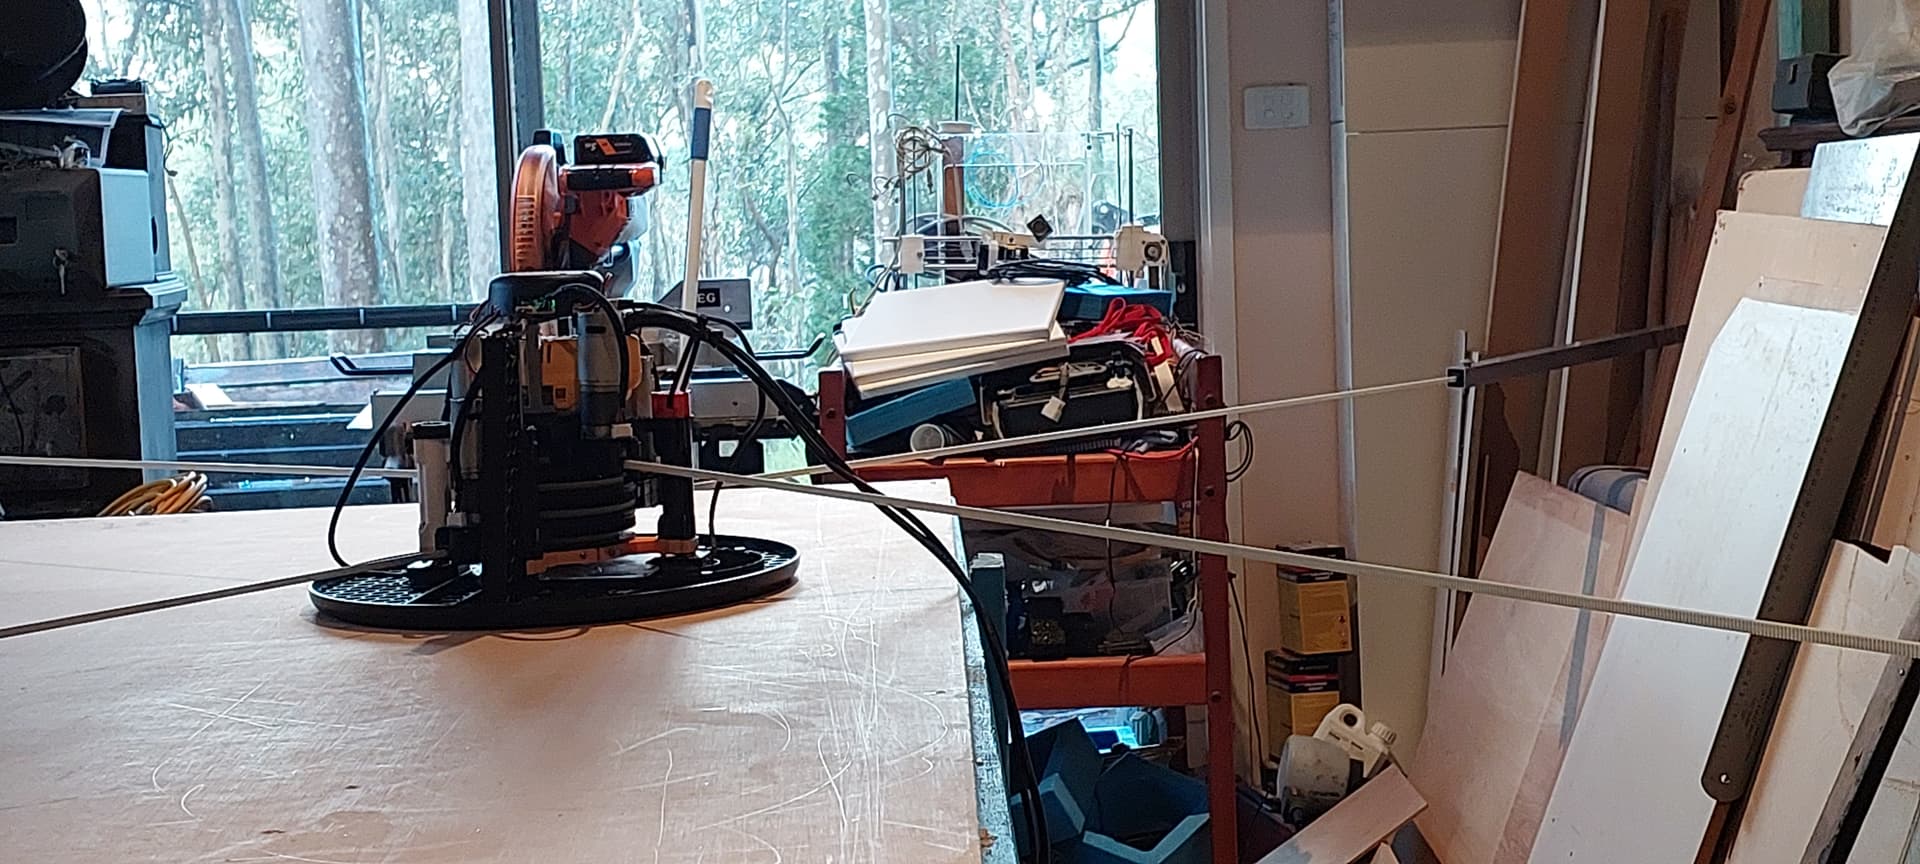
I have had a lot of trouble with the vertical setup, as I couldn’t get enough room to position the belts far enough away from the work area. I have been considering extending the belts by adding a fixed extension to each and going back to a horizontal setup. I have also been worried a broken belt would let the Maslow crash into the concrete floor.
I went into FluidNC Settings, Config items and changed Maslow_beltEndExtension to 1000 and the Z offsets to 0 and added a 1000mm Sq Aluminium extrusion to each belt at the height of each arm fixed to the wall via angle brackets and a 1/4” bolt. A 10mm bolt attaches the belt to the Aluminium extension. Easy to remove as it just drops in.
I then ran a calibration. Still some work to do but I am pleased with the results so far. Attached Maslow serial Calibration Logfile
Looking good! I think that you are the first person that I’ve seen to actually experiment with adding extensions like that so I would love to hear how they work and I’m super stoked to hear that the calibration worked with those one there because the math said that it should work but it’s a different story to see it actually working
I ran the config on V1.07 so I wouldn’t have multiple changes to confuse me if anything didn’t work as expected. Only problem I had was I had to extend the belts to reach the anchors, which required me to do a Retract, extend dance. I could not extend without a restart. Looking forward to trying V1.09
Sad to say, but I doesn’t look like it’s going to work. I’ve been fighting with this machine for 2 months with it a single successful calibration. There really isn’t any bullet proof way to work with this machine. It really just down to luck.
Oh interesting - What’s your total ‘frame size’ with the extensions @ian_ab ? Did you find you needed to up the retraction force or anything to get the extensions to swing and be straight or was it working with your usual forces?
No, what I did do is pulled the machine apart and sanded the arms where the belt drum rides and greased it with a mixture of graphite (used for key locks) and petroleum grease so they glided smoothly. I then did a retract, extended, set the retract to 200 (not expecting the belts to retract) Retracted (all belts went in). I repeated Retract/Extend but this time held the belts from retracting and then extended them until they were completely extended, reset the Retract to 900, Retracted the belts holding pressure on them so they packed properly. Extended again, and this time did a calibrate with results above. I did a couple of dry runs of a simple job without router or vacuum attached.
Now to try V1.09
From yaml tlx -170.2, tly 4044.4, trx 4496.0, try 4013.8, blx bry & bry 0.0 brx 4532.4 (all rounded to 1 decimal place) . Z values all 0’s. Calibration and Retract values 900. Extend distance 1980
The extended size means the effective work area is almost all “in the green”. Haven’t checked how accurate it is in practice yet.
Some observations on calibration. I didn’t notice Bar had reset the size parameters in config to 400 x 400 with a grid size of 3 and was very excited to get a 2.1 Fitness on V1.09
On redoing the Calibration with a 1500 x 800 and grid size of 7 x 7 the machine went into a seemingly endless run with Fitness values less than 0.02 until I stopped it and reset everything and this time pulled the maslow tight against TR BR belts. Within minutes of restarting it had got a fitness above 0.5. It went on to peak above 2.0 initially and eventually returned a Fitness: 0.7922315046227105. Can’t stress enough the importance of pulling TR TL belts tight before start of Calibration.
Note The calibration icon is greyed after Apply Tension (still works though).
One problem I have to address, the worktable is on wheels and even though they are locked, I still get some movement (of the table) as maslow changes direction etc. Not insurmountable but something I have to fix.
Release tension then apply tension causes Z height to be unreliable. The first time it registered the height as negative despite being raised 30mm, it then raised the router z access all the way up. The next time I tried it with the maslow set +4mm it reset it to 0 without moving the Z access. I think Bar is already across this and it will be fixed in the next release.
It would be good if I could pause the job and adjust the Z height. At the moment can’t move anything while paused.
The extended size means the effective work area is almost all “in the green”. Haven’t checked how accurate it is in practice yet.
Some observations on calibration. I didn’t notice Bar had reset the size parameters in config to 400 x 400 with a grid size of 3 and was very excited to get a 2.1 Fitness on V1.09
On redoing the Calibration with a 1500 x 800 and grid size of 7 x 7 the machine went into a seemingly endless run with Fitness values less than 0.02 until I stopped it and reset everything and this time pulled the maslow tight against TR BR belts. Within minutes of restarting it had got a fitness above 0.5. It went on to peak above 2.0 initially and eventually returned a Fitness: 0.7922315046227105. Can’t stress enough the importance of pulling TR TL belts tight before start of Calibration.
I believe that the fix to pull on all belts is going to be in 1.10
One problem I have to address, the worktable is on wheels and even though they
are locked, I still get some movement (of the table) as maslow changes
direction etc. Not insurmountable but something I have to fix.
Release tension then apply tension causes Z height to be unreliable. The first
time it registered the height as negative despite being raised 30mm, it then
raised the router z access all the way up. The next time I tried it with the
maslow set +4mm it reset it to 0 without moving the Z access. I think Bar is
already across this and it will be fixed in the next release.
This is a known bug in 1.09, I believe that @bar already has the fix queued for
1.10
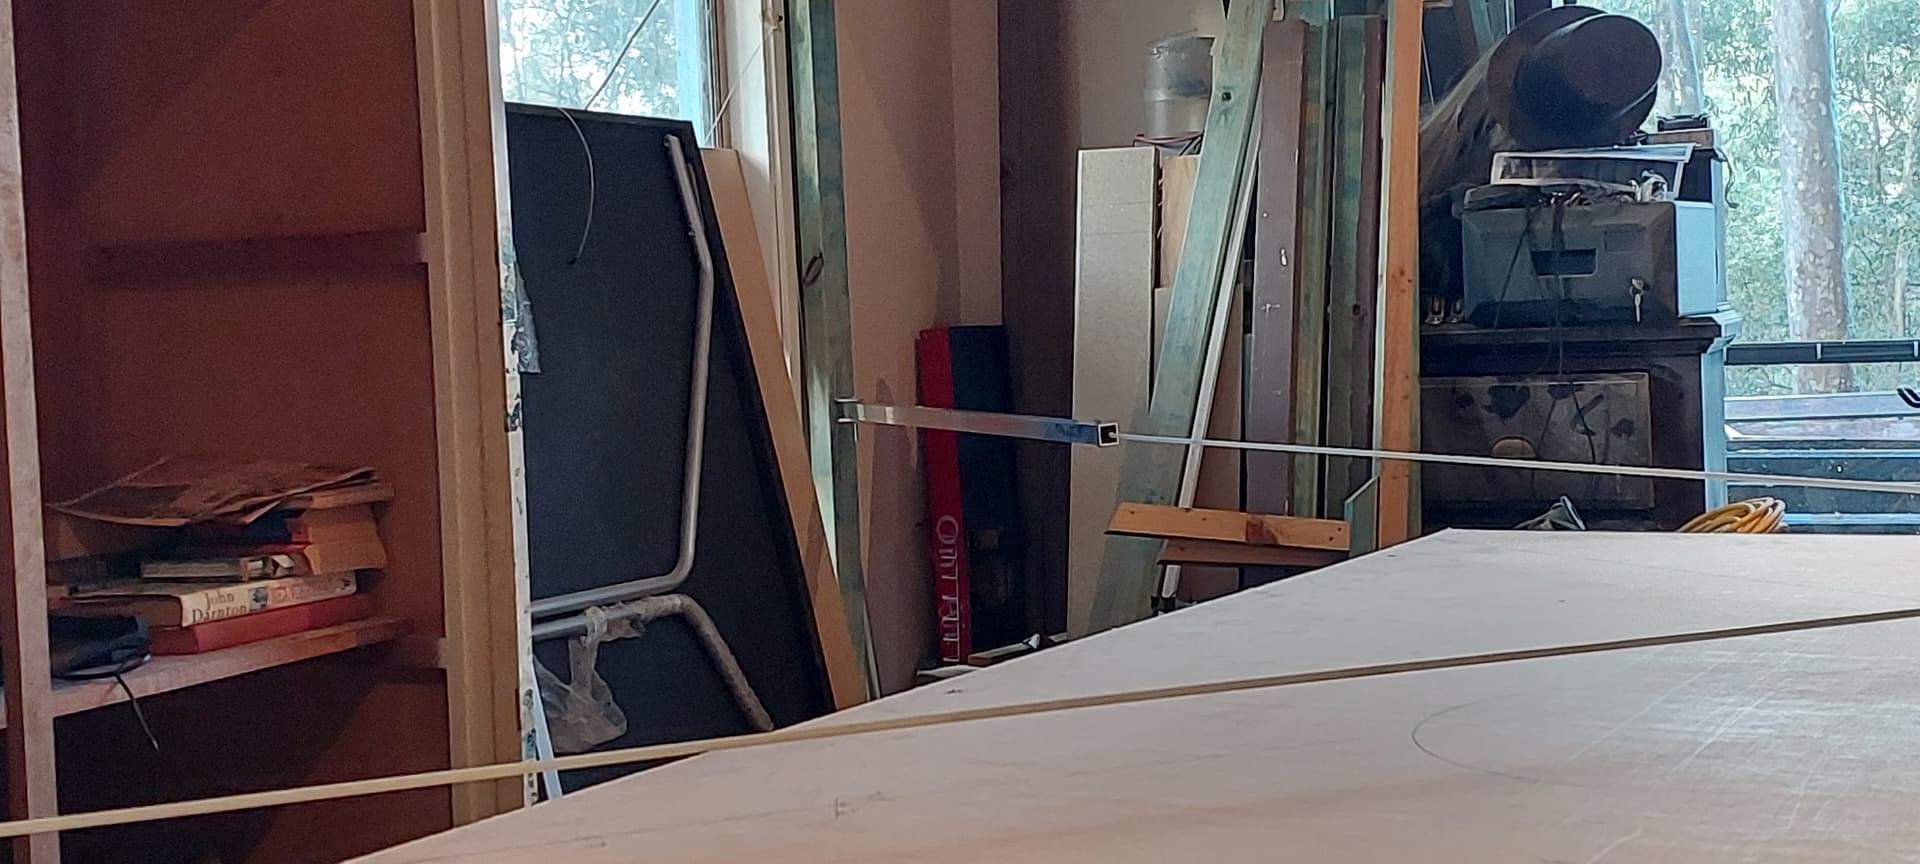
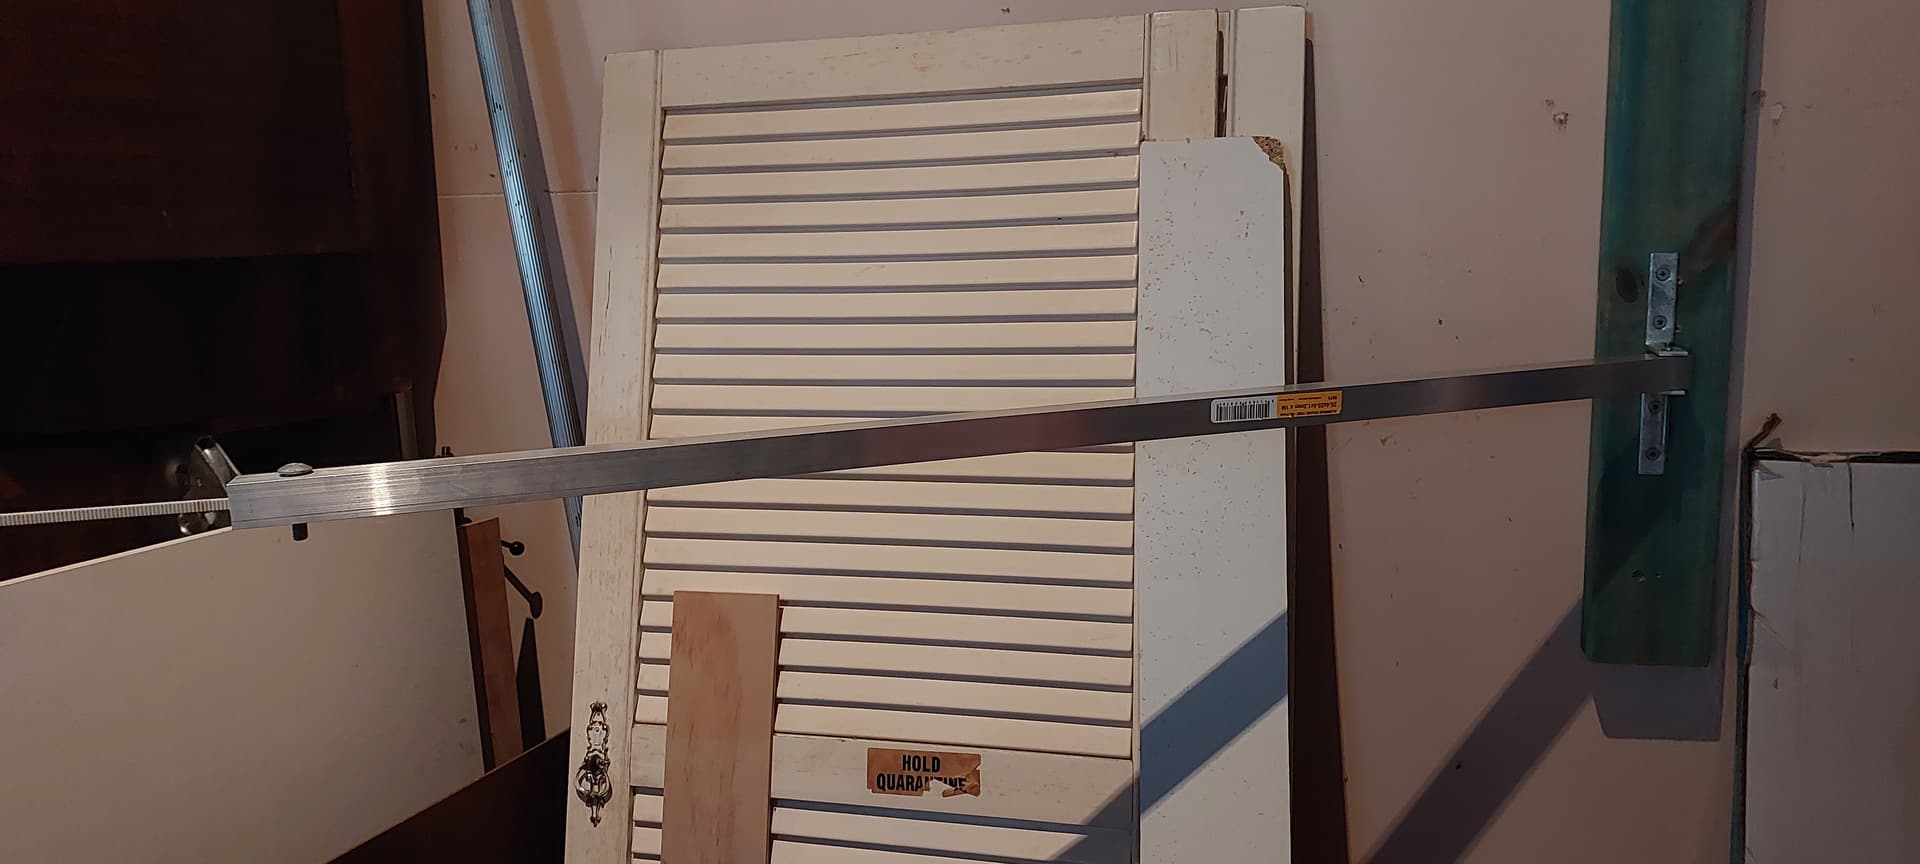
Update on experience with Belt extensions.
I used a standard 1 metre length of square tube aluminium as extensions to the belt, pivoted on the wall with a 6mm bolt, between to right angle brackets. Each was adjusted to be level with the corresponding belt when the Maslow Z was all the way down. On the belt end of the extrusion, I drilled a 11mm hole to drop a 10mm bolt through to intersect with the belt end. Because a window on one wall prevented me from aligning the anchor points in a perfect rectangle, there is an offset of about 120mm in the X direction (which I believe may cause a problem with obtaining a perfect square, more later).
Calibration went well.
Using David Langs software to calculate “Green” cutting area the entire workspace is in the green with plenty to spare.
I have made a pencil lead holder to allow me to simulate cuts without using up material. Using this I have determined, after adjusting, the Maslow appears to be extremely accurate in the X direction, and accurate in the Y direction at the left of centre, but decreasingly accurate as it moves to the right (only off by approximately 3mm after adjustment), so in effect a rectangle marked at maximum spacing is narrower at one end by approximately 3-4 mm. I think this maybe associated with the non-squareness of the anchor points, as it is only off in one direction. If anyone has a perfect rectangle perhaps they can prove this theory.
Overall, I am happy with this change and recommend it if you want to take advantage of available space, while minimizing impairment when doing other work. Also you don’t have to drag out as much belt.
I would also strongly recommend making the belt arms as friction free as possible, as I am confident this has contributed to the accuracy of the Maslow.
I bought an M2 back in 2021 and used it for a couple of years. But I have moved to a house with a bigger workshop and was getting ready to set it up in my new workshop when I discovered Maslow 4.1 - WOW! The ability to use it on a floor is AWESOME and worth it to buy a new machine! Now the reason I’m posting here…
The directions for the floor mount say “You want to place the anchor points on the floor in a roughly rectangular shape 8’x12’ (2.5x3.5m).“ I have roughly a 30ft x 30ft (~10m x 10m) space so I can go bigger if it will work well. After reading this thread, I wonder what is the largest practical size for the anchor points? Should I stick with 8’ x 12’? Would longer belts (if available) be useful for cutting larger projects?
The maximum limitation is the amount of belt wound onto the spools, you need at least a couple of rotations when extended or the belt may (probably will) pull off the spool, breaking the spool. I’m not sure how long these belts are, a bit over 3300mm. Each belt has to be long enough to retain some belt on the spool when in the opposite corner. I used 1 metre aluminium square extensions, I think I could have pushed it to 1.5m. It also requires a corresponding modification in the maslow.yaml for length of the beltEndExtension (mine 1000). If possible set your heights to match the height of each arm, also requires maslow,yaml modification.
it lets you put in frame size (distance between anchors) and workpiece size, and
shows you where you have angles that get iffy (outside the green) and how long
the belts need to be for that combination.
the documentation that says 8x12 frame is out of date, the frame needs to be
significantly bigger to cut a full 4x8 sheet, and if you have different material
sizes, that may add size as well.
Thank you for the calculator. It looks like for a 4’ x 8’ sheet of material, 10’ x 14’ (4270mm x 3048mm) would work and requires a belt length of 3976mm.
Does that sound correct? Did I use your calculator correctly?
Thank you for the calculator. It looks like for a 4¢ x 8¢ sheet of material, 10¢ x 14¢ (4270mm x 3048mm) would work and requires a belt length of 3976mm.
Does that sound correct? Did I use your calculator correctly?
without punching the numbers in myself, that sound in the ballpark.