Working on some shelves for lots of bankers boxes. This is how I organize almost everything I own.
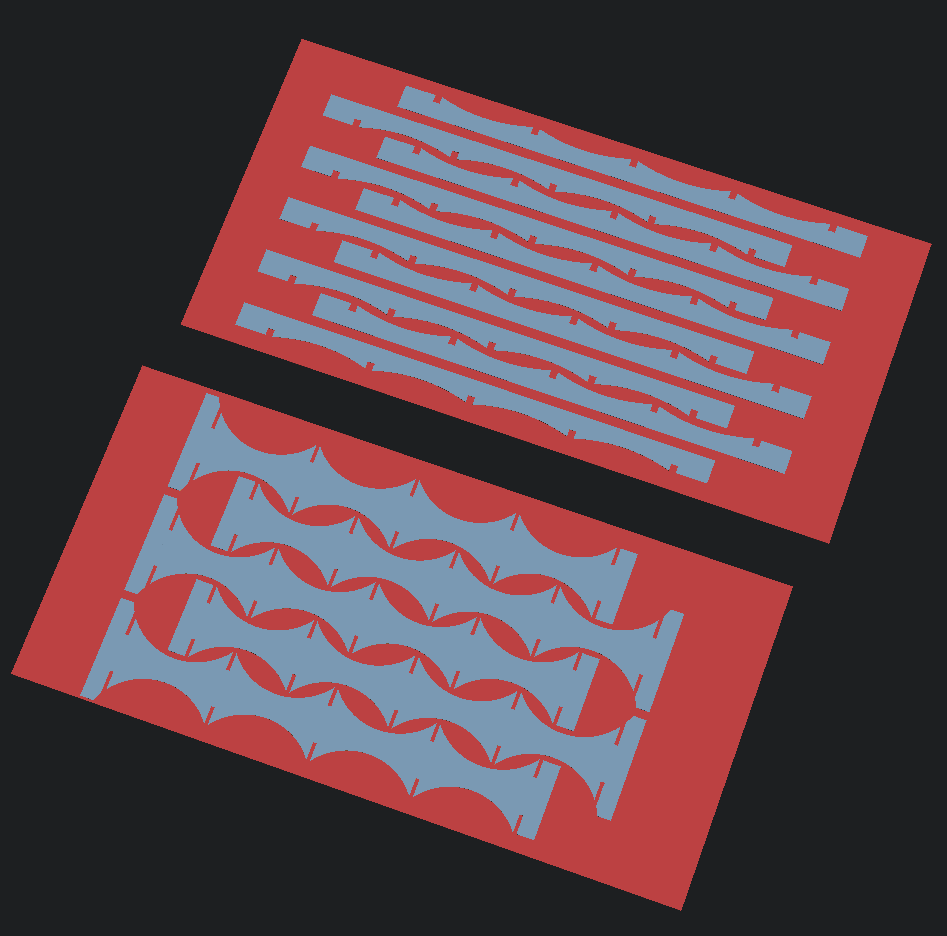
This design is attempting to maximize my use of the plywood. I can get one section out of two sheets of plywood but it will be close to the edges.
I’ll also be testing out construction shims as an assembly mechanism. No screws or nails will be used, just shims hammered in place. Straps screwed into the wall will be added to the top to prevent tipping forward.
Plywood arrives this week, should start cutting this weekend. Open to ideas or suggestions.
My only concern with your design is the lack of cross bracing to prevent a side to side collapse. Even with the shims there is a potential for movement. Now if you hard mount the shelves against the wall then you won’t need the cross braces, the wall will function to prevent the side to side movement. How exactly do you plan to attach it to the wall?
I really like the idea of blocking side to side movements using the walls.
I need to make some pieces that will connect the shelves between separate units. Then I can screw the ends to the walls with L brackets and/or make the whole thing so big that it fills the room wall to wall and is incapable of moving side to side. I’ll still need straps at the top to prevent the center from buckling forward.
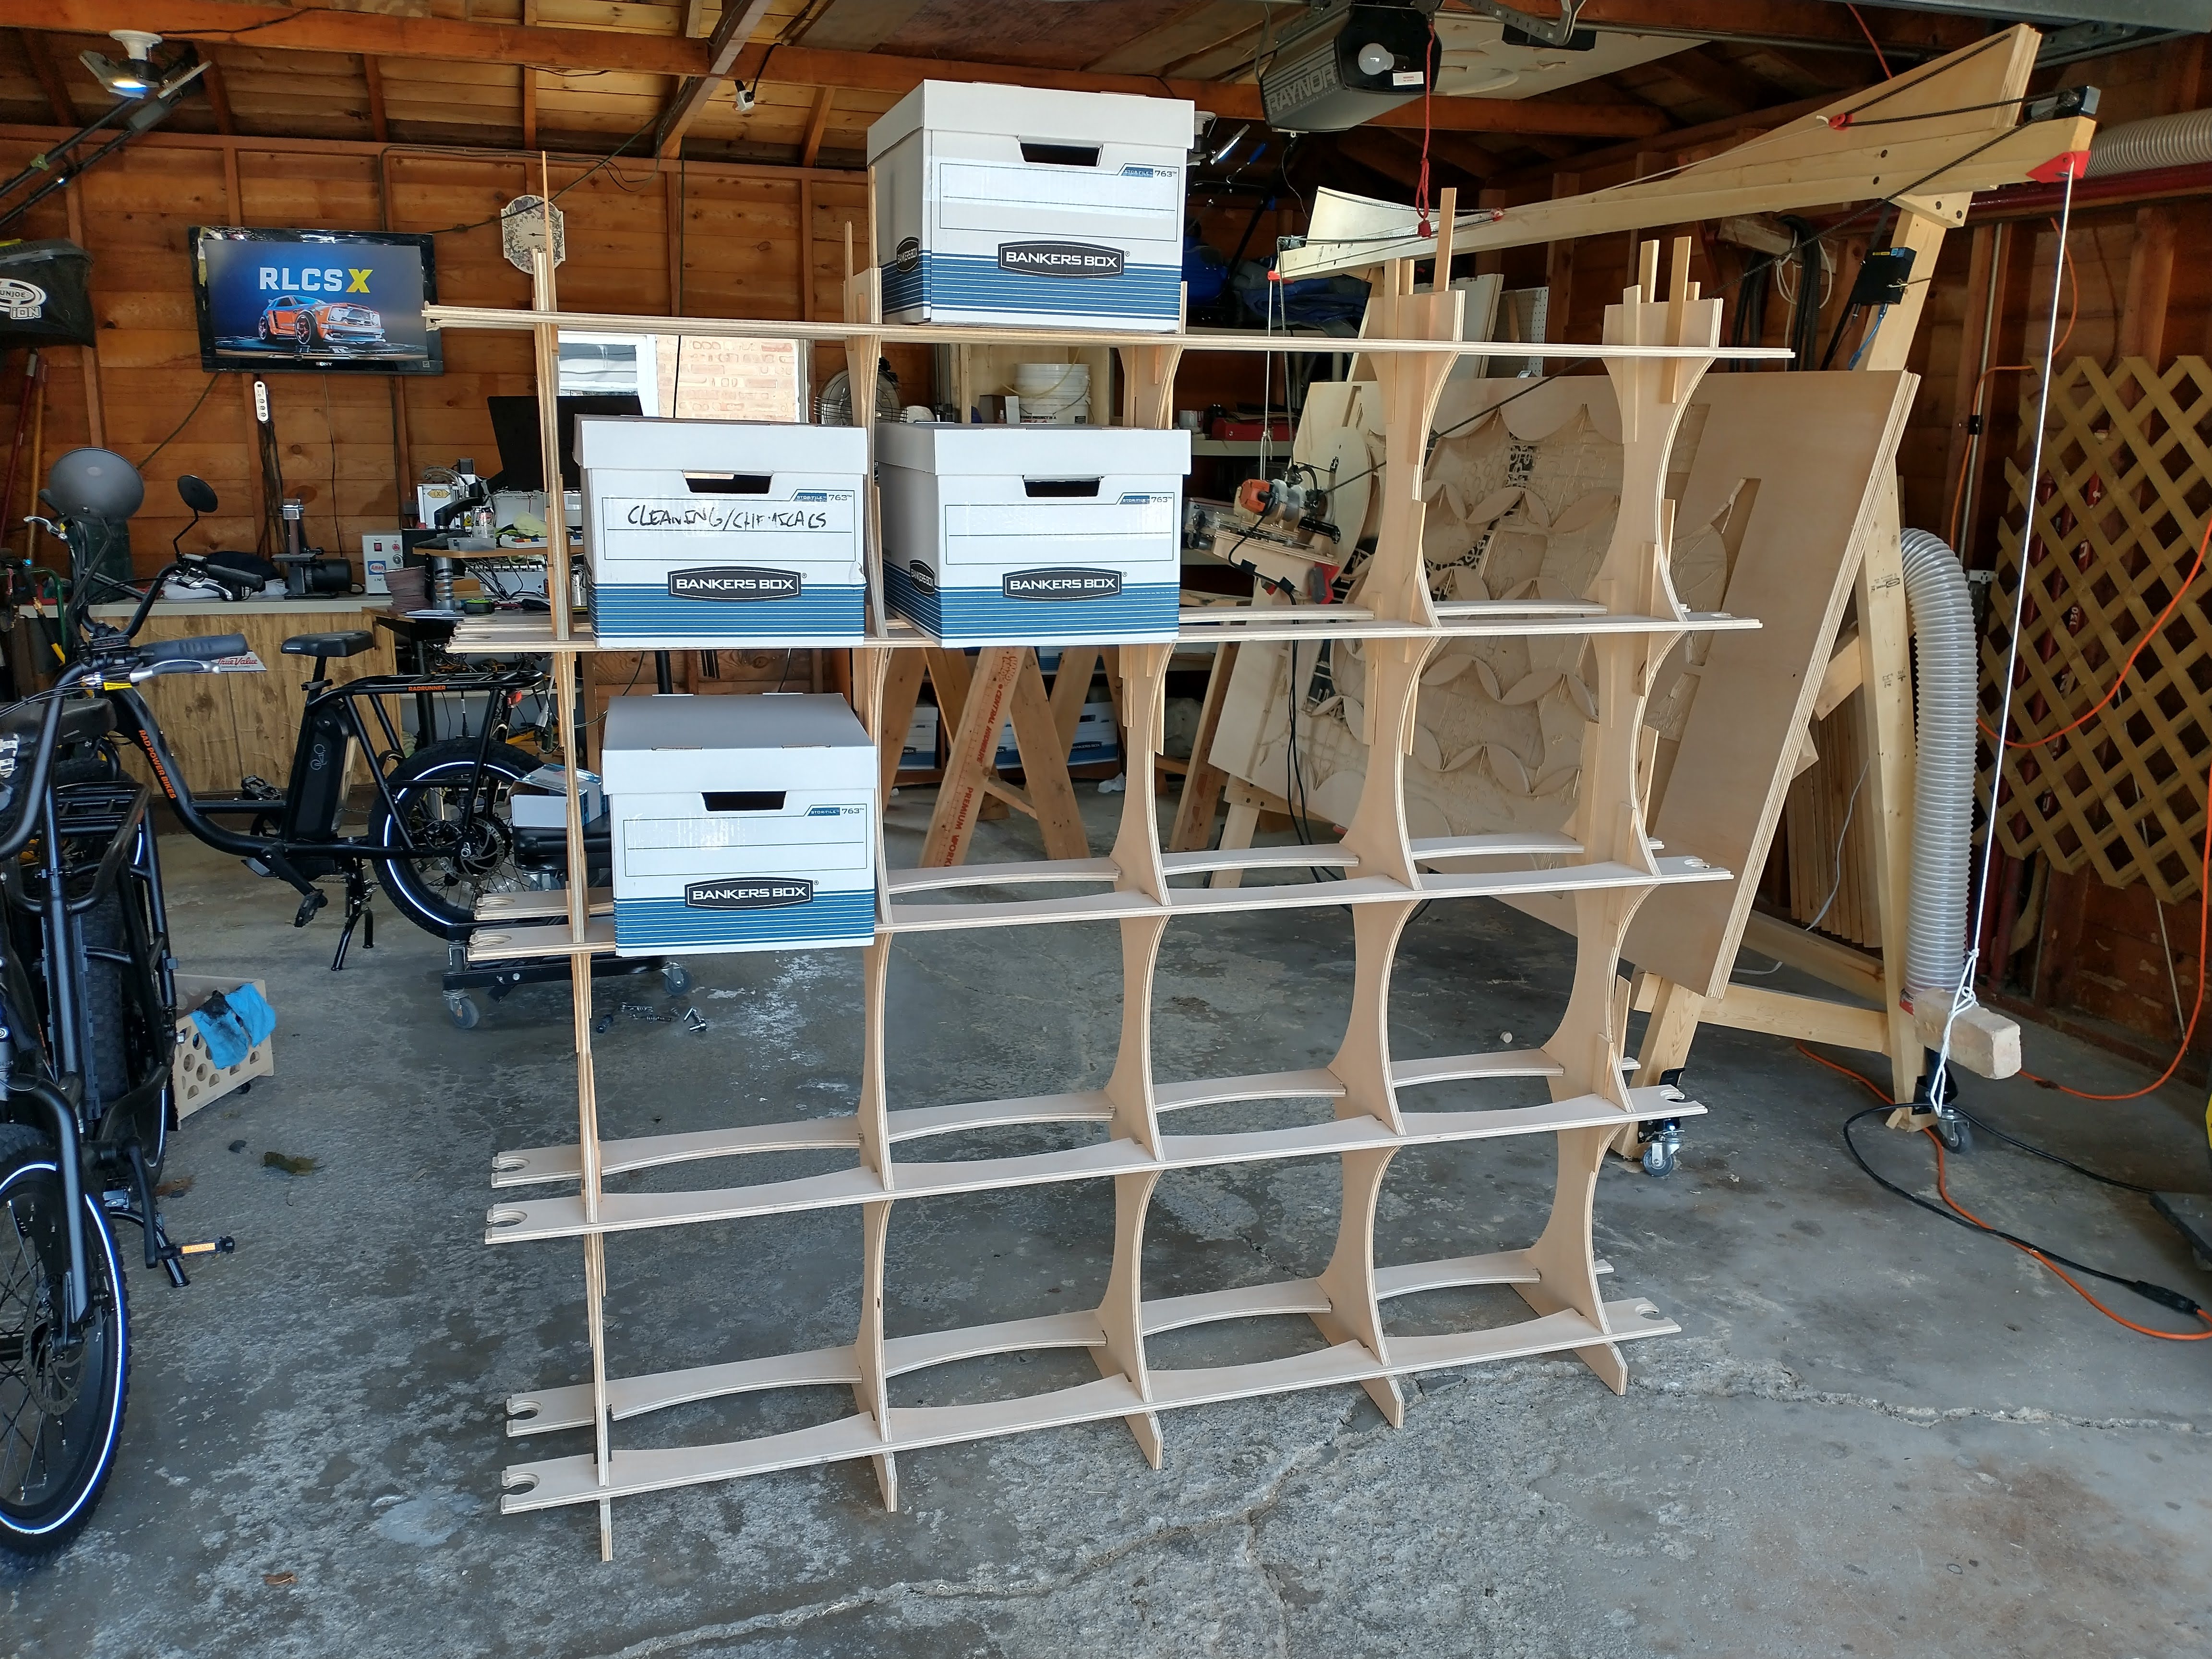
First unit works! The cut was very tight; I’m going to need to predrill some holes to support the middle of the cutsheet or use tabs. There wasn’t enough left to support the parts and I had to hold things up as it went.
The shims are working as I had hoped. It’s very relaxing to assemble and the sheer quantity of joints makes it fairly strong for how little wood is used. When I move it I plan on cutting all the shims in half so they don’t stick out all over the place.
I still plan on boxing this into the room so I’m not relying entirely on the shims for side to side support. I started on a puzzle joint library for the ends of the shelves which will allow the units to be connected and I can make some end pieces to brace against the walls of the room.
There’s a lot of coding left to do but I should have this in the community garden by the time it’s wrapped up.
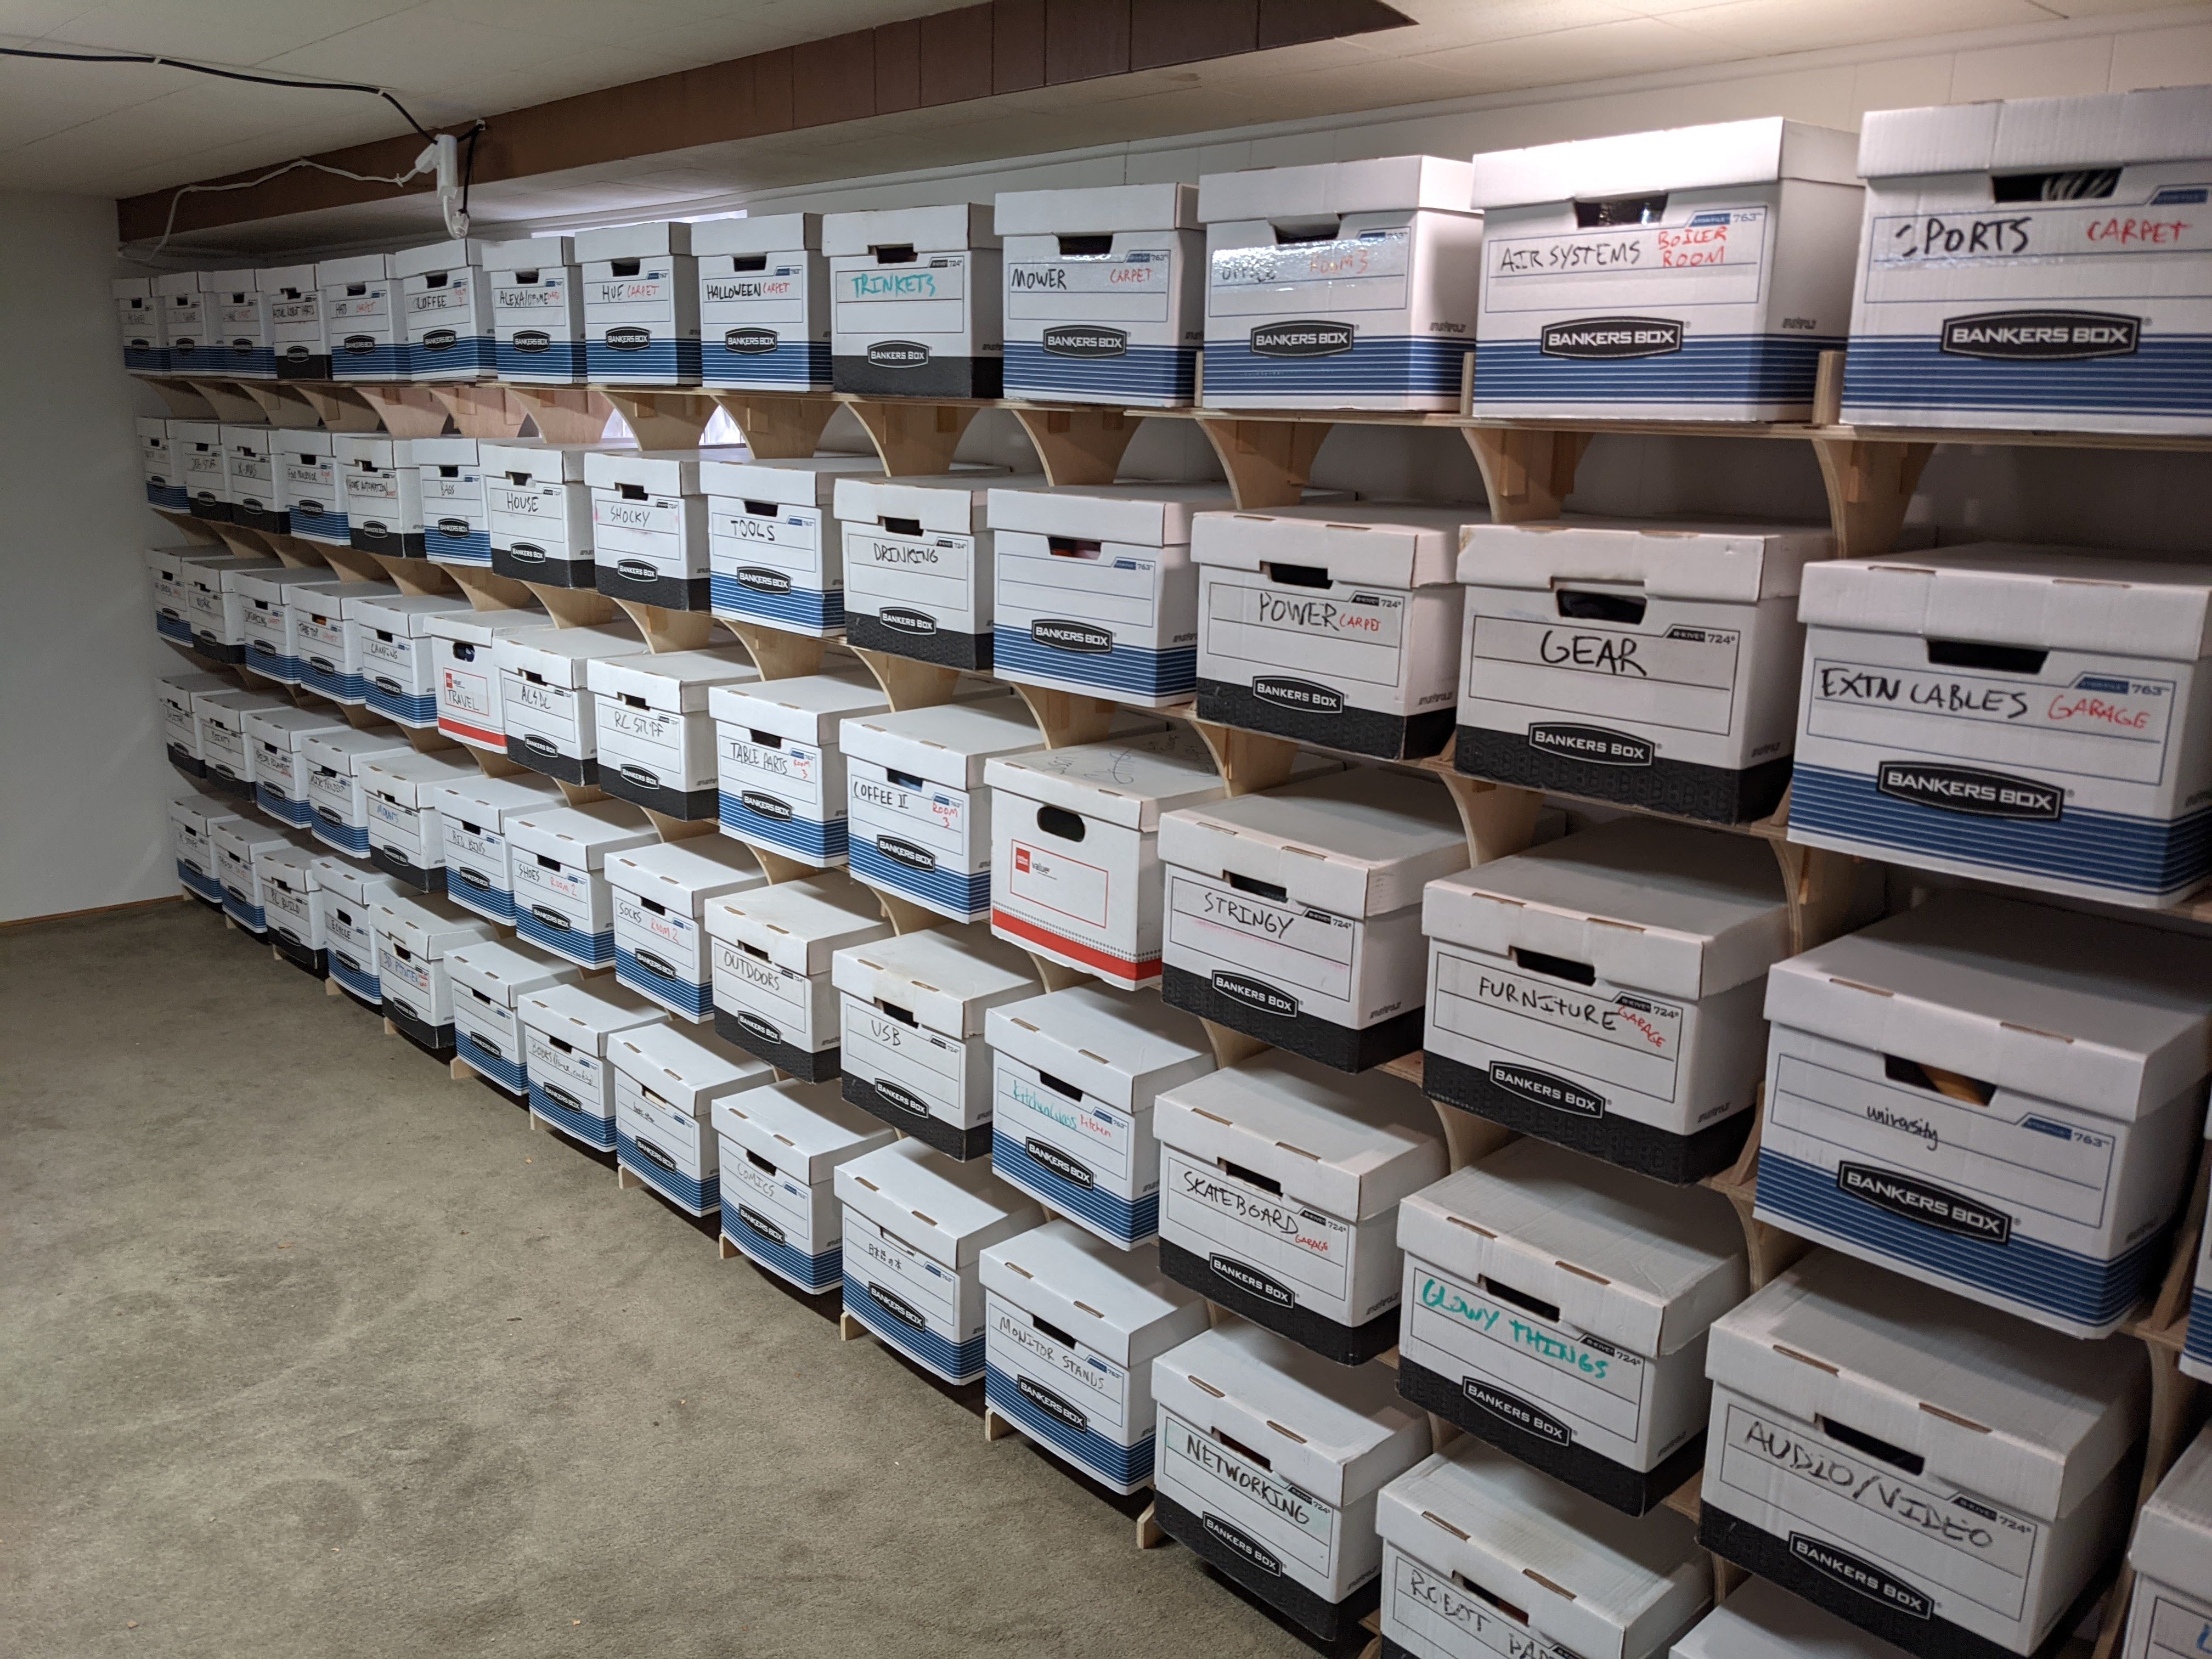
It’s finally done! Wall to wall boxes, all easily accessible. I was worried the shelves would be a little weak because I had packed the parts so tightly but I think what saves it is the sheer number of intersections and how short the spans are.
Total material cost comes to around $300 for seven half inch sheets of plywood and a few boxes of construction shims.
Any chance you have found the time to clean up the files to share? I have the similar need and hoping that I might be able to avoid stressing my limited cad skills.
@RedWagon – Thanks! This will save me a ton of time.
Never used OpenSCAD before, but I am managing without much trouble. Only issue that was a head-scratcher was an error when I tried to render the cut sheets. Figured out that I needed to comment the room() preview before doing the render.
Other than that, exporting SVG files is easy-peezy.
@RedWagon - Thanks again!!! Your OpenSCAD design is truly amazing. It was very easy to modify to change the dimensions and number of rows/columns. Your attention to detail such as including dog-bones is unreal.
One minor addition that would be helpful in a future release would be to include the connector pieces with the two male puzzle joint piece to be in the plywood layout sheets.
I ending up using pocket screws to hold the horizontal pieces to the vertical uprights instead of shims and it worked well.
Also came up with an easy way to tie the shelf to the wall using a 3"x7" piece of plywood with a 2-1/2" pocket screw to a wall stud and 2x 1" screws to a horizontal part of the bankers box shelf.
Awesome! This is the first of my CNC designs that anyone has cut.
One tip: if you put clear packing tape over the labeling area the boxes can be labeled with dry erase markers. After a few weeks it will dry to the point that it won’t easily rub off by hand but you can still change the labels with a little rubbing alcohol on a paper towel.