Getting Back in the Game

Welcome back! I’m jealous of the new workshop!

(And still jealous of the beautiful Maslow frame)

3 Likes

That’s a dramatic increase in space, from the trailer to the ‘shop-mahal’! :grin::+1:t2:

3 Likes

drool!! That is going to be a spectacular shop

4 Likes

Thanks all, I’m still having trouble believing this is real. The new shop is 10 times bigger than my trailer. The change is a little staggering! xD I’m going to be sharing the shop with my two brothers, but we all work well together and we’ve been waiting for a good shop like this for awhile now. We’re definitely going to keep one of the bays clear so we can work on our cars as well.

I’m very grateful my parents decided to go in on a multi-family house with my wife, me, and my two brothers. They made a lot of money selling their previous house and we came to this agreement as a way to help them with retirement.

6 Likes

Glad your back. There is nothing like Family and you’re part of the Maslow family. I greatly appreciate your input. Now the weather has turned i can maybe get a workshop together the size of your tailer. Glade to see you here again.

Thank you

5 Likes

I think it says something about me that I don’t really care how the rest of you house looks, I’m just in love with the size of that garage. The fact that it’s empty is a dream I’ve had since I moved into mine. I had to move heaven and earth to make room for the Maslow’s footprint.

I live one house over from my in-laws. If I had the money, I’d do the same as you and move into a multi-family home with them…not my parents. I love my parents to death, but they’d drive me up the walls.

2 Likes

Given that we just had to slow down the max feedrate because people with heavy sleds were having trouble in the top corners, I’m pretty sure the 25 tooth sprockets won’t work well with a stock sled and stock angle.

But now that we have chain sag compensation in place, I’m pretty sure that you can go with a light sled and a machine angle closer to vertical and that should let you go faster with the stock sprockets and give the 25 tooth sprockets a chance.

P.S. welcome back.

2 Likes

D’aww, why thank you! I’ve missed you guys as well! The footprint of the trailer would have worked much better if I had set it up only for wood. I also had my welding bench/metalworking tools and used it for storage. There was only so much space to go around!

There are a lot of good things about the move, but for me, the garage is one of the greatest things. I would like to launch my own furniture/custom metalworking shop out of there, and be my own boss. It’ll be awhile before that takes off, but at least I can get started. It’s hardly empty now. One of the bays is pretty hard to navigate right now, and the other two are pretty crowded as well. Once we settle in a little more it’s going to be a little better than it is now. I entirely empathize with your last statement. I barely shoehorned the Maslow in my trailer and it made it tricky to maneuver in there.

That’s funny, because my wife feels pretty similarly about her own family. I really think that multi-generation households and co-housing is a great idea to reduce the cost of living. In other cultures, it’s entirely normal to have a few generations under one roof. The idea of the nuclear family in one house is an unsustainable system propagated by the rich bankers trying to sell mortgages. Whoops, didn’t mean to turn that into a slightly political rant… sorry, I try not to get into that here. >.>

Thanks! I remember seeing some issues with the people running at the max feed rate before I got sucked into packing. I’ve been running my machine mostly at 500mm/min, so I’m no where near the max feed rate with my current setup. That’s probably part of the reason I haven’t run into the issue myself, given that my sled it pretty heavy. I still have some reading to catch up on, though, so that will probably inform how I want to move forward with the feedrate tests. I’ve been getting the suspicion lately that I might need more powerful motors to make it work, though. Through testing, we’ll see :wink:

1 Like

That’s funny, because my wife feels pretty similarly about her own family. I
really think that multi-generation households and co-housing is a great idea
to reduce the cost of living. In other cultures, it’s entirely normal to have
a few generations under one roof. The idea of the nuclear family in one house
is an unsustainable system propagated by the rich bankers trying to sell
mortgages. Whoops, didn’t mean to turn that into a slightly political rant…
sorry, I try not to get into that here.

It’s affected a lot by the mobility of the nuclear family, it’s very common for
people to move state to state, let alone smaller distances. Prior to WWII
multi-generational households were rather common, but the returning GIs were not
as tied to a particular location, let alone their family, once they got back.

but nobody can get under your skin like family, even if they aren’t trying :slight_smile:

Thanks! I remember seeing some issues with the people running at the max feed
rate before I got sucked into packing. I’ve been running my machine mostly at
500mm/min, so I’m no where near the max feed rate with my current setup.
That’s probably part of the reason I haven’t run into the issue myself, given
that my sled it pretty heavy. I still have some reading to catch up on,
though, so that will probably inform how I want to move forward with the
feedrate tests. I’ve been getting the suspicion lately that I might need more
powerful motors to make it work, though. Through testing, we’ll see :wink:

what we were finding was that people with heavy sleds making a horizontal cut
towards a motor up along the top would have a motor not quite able to keep up
and so the cut would droop, and then ‘hook’ up at the end to finish where it was
supposed to.

3 Likes

In case anyone has been wondering what has been taking all my time and keeping me from Maslow-ing, the remodel for my new home has been quite a project. If this isn’t Maslow enough I can take it down.

In lieu of progress with my Maslow, I hope that some progress pictures of the project will be enough.

This is basically where we started. I was so anxious to get started that I tore up the carpet in the main living space before I remembered to take a picture. This is a panoramic picture, which is why it’s warped.

The next thing to go was the original kitchen (circa 1980’s). It was very 80’s with off-white laminate and oak trim. You can see one of the base cabinets I’ve kept around as a work table. We kept all the appliances, as they were all pretty modern and in good working condition.

We got filled a dumpster pretty well from all the debris from demo. There are 3 different units on the property, and we had a lot of work do in each of them. My brother’s basement apartment had a bit of a mold problem, so we gutted the bathroom back to the studs and tore up the moldy carpet. I wore my respirator for all of that demo.

With a family on our mind, my wife and I knew we would need to sub-divide our main living space to add another bedroom (from 1 to 2). While the original plan for this apartment was to have two bedrooms, the previous owner changed his mind before the walls went up, and made my life difficult by putting things in the way of the wall. Notably, the attic hatch went right through where the wall was going and was facing the into it. This took me a day to carefully remove it, rotate it, and position it in a way that would work well with the new wall.

Then we could put up the frame for the new wall. I also ran wires for a light switch next to the door.

Putting up the sheet rock was pretty straight-forward. My father-in-law came by after we were done putting the drywall up and worked his magic with the mud. I’ve done joint compound work before and while it hasn’t been terrible, but he is way better than me at it. It’s pretty hard to see where the new wall starts once we got a couple coats of primer up. I was particularly happy to see the wall up because that was our fist project milestone.

The next milestone is laying hardwood throughout the main living space. We left the carpeting in the bedrooms to save time and money, but we wanted to improve the living room/kitchen. This was Sunday afternoon after I finished the tedious work of putting the under-layment down. My wife is looking over our work in this picture. She’s been an amazing helper and I’ve been very grateful for her paitence.

The entire time the floor was going down I was just feeling so good about the look! It’s time consuming, but it’s been totally worth it. I love the color!

This is where we left off yesterday. We were very, very tired by the end of the day. We were working throughout the long weekend, and it got to the point where I was having trouble doing math in my head.

Once the floor is down, the next milestone will be the kitchen. My wife and I fought for a little bit because I wanted to make all the casework, but she wanted to make sure that it would be done sooner rather than later. For the sake of time, we compromised and bought our kitchen off of Craigslist. They’re all melamine, but it only cost us $700 for the set! The seller was remodeling a house themselves, and this was the kitchen that was already in the house. We painted the cabinets to match our color scheme, which is based on a wallpaper my wife chose. The sink base was deteriorating, but that’s what happens when you use melamine under a sink. I will be using the Maslow to make a maple plywood replacement.

I added this awesome pot rack to one of the base cabinets. I bought it for $120 from Lowes. In our last few apartments, pot storage has always been a problem and I wanted to make sure that issue was fixed for our new home.

After the kitchen, we have a few more built-in’s that I will be making. Unless our plans change, these will be made with the Maslow. This is the layout we are planning on:

Note, the grain direction for the floor is going the wrong way in this render. I added it mostly so we could get a feel for the color in the space.

There are two major “items” I will be making. I actually already have the big teal amoire, it’s actually in the background of the picture of the cabinet with the pot rack. It’s a black Ikea Hemnes cabinet that will be repainted to match our kitchen.

  1. A TV enclosure/hutch that will fit into an awkward recess in the south wall. (The white cabinets to the right)

  2. A window bench with shoe cubbies beneath along the west wall. (The low maple cabinets to the bottom right) There will also be a small bookcase next to the amoire, facing towards the window bench that I still need to draw.

Hope that you guys enjoy the pictures! I can keep posting updates if people want to see them.

10 Likes

Please do! :+1:t2:

5 Likes

@MeticulousMaynard This was such a pleasant reading for me; i feel both happy for you and a bit jealous for the workshop.

Please keep posting.

2 Likes

Have fun!

We gutted the entire first floor, including removing the floor joists, of our 100+ year old farm house in the mid 80s while our youngest was a toddler. Wanted to turn the living room/basement into an indoor pool/heat storage but Mrs Moose vetoed it. That pool would have kept the downstairs warm and solved the winter humidity problems.

The old homemade kitchen cabinets and countertops are now part of the basement (where the pool would have been) mini shop.

3 Likes

Clearly your plate is overflowing! The good news is your enthusiasm and willingness to share progress and results. Keep on posting… when you start using the Maslow to help you we will have context. Plus I imagine many of us have travelled similar paths.

3 Likes

Thanks for the encouraging words everyone! It will certainly be great to get to the point where I’m making the built-ins and playing with the Maslow again. I’ve still got a weekend of putting flooring down before I start looking at cabinets. We have to be move-in ready by the end of June, since the lease for our current apartment is up then. I will actually be moving up there the 15th myself, so I’m hoping to have most of the kitchen done by then.

@mooselake That is quite an ambitious remodel. I had considered re-doing some of the subfloor panels myself but decided that I didn’t have enough time to get it all done. The swimming pool would be nice! However the apartment is right above the shop, I don’t want to give that up! :wink:

At least there’s a hot tub in the main house. :smiley:

1 Like

Man am I sore, but the good news is, the new floor is done! :smiley: :smiley: :smiley:

And with only 5 boards to spare! xD

Photos don’t quite do the color justice, but it definitely is a vast improvement over the previous floor. It was a learning process for me. The good news is that I now I have a very intimate knowledge of our apartment. The bad news is that the walls are not nearly as flat and parallel to each other as I was hoping.

Now, on to the kitchen. If all goes well, my Maslow gets to wake up next weekend and shake off the dust. :smiley:

9 Likes

Wow!! Good work and congratulations!!

1 Like

Nice floor, now go make your maslow, you’ve earned it :wink:

1 Like

Well if you insist… :wink:

Ignore the pile of steel in front of the Maslow. The new shop doesn’t have a cantilever rack yet, so it’s all just sitting on the floor.

I woke my Maslow up from it’s long sleep yesterday. I have to admit, I love having it in the shop. It’s so much less cramped than it was in the trailer. I spent the better part of the day just updating and recalibrating. Apparently it’s been quite some time since I last ran the machine, as I updated from v1.03 to v1.15. I moved my old groundcontrol.ini file to my backup folder and started from scratch. I ran the calibration pattern 3 times to really get it dialed in. The chain sag and rotation radius changed each time, so I know that it was doing something. I ultimately got a benchmark value of 0.917 - 0.3125, which is at least an order of magnitude better than it was last time I ran the machine. The best I got before was 1.5 - 0.505.

Quick note to the developers: Thank you so much for your continued efforts improving Ground Control and the firmware. Calibrating this time was so much easier than it has been in the past. If not for your work, I would still be struggling with accuracy. I also especially like the “new” dark blue color scheme for GC!

The main reason I needed to get the Maslow online is because it’s time for it to participate in the remodel. Last weekend we hung all the cabinets we had ready. There’s currently a hole where a sink base needs to go, and that’s the Maslow’s first project. There was also a base cabinet who’s toe kick broke moving it from my old apartment to the new house. I had to build it a new toe kick assembly, but that was easy enough to do with the table saw.

We got a sheet of 1/2" Birch ply for the new cabinet. The sheet was pricey, but it’s really good material. I am morally opposed to using particle board for a sink base. I had a little bit of trouble cutting, but nothing that would force me to remake it. Tension on the sled was pretty low at the bottom of the bed. I’m pretty sure going from my 112" top beam to a 144" (12’) Unistrut top beam will solve most of those issues. My dust hose also caught under the sled a couple of times, so I will need to add more height below the fence to keep that from happening in the future.

The router’s power cable got caught on one of the clamps at the top of the machine cutting the top of the right end. There’s a bit of a squiggle from the first pass. Luckily, I’ll probably never see it, so I’m not going to bother re-cutting it. Also, at $76 a sheet, I’m pretty determined to use anything I cut.

It was getting late last night when I finished up the ends on the Maslow. Needing to re-run the other profile of the right end didn’t help either. The good news is that I can really see the improved accuracy. These ends (minus the mistakes) were within 1/32" tolerance! :smiley: :smiley: :smiley:

I didn’t have time to cut the tabs and look at the parts on their own. That will be this weekend. I’ll also cut the nailers, toe kick, and deck on the table saw out of the other half of the sheet.

Bonus pictures:

Last weekend we got the wallpaper up in the living space. We actually picked our kitchen color (loosely) from the wallpaper. It’s a little more of a green blue than in the kitchen, but it still ties them together.

Cat tax (one of my cats loves napping under the bedsheets):

8 Likes

I’ve changed this thread from “No Judgement” to “Projects”, because I’ve changed over to primarily talking about the remodel. I figured I’d do that for the cabinet that I made in this post, rather than making a second, separate post just for it. If there is not enough Maslow for this to be a “Project”, please let me know and I’ll change it back.

I got the cabinet ends off the Maslow on Saturday and cut the remaining deck, nailer, and toe kick. I gave everything a light sand and then applied 2 coats of tung oil to each side. I was able to save the doors and face frame from the original melamine sink base that we bought with the set, so I simply reused it. Here’s each of the parts lined up before I assembled everything:

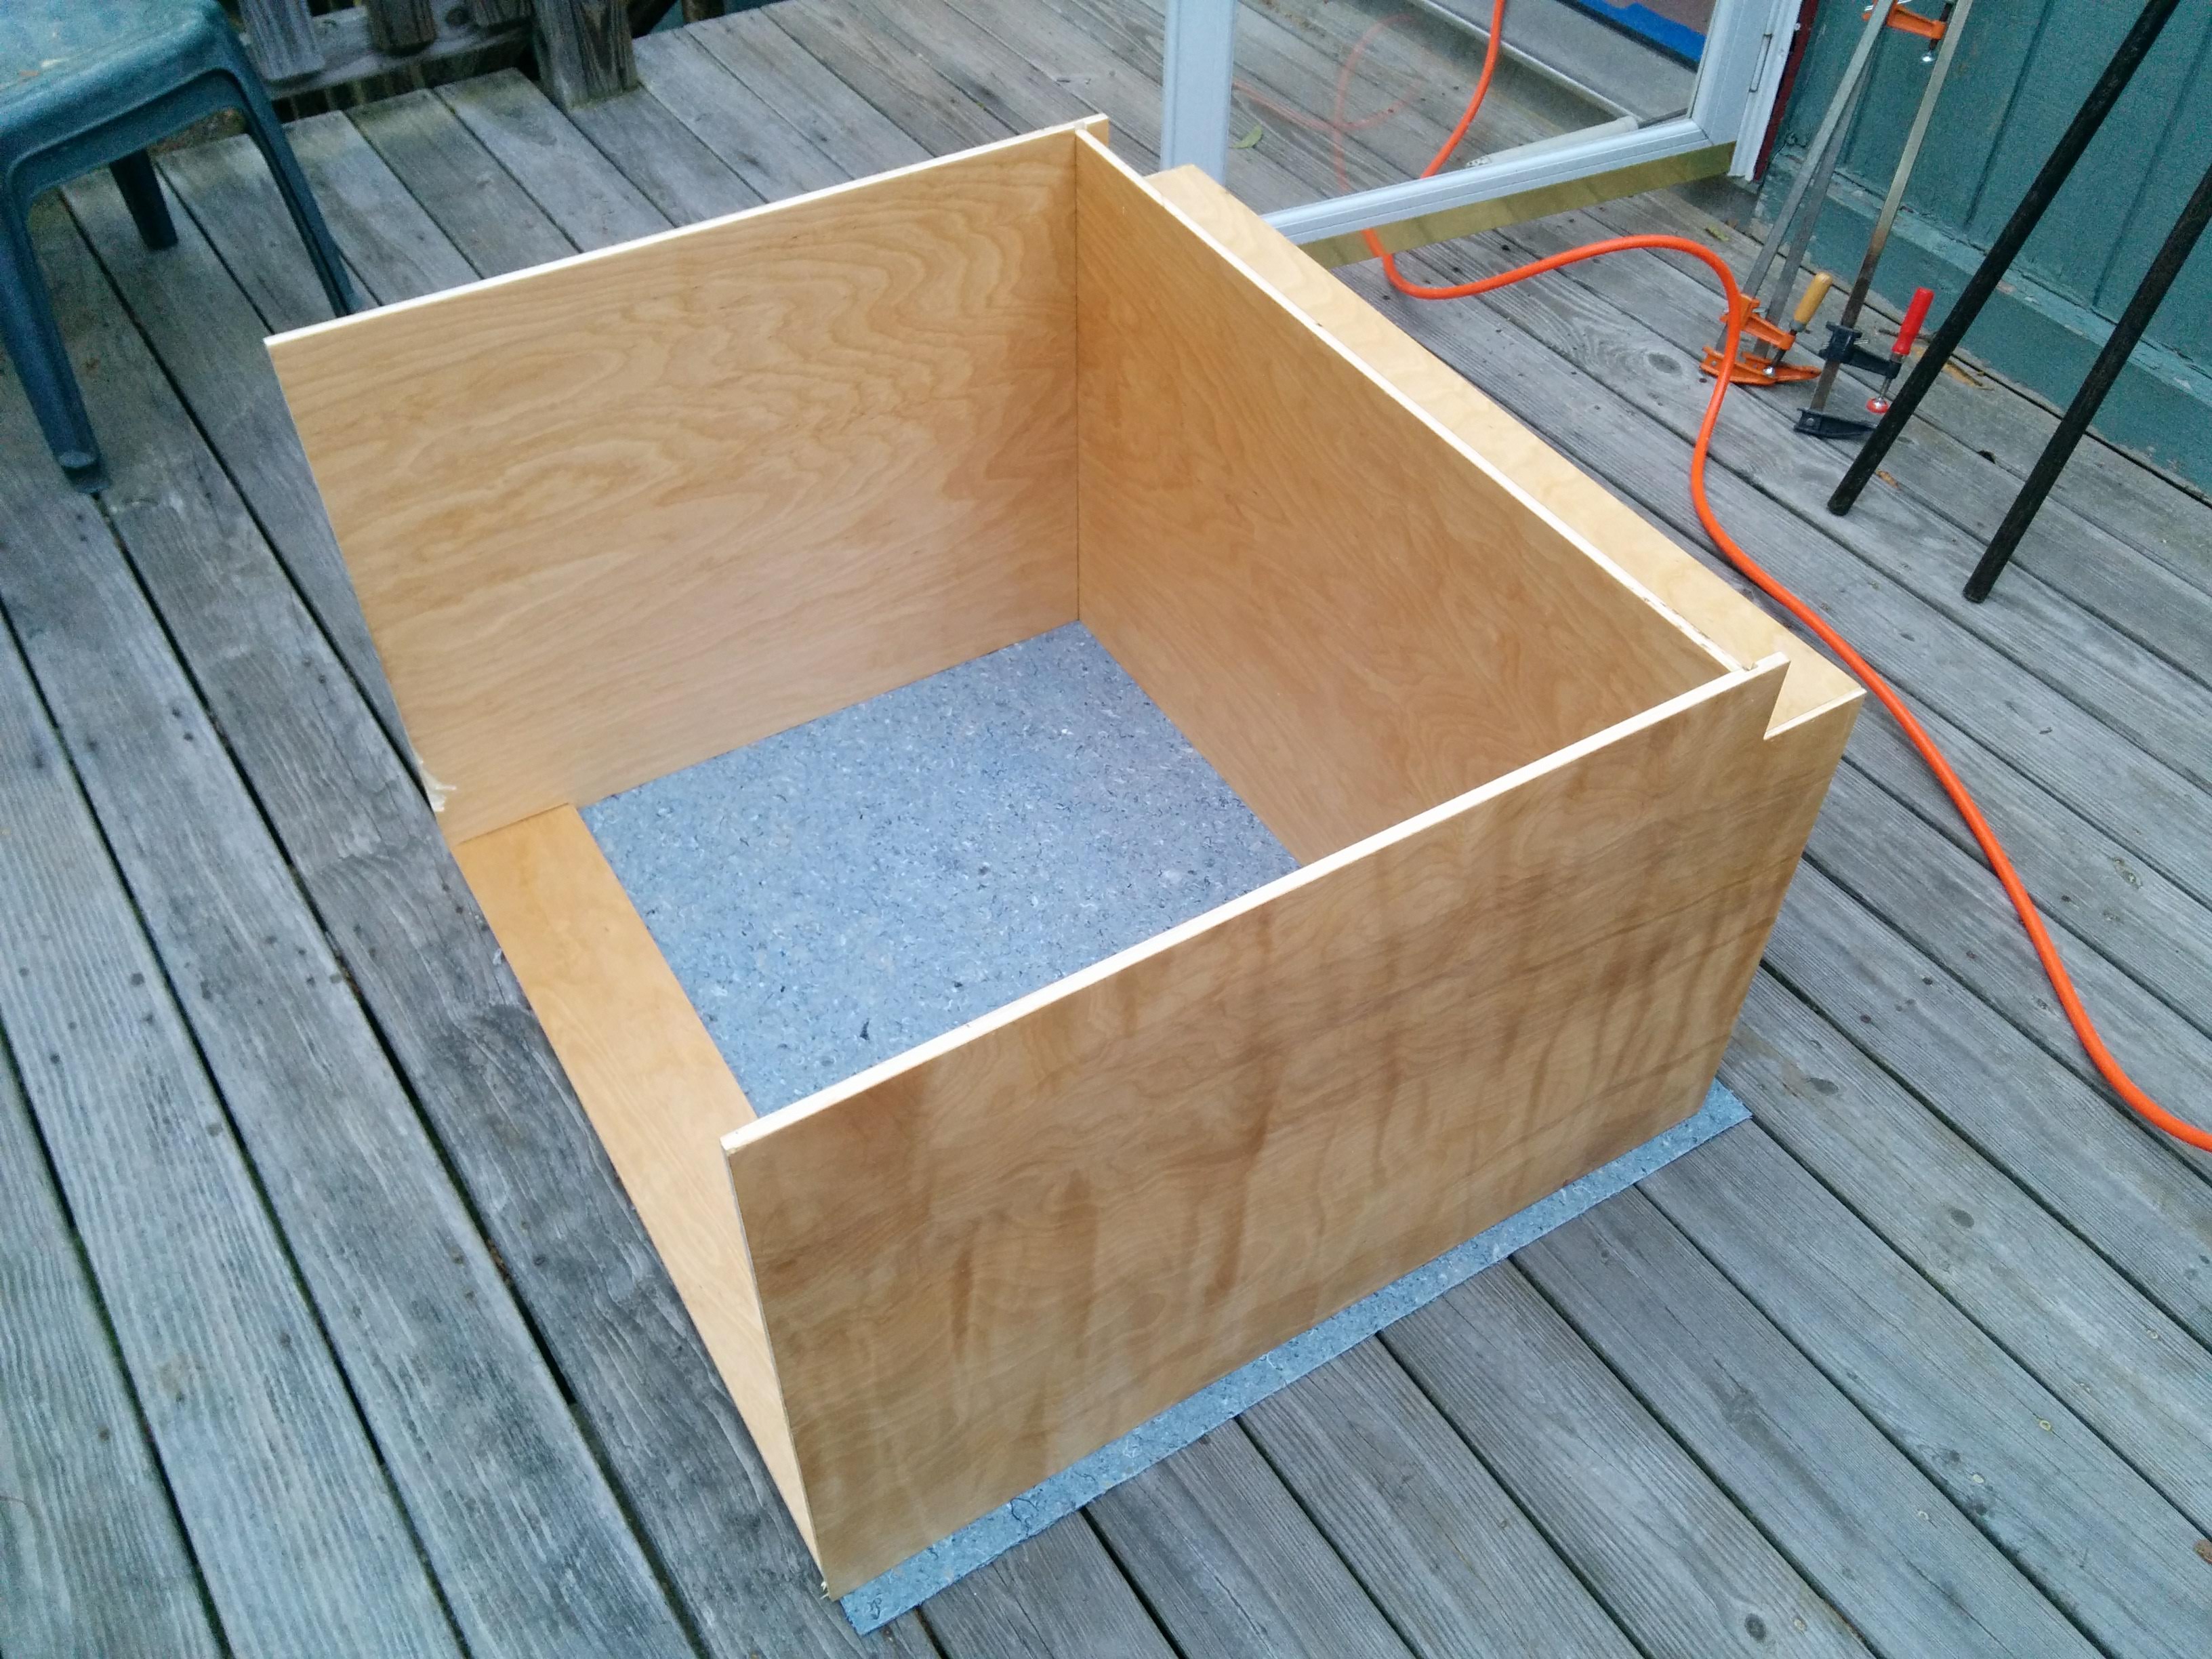
Then we assembled the components. First we built the plywood case. I quickly brad-nailed all the parts together once everything was glued. I wanted to clamp everything together first, but most of my clamps are still at my old apartment (which we’re getting ready for the final move).

Once I was happy with the case, we glued on the face frame, and clamped it in place. Once it was assembled, I had to route out a passage in the left end for the dishwasher hoses and power cable to pass through. If I had been smart, I would have had the Maslow cut that out while it was already making the part.

All the cabinets are in place now. I still have to put a filler and a counter cleat in the corner beyond the dishwasher. The butcher block counter will be arriving next weekend. I hadn’t leveled the cabinet next to the stove in this picture, hence the level sitting on top of it. It was actually bad enough that you could see the difference in the angles of the two face frames. I had to stick a 1/2" shim under the back to get it to match the sink base. Luckily, I have all these 1/2" thick scraps of flooring sitting around.

There are also more cabinets hiding around the corner. xD

It was a hot weekend for all this work, but we’re so close now to being done with the main milestones that needed to get completed for us to move in. And just in time, too, since we’re moving in next weekend! We’ve still got so much more work to get done for this to be “home”, but it’s good to see how much we’ve gotten done. The Maslow is about to help a lot more as well, so there should be more and more of the machine’s work as I get further into the project.

18 Likes