So which file do I need to right click on? The one that looks like that; when I right click I just get Open, Go To, Copy, Delete, and Clear from History.
What OS are you running?
Win 10
so, does the file you downloaded not look like the one in the video?
Can you send a screen shot of the folder that has your downloaded file?
Also, just confirming you downloaded the .zip file and not the .tar.gz
That is a strange set of options for a right click on any kind of folder. Here are the options I get for a zipped folder and a regular folder:
I was just in looking around and I got some little pop up at the bottom that said an update was available. If that means anything.
a pop up for your computer (bottom right hand side?). Probably a general computer update. Windows 10 seems to get updates every 5 minutes
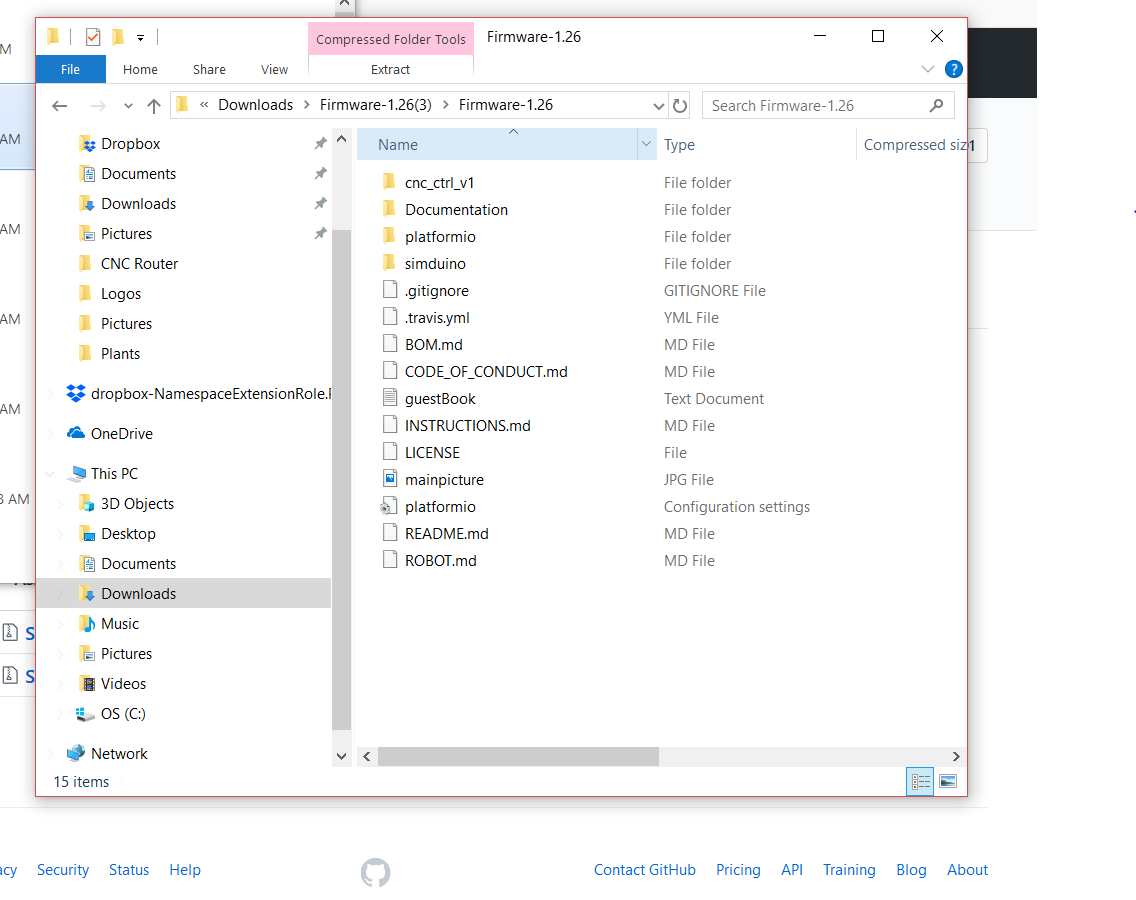
ok, you are 2 folders too deep. Go up 2 levels to find the Firmware-1.23(3) folder in Downloads, which should be the zipped folder. then try a right click.
Alternately, you could use the Compression Folder tools at the top to extract things within the folder in your screenshot (i.e.: Downloads/Firmware-1.26(3)/Firmware-1.26 ), but I am not familiar with doing it in that way.
If you go up one folder (which you can do by clicking the arrow that points up next to the address bar TWICE, or I think by clicking Downloads in the address bar and navigating to find the compressed folder “Firmware-1.26(3)” and then right clicking [which should bring up the extract menu], though I’m not sure about that) then you should see the compressed folder.
As a side note, I usually move the compressed folder I downloaded into a “Maslow” folder so I can keep track of it in case I need to get back to a previous firmware version. When a new firmware comes out, I make an “archived firmware” folder, move the old firmware files into it and then download the new compressed folder and start again.
1 Like
I used to do this until I got Windows 10 and now nothing makes sense I don’t even know how to create my own folders to extract to or anything like that. This may still have to do with my unresolved graphics card upgrade that I have yet to have time to take care of. We’ll see.
I’m not a Windows 10 fan but I don’t know if I’m ridiculous for thinking that Windows 7 would be great right now.
Yeah, I am not super pleased with Windows 10 either  There was a debacle with an update that wouldn’t install properly, but the OS kept trying, and I’d open the computer to a blue screen once or twice daily. No way to disable the auto update, and MS’s answer was to do a fresh install of the OS, losing all the rest of your programs and settings in the process. Considering I had done a fresh install when I bought the computer 6 months prior, I was not keen to do another one and have to install set everything up again.
1 Like
@Arykk
Were you able to get the firmware installed?
1 Like
Hey Keith, no, but I got my XCarve working finally so I’ve just been busy with it. I have my friend who is a real computer guy coming by to walk me through it. I’m just being patient and not stressing. Thanks bud for all you’ve done so far.
1 Like
When I run “Test Connection” in the firmware updated, it tells me that the programmer is not responding.
How do I know which programmer I should select?
I know my computer is recognizing the Arduino Mega 2560 on COM7, but I’m not sure where to go next?
Thank you in advance for any suggestions or instructions you can provide.
In the IDE go to the Tools menu then take a screen shot of the menu as it is seen dropped down. We need to see what you are set to please.
Thank you
So I got some help from a friend from our local Makerspace today and we got this thing running. Now I’m just working on getting the frame complete. Thank all for all the help.
3 Likes


Here’s my progress of the day.
Andrew seriously made me feel dumb, but the fact that he got it to load makes it totally worth it. I personally didn’t even know that Com 6 is not an actual physical location. He guided me through the files I needed and it turned out that I hadn’t even gotten something I needed downloaded. One I did, all down hill and pleasant. I actually got the motors to run.

5 Likes
Awesome! You’ll be making chips with it soon!
1 Like

Ok. So I’ve gotten the frame figured out and I got the home pretty much set. I’ve been playing with it like I’m 6, and I’ve uncovered two issues. While I’m jogging around, I will start winding the chain upon itself. I’ve unwound it a good four times on each side, but I think I’ve got an idea for it. The other issue is that I can’t figure out how to add the Z guide brace and still use the ring. Again, I think I’ve figured out a solution.
I am sure you’ve figured it out, but adding tension to the slack chain will greatly help this. You may also want to search for chain guides in the forum. There are a bunch of 3d printed ones designed for the bottom feed chain set up you have.
Looking at the last image you posted, you mounted the router base upside down inside the ring, which is why you can’t get the brackets in there. The depth adjustment should be on the bottom right of the sled, underneath the right end of the ring. There are more than a few choices here too. I initially attached one of the two l brackets to a piece of aluminum that had a bolt held in the router guide hole next to the vacuum port, and that worked alright.
My advice, however, would be to fashion a separate z-axis with a c-beam or something like the Meticulous Z-axis to save yourself the headaches that come with trying to use the stock depth adjustment. the slow speed, the inaccuracies, and the hassle of trying to get it to work led me to a c-beam, that, once installed, was much easier and faster to use.
2 Likes