This is beautiful! What wood did you use?
A red oak for the main part and some poplar (or maybe birch?) for the orchids.
Curious, why do you think belt wear, are there visible indications?
Tim I’d like to cut a sign for my friend’s business. Any chance he’d be willing to do a write-up on your process for carving these?
I use 2 part acrylic resin epoxy. 1:1 mix with mica powder to dye it.
I grab a picture of the patch (hopefully and svg). I do small edits in Carbide Create, for big edits I use inkscape.
Set up pockets and cutpaths in carbide create. My pockets at .15" deep. On 1/2" or 3/4" ply or MDF. I try to pocket out areas that are only 1 color with a border. Sometimes I have to add thin borders for the epoxy then cut out the border/barrier after it has cured to pour the next color (as I had to do between the blue and black in the item above).
MDF is flatter and seems to give a better cut without tear out. Ply is more durable and lightweight in comparison.
Nail on the hanging hardware.
I paint the painted areas and then spray a few coats of clear coat.
I mix the resin in clear plastic cups until clear then add the mica powder to dye (doesn’t take much, maybe 1/8 or less of a teaspoon.
Make sure your workpiece is level in both directions.
Pour in. I use plastic siringes or pipets to lay in the smaller areas. If you drip on the paint immediately wipe off with a paper towel.
I clean the siringes and pipets with acetone so I can reuse them a few times.
As the resin starts to set, I use a toothpick or nail to swirl it. The mica powder kind of settles and becomes 2-tone. You can buy a liquid dye instead but you use alot of it and it’s more expensive than the mica. I haven’t tried food coloring, or cement coloring.
Allow to cure and it’s done.
Aloha,
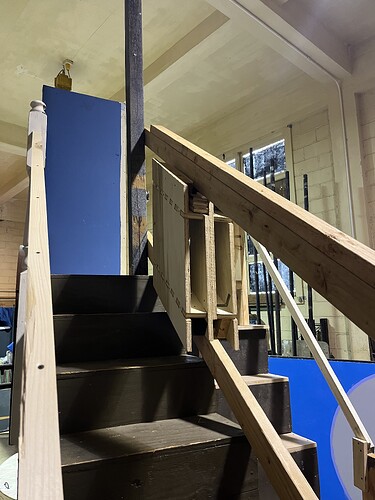
It’s not as visually interesting as many of the projects posted here—it’s part of a mechanism for a stage effect, so it won’t be visible when done—but after eight months of struggle (mostly due to my own missteps and errors), I got clean cuts without issue! I’m pretty excited about that.
When I’ve assembled it (and before it’s all covered up and hidden away), I’ll add a picture of the assembly.
Mahalo,
I think that it is a BEAUTIFUL mechanism ![]()
in pizza we crust, that’s almost as good as “don’t get curried away we have more food on the way” (source)
Nicely done!
Dano
That looks fantastic!
What CAD software are you using for design?
I’m an Autodesk Fusion guy. I have been using it for 3D printing and set design for years, and have used it a little bit for CNC (diving deeper lately, as I have a Maslow 4).
Also currently learning to design with parameters; my reputation as a (community theatre) scenic designer is ascending, and I may be asked to repeat a thing at a different size or for a different space, so I want to be able to just change the parameters and have the computer recalculate based on those parameters.
Mahalo,
Absolutely. I’m using Alibre Atom for my CAD and I like the way that it is parametric from the start, I just have to go in and give some dimension a proper name and then reuse it elsewhere.
Limited colours are available however coloured builders chalk works well, mixes in easy, and is pretty cheap by the gallon.
That looks great! It appears you’re oversizing your cuts that the tabs insert into? How much wiggle room are you giving it?
I actually undersized them (set the wrong stock thickness) and had to enlarge them by hand (and very roughly). When I have leisure, I intend to experiment to learn what my allowance needs to be; lately, I’m including an allowance parameter so I can easily modify it.
I’m making a parametric chest and on the sides I need to make a carved writing, today I did my first carving test with a 60 degree V-milling cutter with the Krabzcam V-pocket function, for now I want to share a trick that someone showed me for dyeing under relief. They showed it to me using a spray can and today I wanted to test if it also worked with a brush and it turned out perfect, I only reused leftover adhesives and put them where the drill bit would pass, it is preferable to let it dry and then sand to remove the wood chips and in case any paint spots come out of the drawing
I want to share with you how this carving test turned out. It’s a chest, called “Alliance.” They wanted it for a wedding event, but it became a symbol in the family that inspired it.
I designed it directly in Sketchup, and the Gcode was generated in Krabzcam (which has become my go-to for manually optimizing cuts). It’s 38 pieces of 18mm plywood joined by 3.17mm diameter bamboo skewers.
I’m inspired by what happens on this great forum. I hope it inspires you too. Happy cutting.
This is astoundingly spectacular!


