Ok, so I’m frustrated… There’s a bunch of steps that must be done in the right order and with the right pre-requisites. Feedback would be nice. Storing “where am I” at shutdown would also be nice. The amount of time between a setup command and action is long enough that you constantly feel like “is it hung up again”. And it varies.
So, I thought I had it all set. Zeroed it, set up, tensioned. I move the router to where I want the Gcode zero to be. I hit XY home. I hit play. I get a few commands on the screen. FYI, -200 X would have been the wrong direction anyway… I had zero down and left of the pattern.
The Maslow starts a slow motion “dammit” course out the top corner (which tells me that “home” was 0% effective). Then I discover that no button pushing will -actually- stop the darn thing from moving.
Next fun (combined with “I’m done”): the top right belt refuses to retract. At all. It happily extends. No retract. I’ve gone from 400 to 1,000 tension without any change in retract.
maybe not a final solution - but something that might work in a pinch ( I have not tried it) - could you use a magnet waved by the encoder part of the belt to trick the machine into thinking there is movement?
Again probably not a permanent solution but if you have high retraction forces - it might be easier on the machine than having to torque the belt that much…
I’ve tried spoofing it with belt motion, but all I see is the cooling fan start and stop. No actual belt motion on its own. I need to go watch the motor fan and see if it spins at all.
The weird part is that the darn thing -extends- just fine!
I need to look at the belt guard and see if one end of it is catching on the gear; that would explain things!
And fed it some regulated power…
Top right spool (the trouble monkey)
0.3 Amps at 4 Volts in
0.22 Amps at 4 volts out
0.12 Amps at 4 Volts in
And then the dratted thing pulls in and out just fine at 500 setting… I’m happy-ish? At least its working, but I don’t really feel like I understand WHY it wasn’t working and why it does now.
Looks like some little bit of junk sticking something… But 0.3 Amps doesn’t seem like its working very hard…
Anyone know the conversion between tension settings and motor current?
Anyone know the conversion between tension settings and motor current?
I think the tension settings are the PWM number that is being applied, when the
pid loop is trying to move the motor and it’s output PWM value hits this number,
it alerts.
when cutting, it can go up to 4000, so I would guess that 4096 is 100% duty
cycle ( @Bar how accurate is my guessing??)
OMG, major progress here! One chewed belt, though. And the unit seriously needs a “stop and pay attention” button. It takes a couple of Gcode steps before it stops…
And those router bits, holy %^^&* are they sharp; 2 blood sacrifices on the same bit
Argh. I thought I had this… Not. BTW, I also put some strips of Teflon coated fiberglass tape on the bottom of the sled to help with the stick-slip on the plastic sheet that covers the styrofoam.
So, I measured stuff on the pattern. Four radial measurements should have been identical; I checked the CAD. Yes, using a 600mm caliper on styrofoam leaves some accuracy on the table But
X- 537.6
X+ 534
Y- 517 Maybe I messed this up???
Y+ 530
So, I made a new, MUCH less complex and fancy pattern that would be easier to measure.
I did the whole dance of:
Power on
Connect tablet to Maslow
Upload new file
Retract to initialize things
Extend
Bolt down belts
Tension
Move home position
Select file
Start spindle and vacuum
Start cut
The router ran over to the corner and started work; all good so far. I noticed that there was some judder in the motion. Later, near the corner, I saw that “straight” had become “sine wave” As it worked its way around the square it finally said “I’ve had enough, too much error”.
After that I said, “maybe I’ll try again, but NOT on the far edge”
Fail.
Unbolt
Power on
Connect tablet to Maslow
Retract to initialize things
Extend
Bolt down belts
Tension
Maslow won’t move
Release tension DOES work
No commands work.
Unbolt
Power on
Connect tablet to Maslow
Retract to initialize things
Extend
Bolt down belts
Tension
**** Tension does not take up the belts. No commands work.
I’m stymied and frustrated. Any suggestions??? @bar ?
Should I re-flash? Sacrifice some resistors by releasing the magic smoke? Break a bit? I don’t have chickens anymore…
OK, so when its centered the dratted thing is perfect… I still need to measure, but the results look sweet!
Process:
Power on
Sign in
Status: unknown
Retract all
State: retracted
Extend all
Status: extended
Bolt down
Apply tension (worked)
Status: ready to cut
Move to center
Hold and double tap to zero
0,0,3
Select file
Hit play
Unit runs!
Jobe succeeded
Release tension
State: extended
Unbolt
Retract all
Shut down.
There’s a tiny bobble/missed area on the top center (left in this picture), but nothing else jumps out. Needs some quality time with the giant calipers.
How big is your frame? You might be pushing the edges of where the good working area is. Check out this simulator that can help to show where the machine will be most accurate:
That wavy pattern is for sure the calibration being a bit off and the motors fighting each-other, but that could be the result of something funky in the calibration, or it could be just pushing the limits of how big of a work area it has.
Yeah, the salmon color lines up with the squiggly parts. Argh. At least I know what’s going on!
Looks like I should consider re-doing the anchors and change my 2443.2, 3679.2 to more like 3100, 3679mm. It won’t fix the corners but it will improve the middle hourglass thing.
OK, three fresh anchors and more marks on the floor. Calibration tonight, probably.
I had blue tape to tie that to the shelf bracket… I think that’s PEX pipe; it matched the poolzilla anchor very nicely. Just pulled the bolt and give the tube a whack. Then trimmed and sanded the JB Weld flush. BTW, having some random junk to drop into the bottom of the hole to tune the depth and get your anchor just under the concrete makes this easier.
Just an update… The new anchor spacing is WAAAAAY better!
I did about 6 runs of a 500mm double square pattern. It took a few tries to get the dimensions right. BTW, they are more right in the middle. The half meters on the outer edges are a bit out.
Here’s hoping we get some serious stretch calibration on the next rev
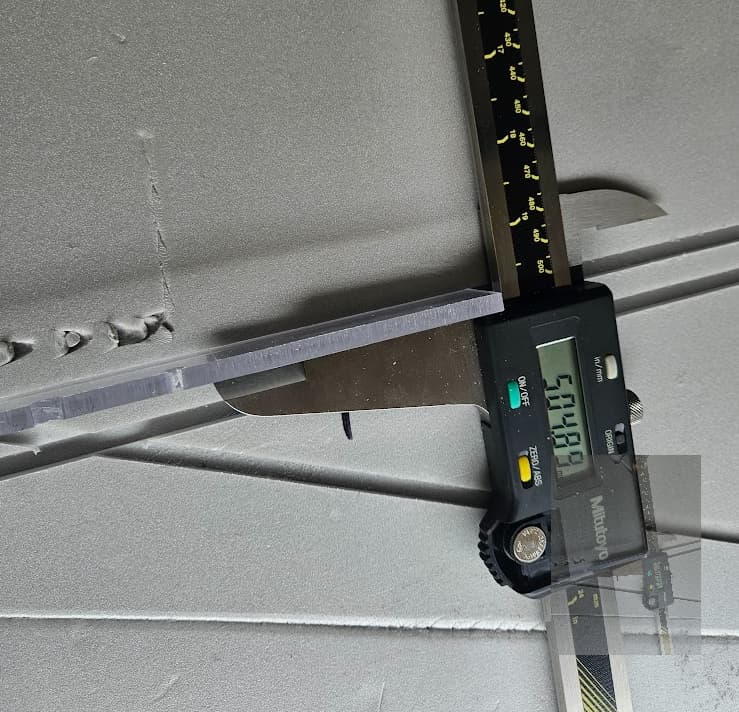
Here’s a good trick to avoid smooshing your styrofoam when measuring: put in a strip of plastic!
If its not 1/4" thick you will need to do some math.
I started trying to cut this past weekend and also experienced a wavy pattern. Mine was near the center of the spoil board and not physically far from where the machine had been correctly cutting. The machine was moving up and diagonally up when it was wiggling. The opposite end of the piece moving vertically down was straight. Should I be re-running calibration too? I’m on firmware 1.0.7. Workpiece relative to spoil board