New setup - Issues with quality and finishing programmes

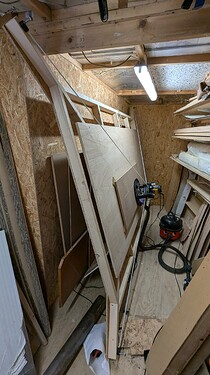
Hi folks, After a bit of a break from using the maslow, I’ve rearranged the workshop and set it up in it’s own space and giving it a proper go. Having had several painful days with the original calibrations I stiffened up my frame with OSB just incase that was part the issue.

A new calibration with the latest firmware seemed to go ok, though I’m still not really sure what a good set of numbers looks like. I’ve then attempted a simple MDF template, Gcode generated in KrabzCAM, cutting with a single flute spiral style cutter, straight off the first pass (~3mm) was looking disappointing, then it stopped before getting back to the start for a second pass.


you can see the straight lines are really wavy, +/- more than 1mm. and the corner in the picture should be sharp.

Before I get lost in the cycle of calibrations and more testing any pointers from the community would be great.
I’m questioning things like the height difference between calibration and the real run.
Do my anchors need to be level with the working face? should I calibrate on a piece of material the right thickness rather than my bed?

Prior to stiffening the frame, the results weren’t that bad. Though I only tried one engraved text design so not really like for like. Still I was pleased. the main issue on this one was it failed to complete and seemed to crash before completing the Gcode. one or two passes before the end.

Any thoughts on failure to complete programmes? I didn’t see anything significant in the output log, maybe because it crashed.
1 Like

If the machine finished calibration, then it should be > .50 fitness (I think, it may have been lowered recently).

The cuts look to me like the sled might have been skipping / leaning as the cut was going; did you happen to notice that?

What feedrate did you use?

Is the bit sharp?

Also, today I noticed a (potential) issue on mine. The Z-Stop seemed to be wrong. Here is how you double check that: measure the distance from a Z stepper to the plastic router mount,

then go to the first tab and check the Zm, which should match that.
image

If its not then all the Z calculations may be off, so go back to the maslow tab, run the z all the way down until you hear grinding noises, then go to setup and hit
image

2 Likes

Thanks for the tips @ronlawrence3 sorry it’s taken so long to get back to you, I don’t have enough time for days on the maslow.

In response to your questions…
I think the sled was reasonably level, didn’t notice it leaning at all. I’ve generally been pretty careful to use big enough sheets to mean there is plenty of support. I notice it skipping in the first phases of calibration runs, but seems to become much smoother as it progresses.

I don’t recall the feed rate, but it was slow 400-600 ish.

The bit was razor sharp - straight out the packet.

I have just checked my Z-stop stuff. On a new config so not reflective of what it was but interesting to see, it is reading a Zm of 46 but measures 43mm so a few mm out.

An update on where I have got to.

Today I firmed up all my anchors, they weren’t quite full depth since I added more OSB behind the holes, so just buzzed a drill all the way through.
I updated the f/w to 0.83 and did a fresh calibration. That seemed to go well.
I switched from the fancy spiral single flute cutter to a brand new regular two flute straight cutter.

I’ve then tried a couple of test patterns. First up I took it really cautious and had a feedrate of 400, and small depth steps of 0.5mm going down only 3mm. Took forever, but the results were decent until it drove off to one side on what looks to be one of the last few passes. It seemed to die in this position so I had to turn it off.


so close to perfect, was really disappointing to see it drive off so randomly.

I decided to have another go with a quicker config, this time feedrate of 600 and depth steps of 1.5mm. Would people agree that’s still pretty modest? So just a 2 pass run this time and it made it! First time I have had a run go to completion. I did notice 2 Motor current warnings exceeding threshold (both Top Left) So I guess the new firmware that allows this is to thank for that. Doesn’t explain why it died on the first one.


The quality on this one was not as good though, ignore the horizontal line, that was from a previous failure. Where it seems to have struggled is the upper edges. There I see the same sort of waves I had on my previous failure in August. I watched it doing this bit and it really seemed like it was deliberately moving in waves. Anyone else had this?

One final observation, the first go was in the lower left of my working area. the second attempt was in the lower middle.


I only noticed it middle of the second attempt, but the view on the maslow.local window really didn’t match the position I’d homed it to.

Is this normal? I was substantially lower than that in reality.

To me the waviness seems like what would happen if the sled was “sticky” or skipping/tippint as its cutting.

I have not seen this but maybe others can chime in.

It might help if you can record a video of it when its doing the problematic cuts.

1 Like

I’d guess the wobble is a loose belt issue. With the circle cut, it’s only wobbling in certain parts of the path which might be where it needs that one loose belt’s tension. Here are some loose belt issues I’ve had that could cause your issue:

  1. How much flex are in your anchors? I had mine temporarily drilled into the wood and they moved a ton! The Maslow puts a fair amount of tension on the bolts and wood is pretty soft. I believe this also screwed up the calibration as well as when the machine would run.
  2. Did you calibrate with the vacuum attachment on the machine? I noticed on mine that the BL belt interferes with the attachment and messed the calibration up when in certain areas of the board. The machine also needs to have the Z bottomed all the way out and no bit in the router.
  3. Another thing to check is a loose belt when jogging – when you retract and tighten, how taut are they? Do they stay taut when you jog the machine? It might be hard to notice how much they loosen up.

For the deviated path, my guess would be an encoder issue — I don’t think it’ll flag anything until it moves more than 15mm out of where it should be which is quite a lot. My machine dive bombed in a similar way, since the encoders are already hot glued, I zip tied the cables to the top board and haven’t had a problem sense.

Good luck!

1 Like

Thanks for the tips gives me some good things to focus on next time around.

I did have concerns about my initial anchors and did some work on them to make it more rigid maybe I take them up another level with metal inserts or plates.

I did not calibrate with the vacumm active or the hose attached, but the 3D print was mounted. I had the same thing you observed with the belt touching on the lower left when at the extreme left of the calibration process. I’ll calibrate next time with the vacuum active and the calibration area reduced. I’ve been calibrating with z bottomed out as you say, but I’ve been wondering how the additional thickness of the work piece impacts the same sort of function. Should my anchors be level with the work piece?

I also saw a loose belt when jogging once. I was jabbing jog instructions pretty fast and between a couple of downs and a horizontal i noticed a belt slack for a second then it tightened up. a bit like it does in the first phase of calibration. @kyleschoen is that more a symptom of a bad setup than a specific thing to fix? like do a focus in on the particular belt in question or hope anchors and calibrations are to blame.

I guess I’ll also hot glue my cables and keep my fingers crossed for no more dive bombs.

Thanks for the tips.

Thanks, I’ll record some video next time I’m having a session on it.

Matthew Hart wrote:

I did not calibrate with the vacumm active or the hose attached, but the 3D
print was mounted. I had the same thing you observed with the belt touching on
the lower left when at the extreme left of the calibration process. I’ll
calibrate next time with the vacuum active and the calibration area reduced.

you don’t need to calibrate with the vacuum active, just make sure it doesn’t
interfere.

I’ve been calibrating with z bottomed out as you say, but I’ve been wondering
how the additional thickness of the work piece impacts the same sort of
function. Should my anchors be level with the work piece?

what’s important is that the Z offsets in the maslow.yaml file are correct for
your calibration and your cutting (they can change between the two, but they
need to be accurate for each of them)

The more level the belts are, the less they are affected by adding a workpiece
(see the recent posts in the topic “Corner Floor Mounts and Pins”)

David Lang