I have been through a lot of troubleshooting, replaced a DC motor, tore it halfway apart and rebuilt. It took 90-120 minutes to calibrate, then errored out while cutting. The CNC constantly reported “unknown state” which means the 10+ minutes process to reboot, loosen belts, retract belts, extend belts and cross my fingers.
After replacing the DC drive where troubleshooting led me, I ordered and replaced the controller card. I made the unfortunate assumption that the version of firmware was below 1.0 so I attempted installing 1.13 through the USB. The usb/serial port were not recognized by my Windows laptop and I was about ready to reinstall the original controller card. On a wish and prayer I attempted to update firmware through FluidNC and it worked like a charm.
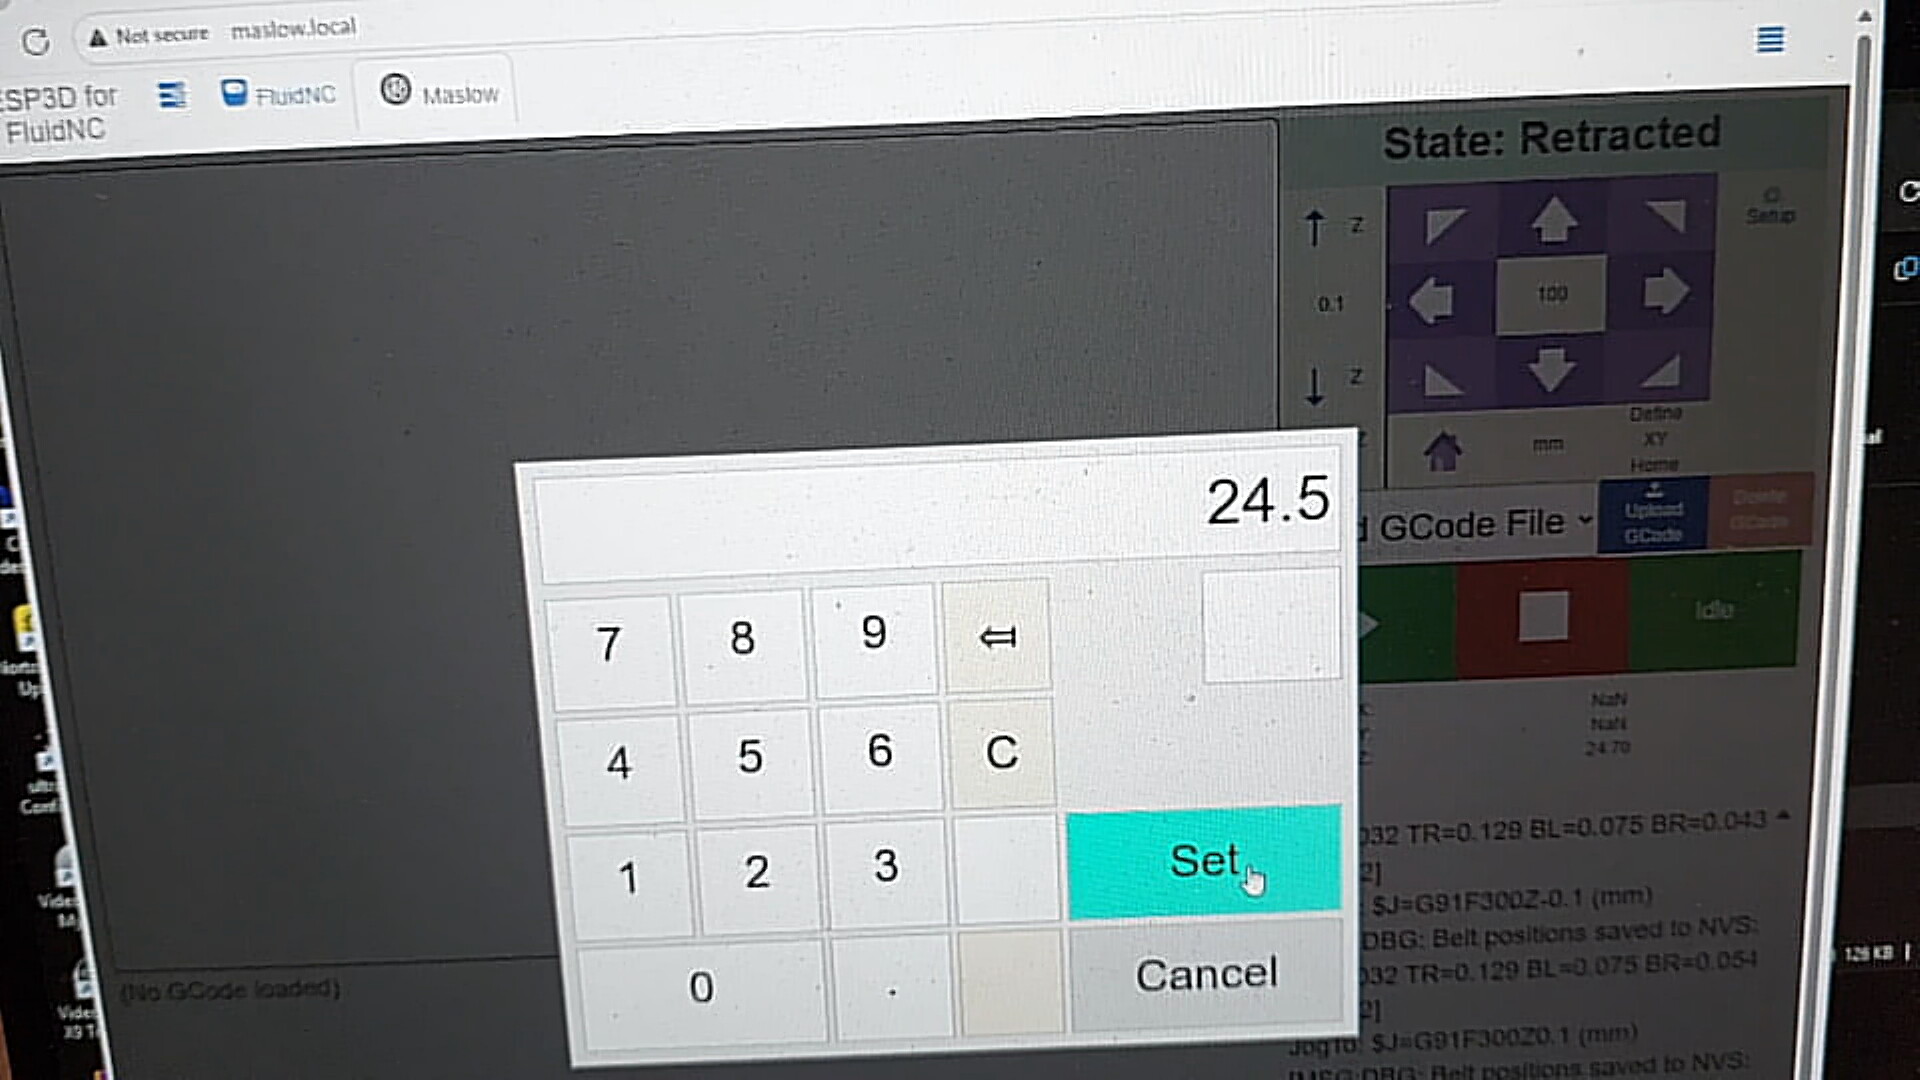
After installing the new controller card with firmware 1.13 the CNC calibrated in less than 10 minutes. I followed up with 2 air cuts. The CNC never reported “unknown state”
I shut down the web browser and put the laptop in sleep mode. This morning I was blown away when I opened up a new browser session to Maslow.local and the controller picked up where I left off yesterday in a “Known state.” I loaded a test piece of salvaged MDF, installed a bit, completed rebooted/belt-dance process, zeroed outZ axis, zeroed out X/Y axis. Followed up with 3 hours of test cuts. I repeated cut of the same shape and the cut matched exactly.
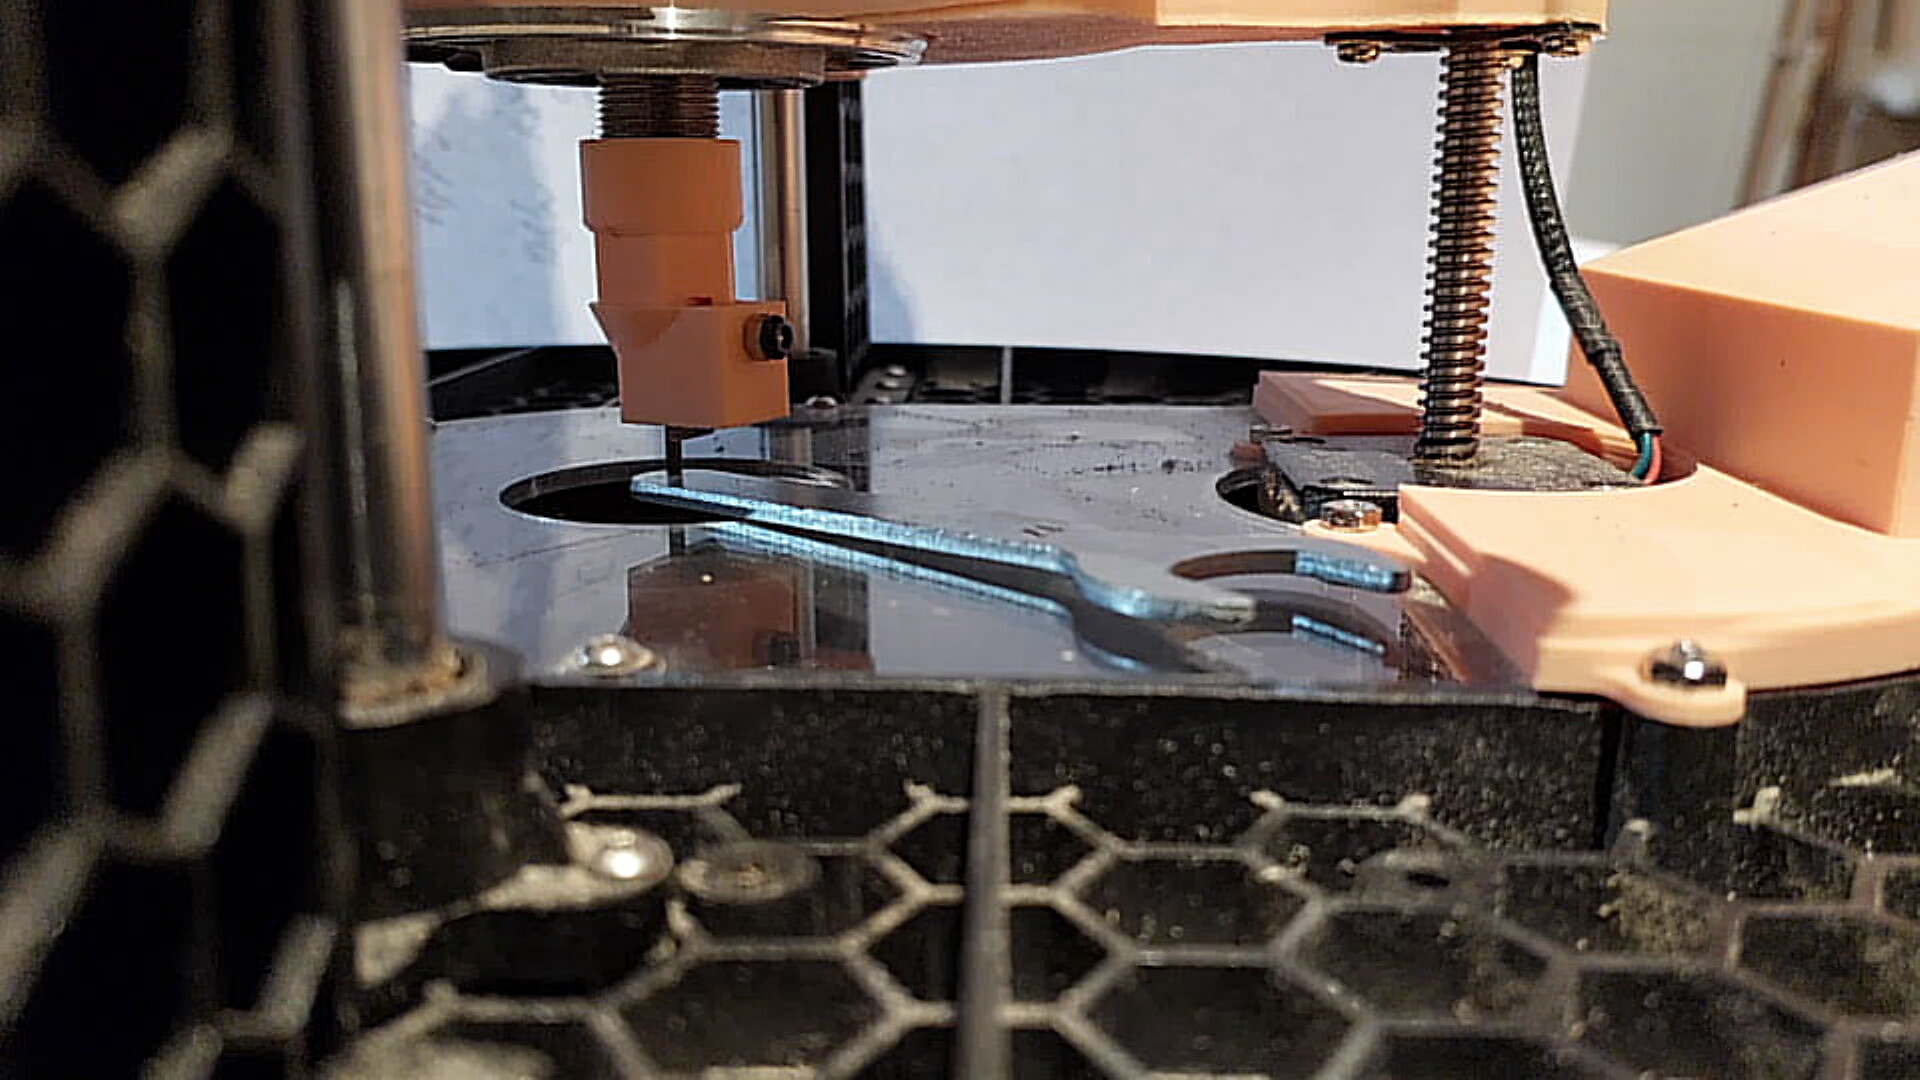
I am still mastering changing out the bits. The plastic key to lock the collet is tricky and then finding the surface still eludes. If anyone has tips on changing the bit and finding the surface reply