Layer 2 fully cut. I need to glue and route for loose tenons.

3 Likes
Small update.
Frame is wired, fully painted, and moved outside.
I’ve moved to manual cuts since the Maslow doesn’t seem to cut a straight line plus that space in the garage is occupied at the moment. Working on the left side wall frame. Foam 1" board fills the gaps. Door and AC are a perfect fit.
Everything is loose tenons (domino) with this cheap $40 Chinese jog. I am pretty impressed with this purchase. The loose side also slides off for registration against flat surfaces.

I also took delivery of 65 yards of fiberglass and 2 gallons of epoxy for the skin. If I calculated it correctly that should be enough for one outer layer and one inside with 5-6 yards extra. Fiberglass has gone up considerably in price since my sub box highschool days, but I’d rather it be waterproof.
2 Likes

Project update: Second wall and insulation cut. The bottom of the base has been fiber glassed and should be ready for final trim and paint in 2 days time. I had a quart of total boat left over from a project that I used initially. That takes more time to set up than the US composites 3 to 1, which the rest of the project is using due to cost. In the background you can see I’ve rolled the 65 yards of fiberglass up in a tarp to prevent any damage from water as if it rains hard here, some water can make it’s way into the garage.

Here is the process of cutting the foam insulation. I’ve got one wall done and if you can’t see by the amount of sawdust on my sad neglected motorcycle it hasn’t been out recently… I mark the line with a knife and then just cut out with a circular saw till it fits snugly.

We have two matching panels.
Some flush trimming will have to happen in the upper section to make it “chef’s kiss” perfect, but the bottoms line up within 1/16".
I’m sure you can’t tell by the photo, but the door and window on the left side is actually around 1/4" more front than the left. I’m sure that doesn’t matter though as the doors and windows fit.
Who will notice doors and windows off 1/4" walking around the camper? I won’t.

1 Like
Hi
My back of my head reason for my Maslow 4 is to cut a teardrop trailer box with the CNC . I have a flat bead bike trailer / multiuse trailer that I want to use as the basis and put a teardrop box on . The idea is to be able to take it off when I need to use the trailer for something else . Following you project with interest . Good luck .
1 Like
A fresh coat of fiberglass down on the right side wall exterior. I’m pretty sure I severely underestimated the amount of epoxy I’d need for this. I originally ordered 2 gallons and have about 3/4 of a gallon of resin left. Pretty sure at this rate I’ll need somewhere around 6 gallons at a minimum to finish this if only doing one layer of fiberglass.

1 Like
Project update. Waiting on epoxy to show up… I ran out.

Some of the front panel all glued together with loose tenons and half the insulation in.

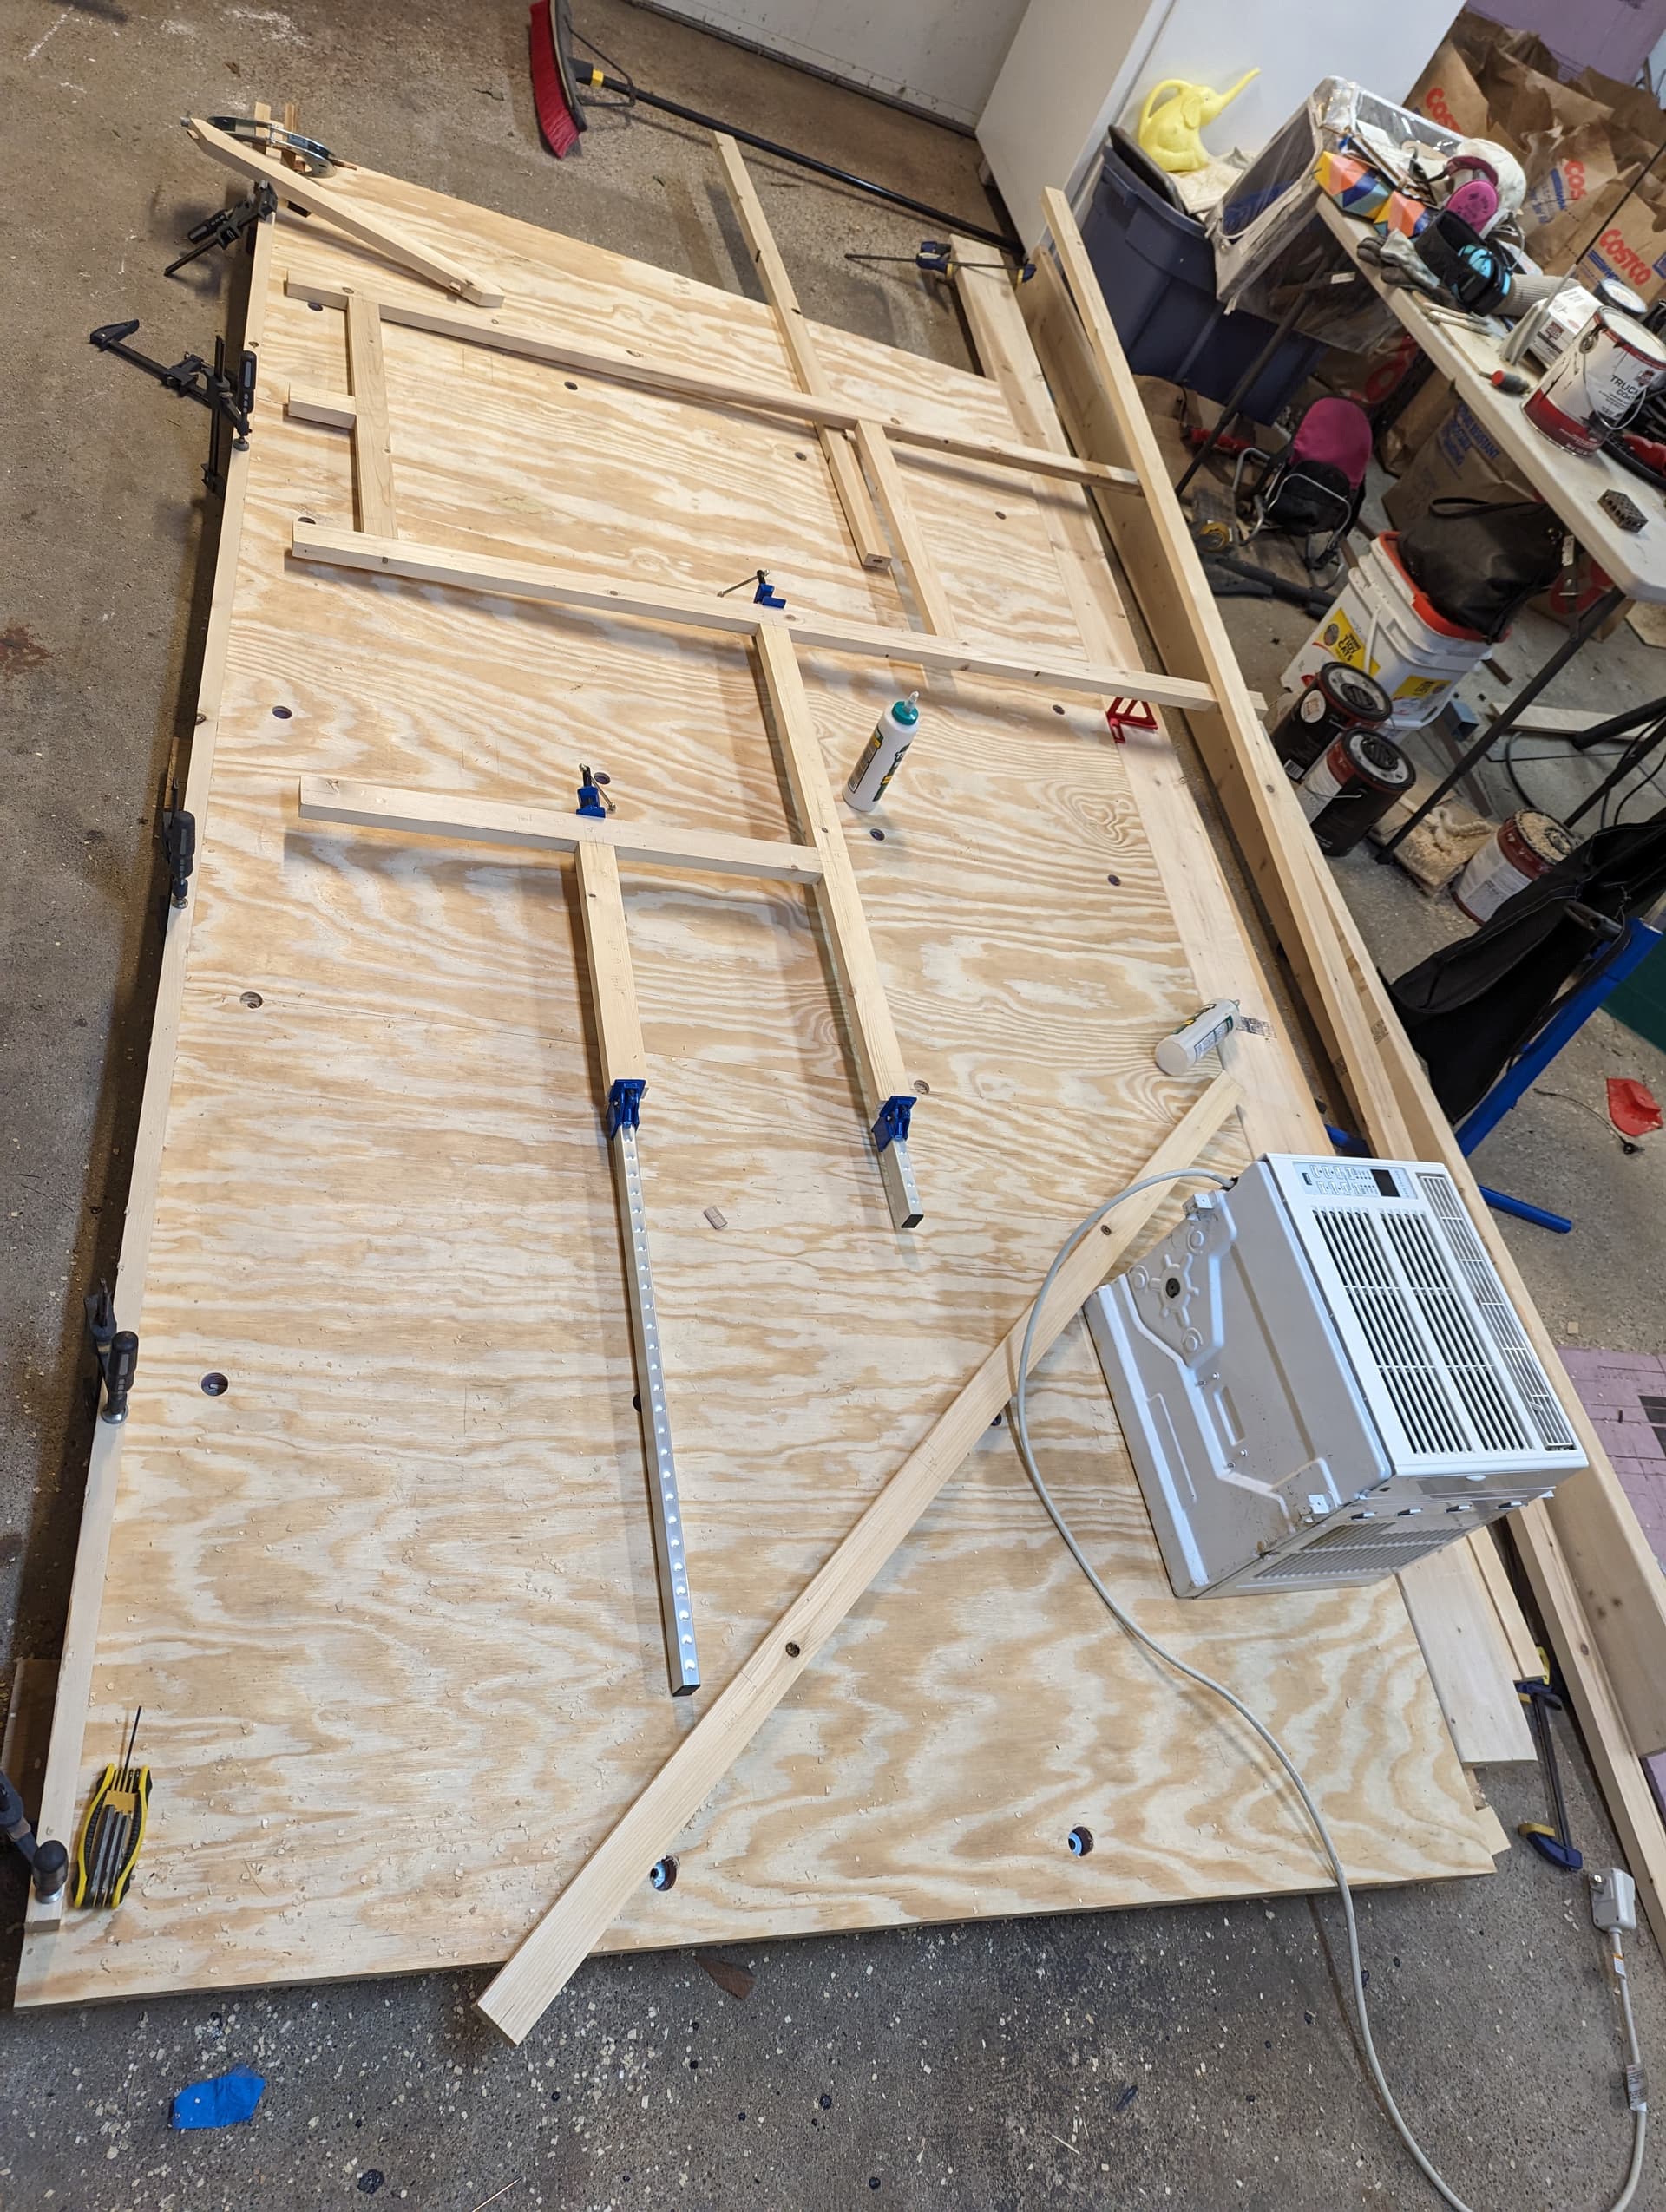
Here I’m starting the framing of the roof. For this I’ve moved from loose tenons to butt joints glued with 2-1/2" protec-kote screws, pre-drilled and countersunk. Glue first to get the positioning perfect and then come back later with the drill.

I’m hoping this is enough support for the roof, if not please comment. I don’t plan on putting anything up there.

I’m trying to fiberglass everything on the garage floor as much as I can to keep the epoxy flow even and then glue and bolt together later. Then I can just put smaller fiberglass tape across the joints.
The hatch has me a little worried. This is the first time I’ve EVER dealt with gas pistons. I’ve been running through some online calculators about gas piston alignments and that is where I’m a bit off. The bottom mounting point ends up somewhere more front of the 90 so I’m going to have to end up making some sort of either steel or aluminum bracket to hit the studs. Not saying I’m going to throw some mic-6 under my maslow, but dimensionally… the maslow might be the right machine for that part.


1 Like
I don’t know where you live but could it see a lot of heavy wet snow? Here in New England that would be a real concern if stored outside.
1 Like
Oh no that’s troubling news. Northern USA, so we get a decent amount of snow. How many supports would you add across? I was kind of hoping the fiberglass would make it structural enough. The fiberglass is on both sides.
It might be too late, but I would want to put a curve into it, preferably in both horizontal directions - that would make it very strong. Failing that, two flat surfaces making a ridge in the center would help.
RVs have flat roofs and are often left out in the snow - I wonder how thick their roofs are?
Maybe an extra layer of fiberglass top and bottom?
A couple of feet of heavy wet snow could easily weigh 30+ lbs per square foot, and that could really add up over the whole roof.
Here I was hoping the 5° slope from front to back would be enough. That’s a 8.8" (225mm) drop over the 94.6" (2403mm) distance. I am using the 30 PSI 2" foam. I’ve got a bunch of 1" square full length cutoffs from the dimensioning process. I could just set the depth and pocket length wise and insert.

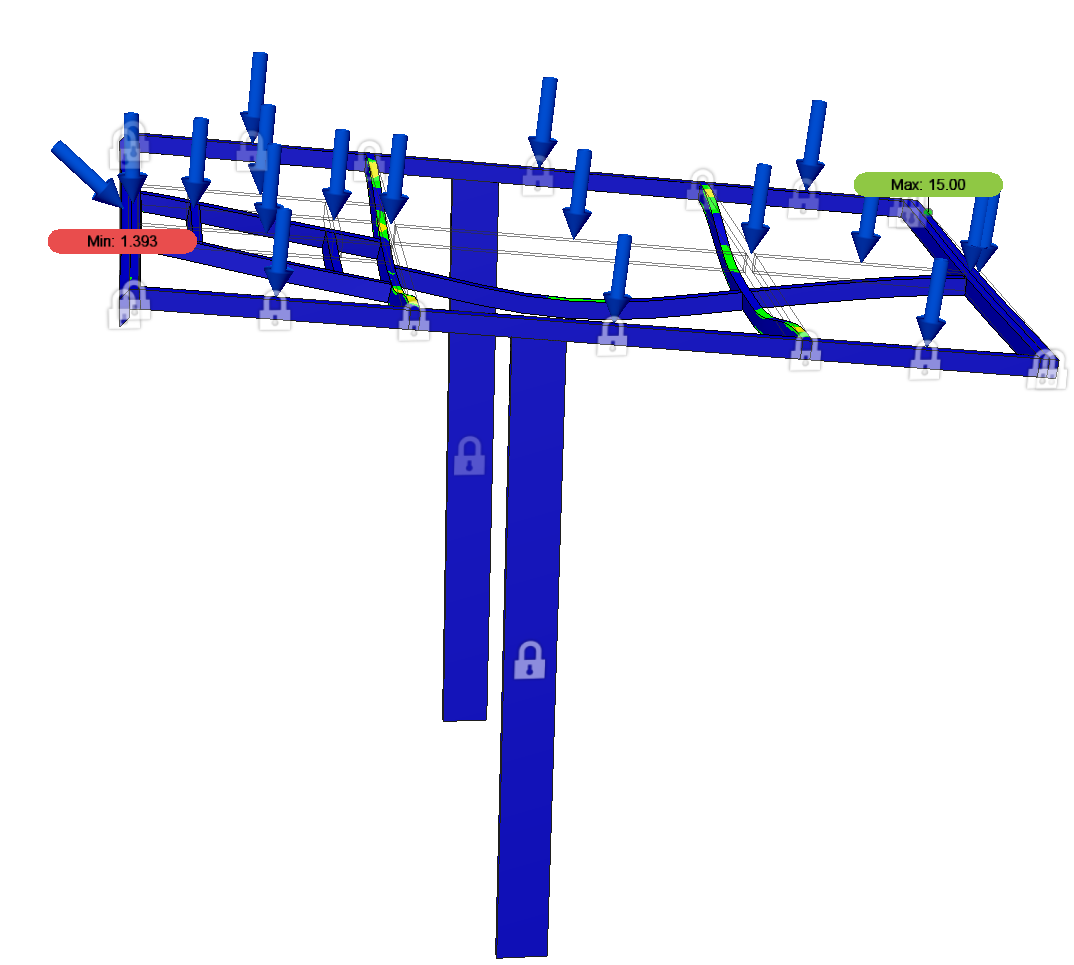
So I was messing around with the simulation a bit. Fusion 360 currently does not support orthotropic materials (wood) in the simulation workspace, but MDF is supported.
39 sq ft with 20lbs of force is 780lbs. That’s a broken roof.

With a doubled up front header. I suppose maybe good news???

These don’t account for the fiberglass.
1 Like
The fiberglass will definitely give you a benefit, particularly if you attach the fiberglass to multiple points along the frame (maybe glue?) I don’t think it’s trivial to determine what that benefit is. If it were my project I would either 1) figure out how to include the fiberglass into the simulation or 2) beef up the wood until it gives acceptable deflection and treat the fiberglass as your factor of safety.
1 Like
If I double up the front header and add some outside cross members with a 1x6 vertical beam in the middle that gets it to 1.39. I’m probably going to go with this and a couple extra layers of fiberglass.
1 Like
Hi Frank,
probably a dumb question, but still: in the simulation pictures I can’t see the sheets of plywood, but they are in the simulation calculations?
Also adding fiberglass will have a huge impact, especially if you glass the underside of the roof.
That’s a great question. I’m not planning on plywood, but going straight to fiberglass. I intend on doing both sides and then assembly with a few more external layers.

You are correct, the simulation does not include the fiberglass. Fusion 360 doesn’t support orthotopic material.
You are building it already! then you can test it as well. The underside will need the most fiberglass, because that is where the tension will be when the roof is covered in snow. Make sure you overlap any seams in the cloth.
Good luck!
The fiberglas could be modeled as an isotropic material because the axis that is most different is in the direction of the (very small) thickness and has little effect. The important question is whether it buckles in compression and that will be determined by the foam and not deformation of the fiberglas through it’s thickness.
The load on the roof will be supported by the fiberglas skin in tension and (to the extent it is supported by the foam so it doesn’t buckle) in compression. If Fusion360 allows you to model a thin sheet of stuff with the same properties that fiberglas has in the xy directions and allows you to bond it to the foam then you should be pretty good results. The onlyl thing I would worry about is whether or not Fusion360 can model or at least detect buckling of the upper skin under a compressive load.
I’m no expert, but here is how I’m laying up the bottom of the roof. 1.5hrs condensed down.

I cant tell if you have done it but you really should key that foam so the epoxy bonds to it. 40 grit or similar sandpaper should roughen it up enough or you’ll find over time the glass skin comes away from the foam and the structure is cooked.