I used 1/2" ply, though its not overly sturdy so I should edit the files for 3/4" ply. Fine for kids but I sat on it and have heard creeking. Gluing it up may fix that, but only so much.
Disclaimer: This was an offshoot idea based on other designs I saw, and I cut it out, put it together, w/o glue and there it sat.
Lessons learned: 1) The octagon design is not ideal as it gets smaller at the bottom, and stools should be widest at the bottom for best stability. 2) If I redesigned it, I would make sure that all cuts were performed with tabs so the cut between the inside and outside octagon was exactly 1/4". Also another Larger octagon as a bottom base would work.
I don’t mind sharing the design with the understanding it is a work in progress, without that much progress. I have it in Fusion 360 format with a ply variable setting. Haven’t tested 3/4 yet to see if it worked out right.
Neighbor has been bugging me for a silhouette of the unknown soldier which is about 6 feet long and close to 4 foot high. Also wanted a small one which needed to be just 18 inches or so long.
A bit unusual for the Maslow, but I had a lot of fun with this one. My wife has been working on a new series of jewelry, using electro-etching to make patterns in the metal. For this piece, it’s a 3 layer earing, with brass on the outsides. I suggested us making the middle layer out of cherry veneer, so we gave it a try on the Maslow. I cut these with an 1/8" endmill. I spot drilled the holes in the top with a engraving tool with a broken tip. Did a great job.
This is the stacked group. We’re going to use a very red stain on it, Miniwax gunstock for those curious. That should really make that layer pop. I have to say, I’m impressed with how these turned out. I wasn’t sure something so small would turn out well.
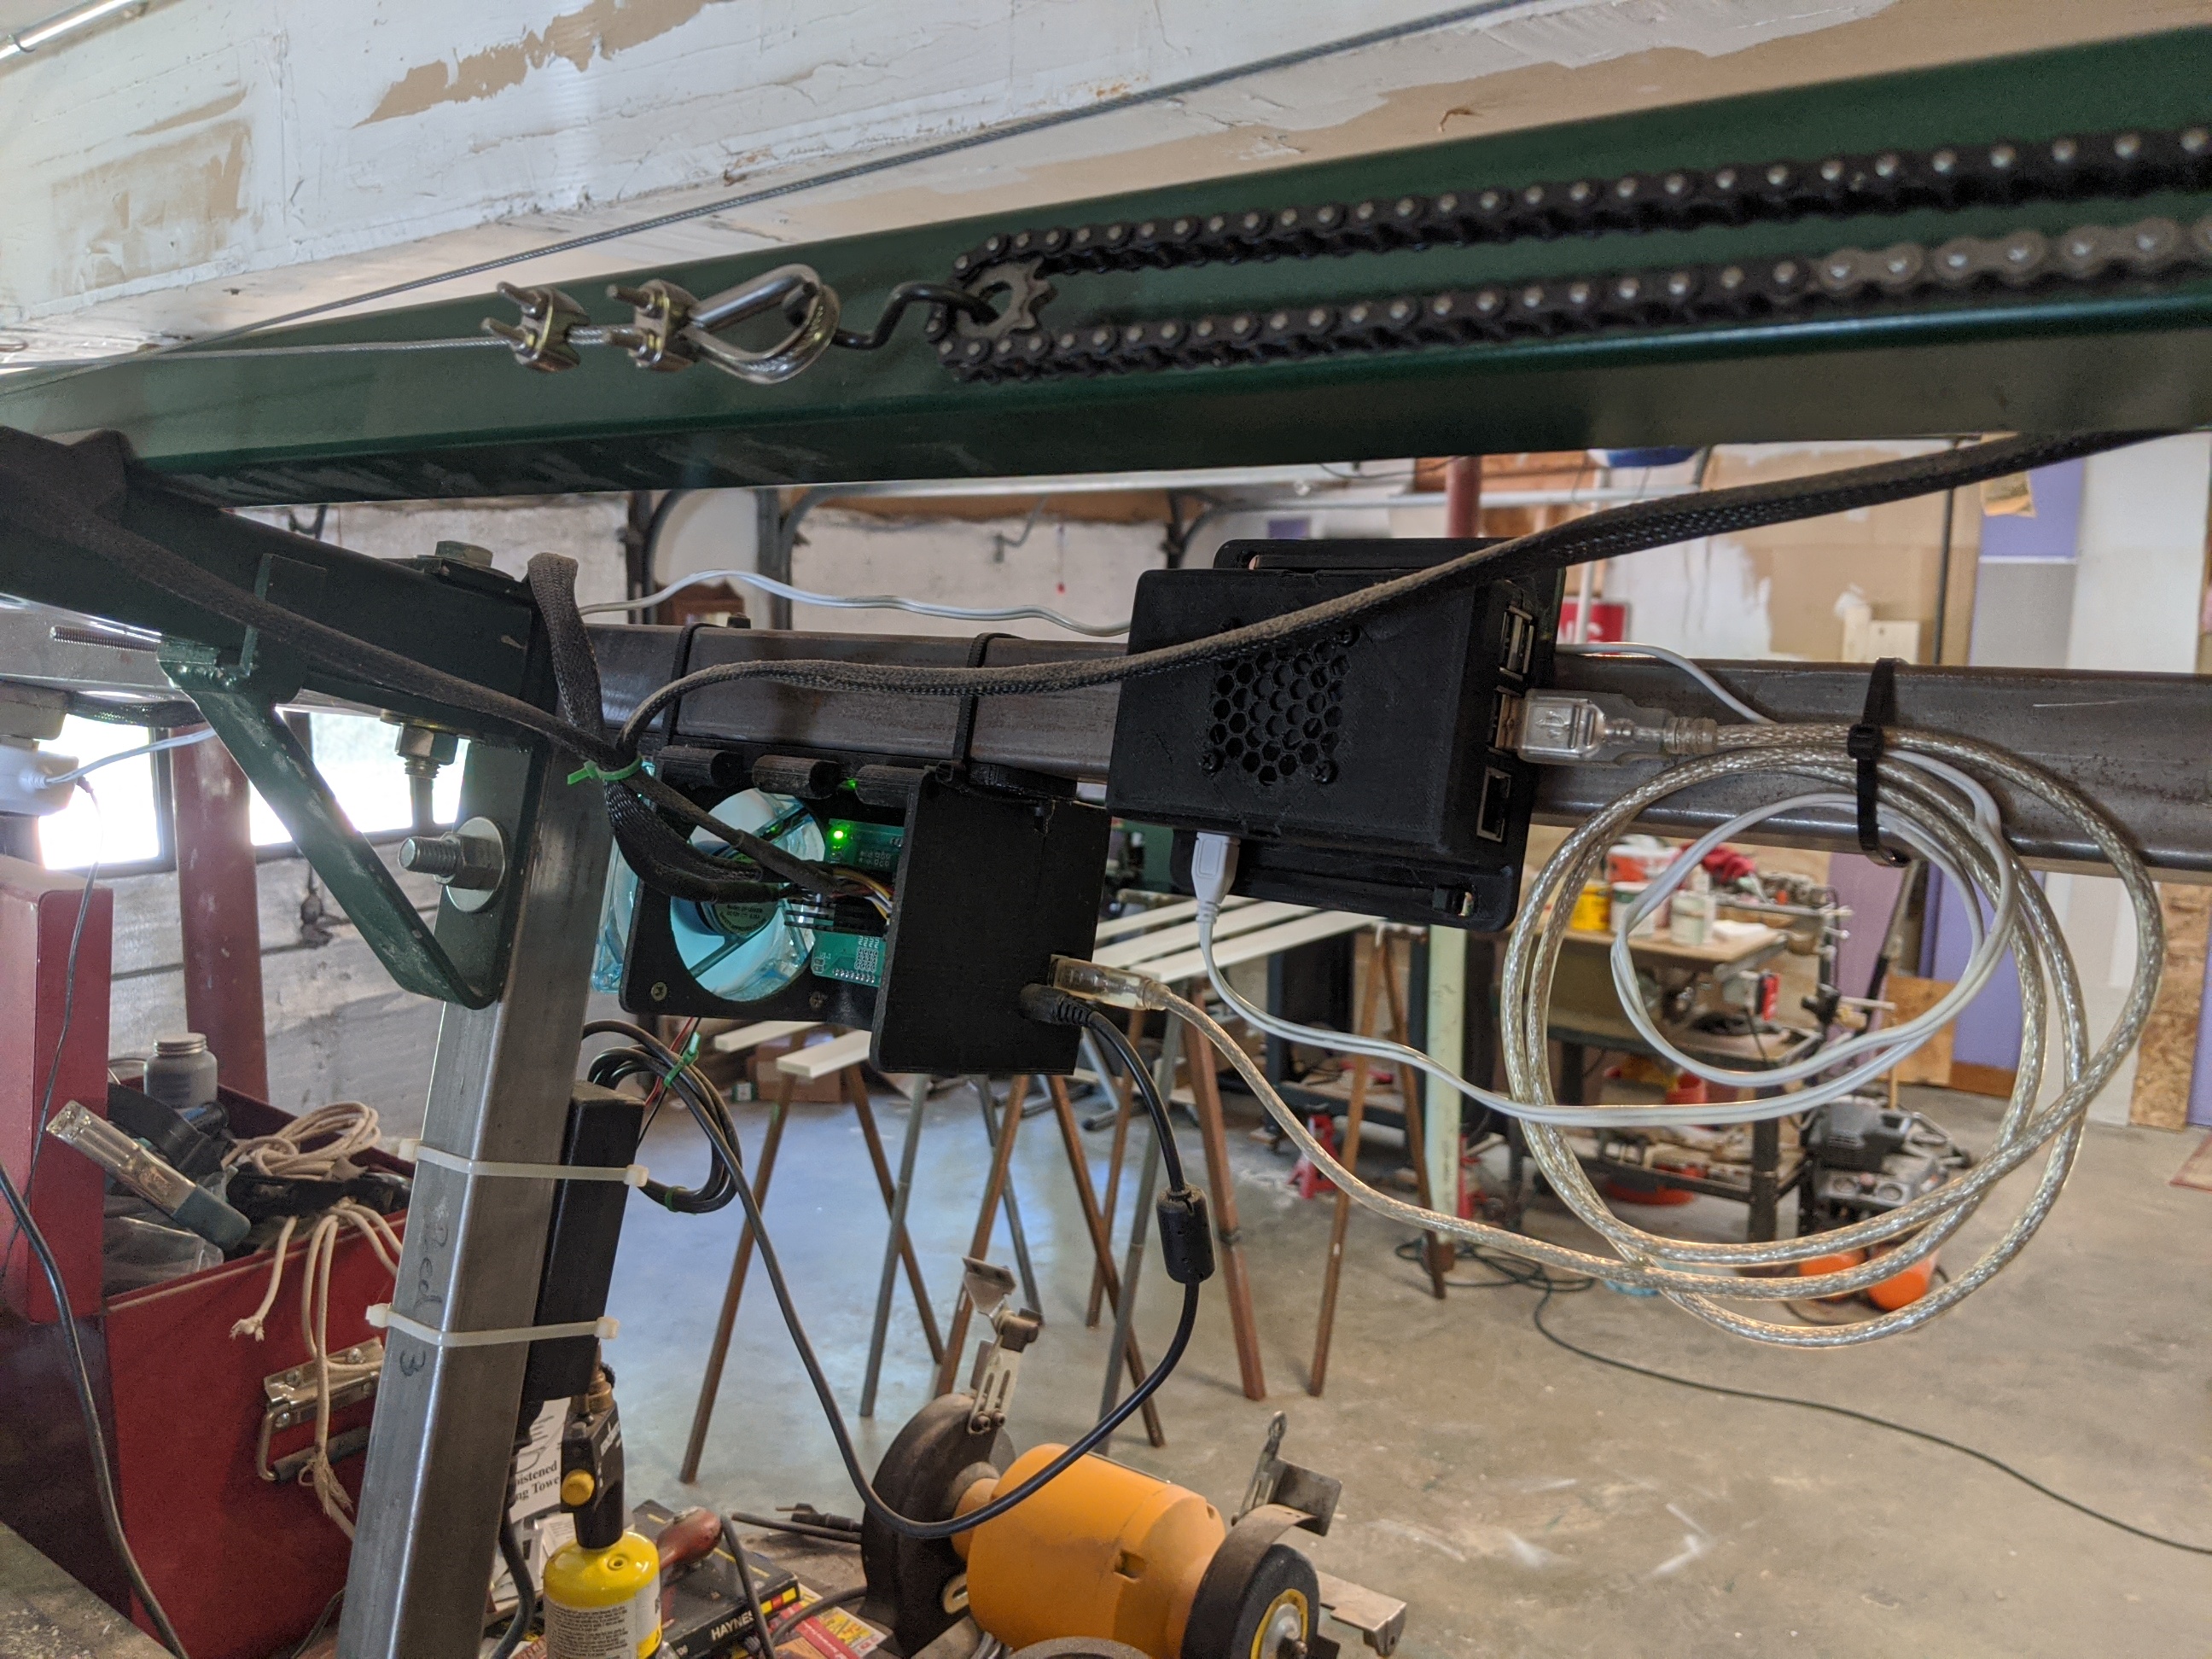
This particular project was the first one powered by my new WebControl Raspberry Pi. I was tired of having usb wires everywhere, so I decided to make the jump. So far, I’m loving WebControl. It’s really nice to be able to use my phone to control the machine, its very much like having a pendant on an industrial machine.
Really nice one!
Not that fancy as yours, but I did this a couple of weeks ago with the Maslow when i realized that there were alot of small wood pieces lying around
Had some more fun with my Maslow recently. I’ve been needing a little sweater rack near my dresser for awhile now, and I finally had the chance to make one:
This is my second piece made with V-carve. As someone who typically uses Fusion 360 for CAM, it is admittedly easier for stuff like this in V-carve.
I cut this from a piece of bamboo flooring I had left over from the remodel of my home. I slowed down all my feedrates just a touch and it came out fantastic:
Finally got around to sanding this. Still need to paint it. It’s about 5’2" tall. The wing width was the limiting factor or I would have made her bigger.