Looks good. What bit was that?
60 degree, 0.5" v-carving bit. Cleanup with [this].(https://www.amazon.com/gp/product/B000K2BGNS/)
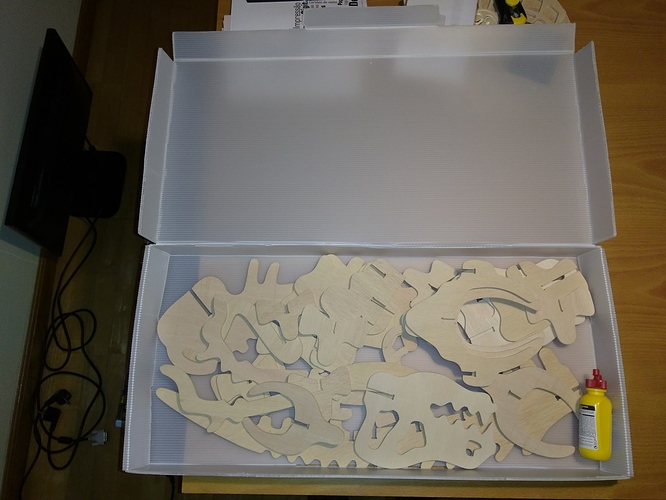
I made a T-Rex for my nephew but I wanted to give it on a box so I thought I could try to make a folded box out of alveolar polypropylene.
It came out OK but polypropylene is a tricky material to finish. Cuts come a bit rough and sanding doesn’t help much.
I like this a lot. Out of the box thinking 
I haven’t cut it yet, and it may not work out, but I coded this tonight and with the amount of work it took I thought it was worth posting.
Cheers!
My latest project has been the Meticulous “Z” upgraded sled.
I added the hose clamps to the router connector pieces otherwise it was per the instructions provided.
Shout out to @MeticulousMaynard for helping me figure it out.
The most difficult part I experienced was getting my 3D printer to make the dust collector shroud and cutting the Lexan for the clear cover (was lower cost to make from Lexan than plexiglass).
If anyone needs a clear cover made, let me know I have enough material left to make two more. Let me know quickly or I am going to remove the templates (*) from the Lexan and place it in my stock for use on some future project.
(*) I printed the pattern out (1:1 scale) on paper then glued it to the protective plastic of the Lexan and cut the one I needed out. Was simple and could be cut our with a band saw. the single sheet of Lexan would allow me to make three (3) windows.
Did you try a deburring tool?
It’s been a long time since I’ve cut semi-soft plastic (mystery material from one of my sign maker scrounge trips) but that had a decent finish on the side of the material and a frizzed up edge. I used a one flute 1/8 bit designed for plastic on a much smaller and faster CNC router
Sorry, deburring not deburrong tool for emailers. Something like this
I’m too old for thumb typing, I guess
Thank you! That looks excellent!
Just a quick reminder, the way you have the chains attached to the clevis with the hairpin-cotter puts the weight of the sled on the “shaft” of one of the chain rollers; it is possible (and has happened once that I know of) for that center piece on the chain to come loose then you’d have a swinging sled (bad). I know a lot (perhaps even most) people do attach their chains this way but it technically can be dangerous. The cotter pins that I sent with the kit are designed to go through the chain link like an axle (pointing perpendicular to the work area), this is how the chain was designed to take force. That is the reason for the cutout in the sides of the clevis pieces, this allows you to access the cotter pin.
You probably won’t have a problem, but it’s a good thing to be aware of!
Will amend, thanks for the reminder.
Thank you for the suggestion. I’d never actually seen this kind of tool.
I just bought a cheap one from Amazon.de
I have a couple of them, handy for cleaning up drilled holes, copper and plastic pipes after cutting (lot of plumbing projects lately), or getting rid of sharp edges. The sharp edges often have a few bloodstains, remember to deburr them a little too late…
I tried doing this, but could not get the cotter pin to go through. Anyone else having problems with that, or am I doing someting wrong?
Oh dear! Maybe there was a batch with thicker galvanization or something? I clearly don’t check every pin but I’ll check some now for sure! I’ve been using the exact same pins from the same manufacturer for more than a year, I hope they didn’t change something on me!
Thanks for the heads up, I’ll look into it!
-Logan
Made just a simple sign with my wife’s name on it for her birthday to place on our mudroom shelf. She seemed to love it.
(Let’s pretend you didn’t notice the dust on the shelf lol)
Did you make the flags too?
Sure did but those are handmade from pallets and painted using vinyl stencils.


