Resin is very forgiving if you make a mistake, but you still have to really really ‘apologise’ to fix the mistake up.
My latest project, cut using the original Maslow with x-axis motor, are cornhole boards with epoxy resin finish and a digital scoreboard. The digital score board is mounted to the back and protected with acrylic and clear resin on the front side. I used a 20 degree bit throughout the cut and it took many hours to complete. I’m curious for those who have upgraded to the M2 what type of speed increase you’ve seen on more detailed cuts like this. I currently use the 30/30/15 settings (feed, plunge, depth) what type of settings do people with the M2 use?


3 Likes
Looks great!!! What did you use for the scoreboard how do you change the score?
There are arcade buttons mounted on the backside of the board. I used the is digital scoreboard along with the modification kit to allow it to reset. There is a spec/install sheet for the reset mod kit as it involves cutting and attaching a jumper wire to the board. I am making another set of boards and if I make a tutorial I will post it here. I would recommend purchasing nicer arcade buttons than the two buttons that they provide.
Scoreboard: https://www.allelectronics.com/item/ctr-92/2-digit-counter-w/power-supply/1.html
Reset Mod Kit: https://www.allelectronics.com/item/mod-92/parts-for-ctr-92-mod/1.html
Everything is powered by two 9 volt batteries.


2 Likes

How does the epoxy hold up on the boards no cracks after time?
Hola , gusto slaudar ; como haces para que la impresion grafica registre con el corte? saludos

4 Likes
Absolutely nothing to do with my Maslow, but I did make it and install it on 30 Dec
- 8 different bourbon bottles (nothing special, just what I can get here), and yes I did drink most of the contents
- 100m of Happy Santa day LED lighting, with about 5 LEDs per meter
- Less than 2m of 2mm wire rope
- and some other bits and pieces
For some not-so-boring lighting in my home office
And yes, my cat was angry because it was playtime, he’s only about 1 year old, so still really a kitten.
4 Likes
It depends …
Yeah, I know, so “depends on what?”
- Quality of the epoxy
- UV exposure vs. UV stability of the epoxy - so obviously something that’s only ever going to be inside won’t have the same issues as something that’s in full sunlight. And for me ‘full sunlight’ == ‘skin cancer in 2 hours or less’
- Age of the epoxy - less than 2 years from the date of manufacture is what you’re after.
- Is the epoxy UV stabilised?
- Mechanical stresses - Lots of vibration makes a lot of difference WRT things like delamination
Hi @Camilocor
My apologies, I’ll answer in English, because I don’t know Spanish - Lo siento
Google translate gave me: “How do you make the graphic print register with the cut?”
I will interpret that as “How do I set the origin?”
- Set the origin for your cut to match your design - this is done in the software that you use for your design
- If you have already put your design on the material you are cutting, then set your ‘home’ to the origin of your design
- Change your materials. Swap out your design for some scrap materials you can do a test with.
- Upload your GCode for the cut
- Do your test cut
- If it is all OK. Swap back your real materials, and do a real cut
No issues at all! However I made new boards that have much more epoxy covering wider expanses on the boards, I’m curious to see if these have any issues.

5 Likes

9 Likes

8 Likes

These are all GORGEOUS! Are the corners on the book shelf rounded over a little bit? If so how did you do that?
Thanks!
Yes they are rounded over. I did it by hand using a porter cable 690 and 1/4" roundover bit. It goes very fast. It’s actually one of my favorite parts of the process. Rounding the edges causes such a transformation in the look and feel of plywood. It’s also an important part of getting a good fit for slotted plywood construction.
1 Like
Since there’s some interest, I’ll post a couple of things I learned along the way on the picnic table project:
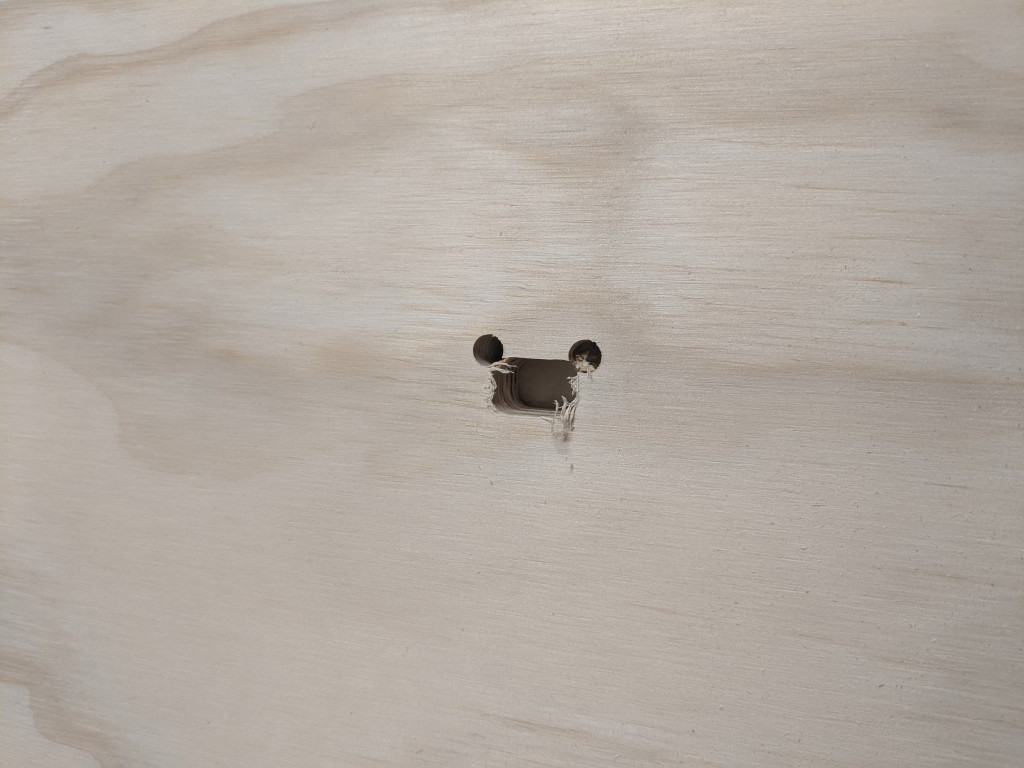
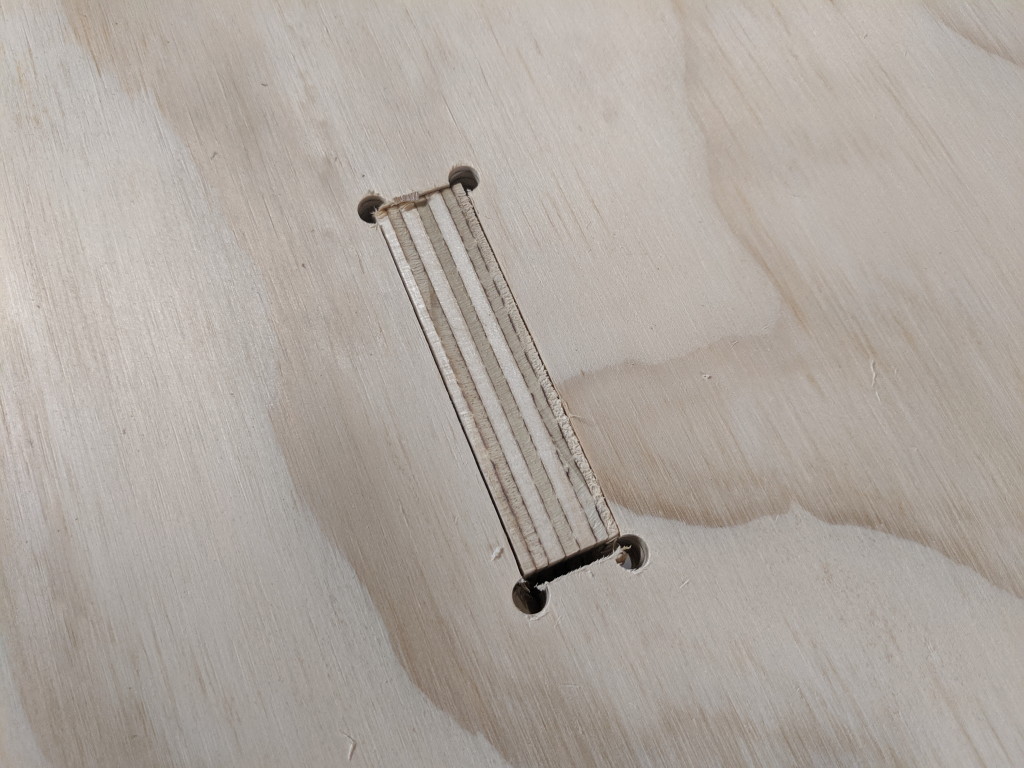
First of all, I’ll say I am still surprised at how accurate I was able to get my machine after some fine tuning. However, I had to do a little work to get the slots to cut and fit nicely over such a large piece. Here’s my trick, I call them mouse ears: At the end of a slot I pre-drilled the corners then milled out the bottom 1cm of the slot. I found this helped the machine cut the final outlines and take the corners without too much of a slowdown and also not get deflected by the sudden change in load direction for a 90 degree corner. It was the right compromise between deflection caused by changes in speed and deflection caused by changes in load. At least, this is how I did it, and it worked well.

3 Likes
I also engraved a cool rainbow pattern on the table top that followed on to the seat. This is the best picture I have (not all filled in), but the overall effect was it looks kind of like those rainbow socks from the 80s somehow mixed with a skateboard ![]()

one more pic with the tops off, so you can see how they’re assembled:

(P.S. I’m happy to share cad files)
10 Likes
