This wiki entry is about Makerverse version 1.1.2.
General Use
- Login (lots to add here: github login worked best when I did it)
- Homing / resetting chains (I only do this on spoil board with original center mark) This only sets X-Y positions, not the Z

- Loading Gcode
click upload, select gcode file.
- Unloading Gcode file - click the trash can:
- Unlock enables the system to move
- Sleep shuts off the system to stop the motor noise
- Reset restarts the motors so a gcode file can be cut
- machine vs workspace commands
- zero machine z
- zero workspace z
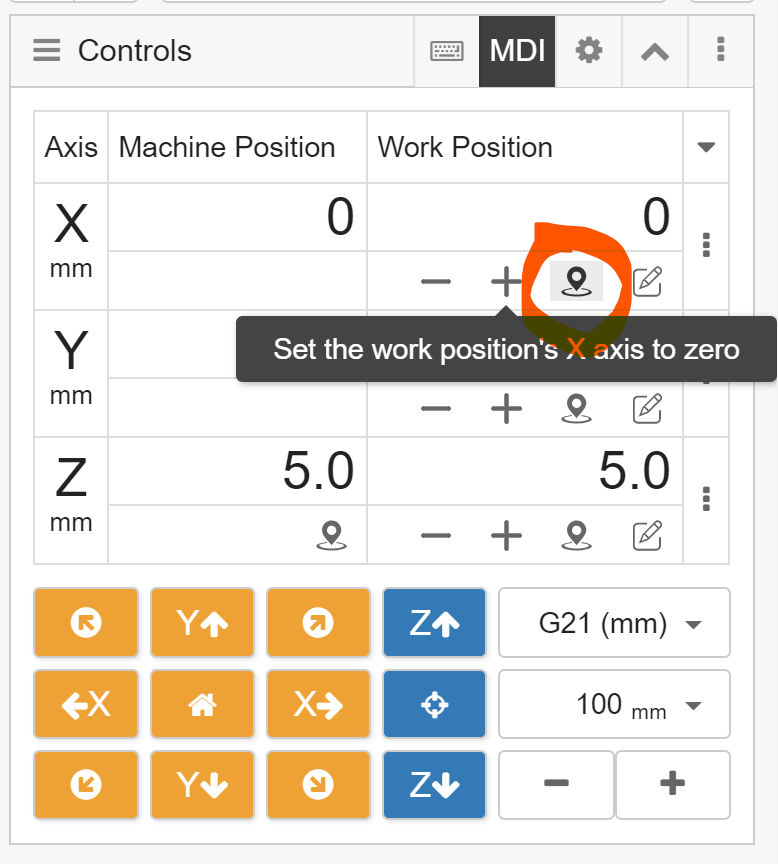
- Zero workspace X
- Zero workspace Y
- how to fix soft limits → 1. disable by setting to 0 or enable by setting to 1, then 2. click the save icon
- Moving cutting location on the workspace (for the cut only. will not affect calibration):


- move sled to desired workspace home position (indicated by the dot)
- zero the x and the Y axis (supposed to be at 100, so (-1) - 99 = -100, so it was 100 off) :


- Starting the cut job (press the play button)
- pausing the cut job - press the pause button
- Stopping the cut job - press the square (instead of the trash can when cutting)
USEFUL Tips On Makervers use:
- RESET CHAINS if the system is brand new or the firmware has been flashed so it thinks it has a home reference position. It does not have to be dead center. Just a point of reference so it can be moved. If your system runs off the top or bottom of the board when anything is tried, then it have not home position and simply needs to be reset to avoid damage or further frustration.
- use the sleep command to put the motors to sleep while not in use.
- use reset and then unlock to reenable the motors for use
- if you have to update your firmware for the due or for the mega, please see reference information on how to use arduino IDE.
Calibration
- video on calibrating Due (this is a video made with 1.1.1g, not the latest 1.1.2, so the setup screen is different, but the calibration procedure is similar).
- Tips or details on calibration:
** Measure and mark the center of the cut area.
** shuttle the sled to the center and then reset home again.
** once started, finish it
** calibration will progressively get better with iterations, but if after 3 runs, it is still way off, remeasure the motor spacing and motor height with help to get a better measurement
** you can update to the most current makerverse version if you git cloned the repo with
>git pull
** if you downloaded and unzipped, then you need to redownload
- windows: download installer
- linux: download .tar.gz
Makerverse options
- how to use tablet / phone add-ons
- adding a status LED to a raspberry pi running makerverse:
- write a script for the LED use using pigpio and put it in a sub folder in the makerverse folder. If your makerverse folder is named makerverse, then it is straightforward. If it is not, then you must still use “makerverse” as the folder name whatever your folder is named. If your folder is named “mv” then the link is still ~/makerverse/ followed by the subfolder name where the scripts are located if in a subfolder. Here is a sample script for a tricolor LED with the red on pin 19, the green on pin 26 and the blue on pin 13:
- in the makerverse settings page, click Events
- click the ADD button to make a new event or the edit icon on the right to change an existing one
- enter the path and script name.
- write a script for the LED use using pigpio and put it in a sub folder in the makerverse folder. If your makerverse folder is named makerverse, then it is straightforward. If it is not, then you must still use “makerverse” as the folder name whatever your folder is named. If your folder is named “mv” then the link is still ~/makerverse/ followed by the subfolder name where the scripts are located if in a subfolder. Here is a sample script for a tricolor LED with the red on pin 19, the green on pin 26 and the blue on pin 13:


a video:

Makerverse and the MEGA
Makerverse on the surface functions the same with the mega or the due. There are a few particulars to get the Mega to work with makerverse:
- Mega must have holey-51.28.hex firmware or newer loaded to function with makerverse. It is available as a hex file that can be flashed with avrdude_gui or source code from that repository can be compiled with arduino ide and loaded. One could use the webcontrol flash option by putting the hex file in the Webcontrol/Firmware/holey/ folder and removing the other version. NOTE: holey-51.28.hex does NOT work with Eastbay 1.5b shields.
- When setting up makerverse, use the Mega communication speed of 57600 bps which is faster than the due communications speed of 38400 bps.
Troubleshooting FAQ
- wrong axis moves : reseat all wire connections, rehome system, verify chain over/under, wire plug locations: left motor connects furthest from USB, Z axis in middle, right motor closest to USB (verify this. could be left and right are wrong)
- ensure shield board is well connected to processor board. Secure with zip ties or rubber bands if required.
It may help to secure the motor wires so they do not push the boards apart. - if the bit is creeping deeper and deeper over time or the actual cut is not straight or in the correct location, check the work piece flatness, check for beam flex, check for parallel chains, rough surface, or a tipping sled.
Make sure bit is not creeping out. They can work loose if using a 1/4-1/8" collet adapter and then eventually break or throw the bit. Keep collet tight and make sure to insert the bit far enough to hold tightly. - sled moves and doesn’t stop: system has no home. put sled near middle of work area and reset chains. Drive to center mark / align sprockets and chains, then reset chains again. Reseat wires.
*motors do not move: check power to shield since pc powers the processor only. - RPI docker system uses up all your SD card memory: manually prune it
> docker system prune --force
- system won’t connect: due baud rate is 38400, mega is 57600, make sure the correct communication speed is selected or it won’t work. Sometimes the EEPROM is not clear. Reset EEPROM memory (WILL WIPE ALL CALIBRATION INFO) with console command from Arduino IDE
>$RST=*
